Announcement

Collapse
1 of 2 < >

ANY BUYING/SELLING IN THIS FORUM WILL RESULT IN AN INSTANT BAN!

Read the rules: http://www.cb7tuner.com/vbb/showthread.php?t=43956

Myself, and the other mods have been very nice and lenient with the rules. We have been deleting threads, and giving out warnings. Some members didn't get the clue and re-posted over and over... Now ANY member buying or selling in this section will be banned... No IF's AND's or BUT's.
2 of 2 < >

Beginner Forum Rules - EVERYBODY read! (old and new members alike!)

Beginners start here. Once you have 30 worthwhile posts (off topic doesn't count) you may post outside of the Beginner forums. Any "whoring" (posting simply to raise your post count) will return your count to 0, or result in a ban.

These are the rules. Read them. Live by them.

1) Absolutely NO flaming! "Flaming" is an outright attack on a member. ALL questions are encouraged to be asked here, no matter how basic. Members with over 30 posts will be subject to a ONE WEEK ban if caught flaming in this forum (and yes, moderators can read deleted posts). Members with under 30 posts will be subject to a ONE DAY ban.

2) Use appropriate language. Racial or sexual slurs will not be tolerated. A ban will be issued at the discretion of the cb7tuner.com staff.

3) No items may be sold in the Beginner forums. Any "for sale" threads will be deleted.

4) Temporarily banned members will be PERMANTLY banned if they are found posting on another account.

The rules can and will be added to. Any updates will be marked in the title.

The rules for the overall forum can be found here:
http://www.cb7tuner.com/vbb/forumdisplay.php?f=144
Read them. You will be expected to follow them.
See more
See less

DIY side skirts

Collapse
X
 
  • Filter
  • Time
  • Show
Clear All
new posts

    DIY side skirts

    New shot at an old Idea.

    It all started at the hardware store when I saw, and ultimately bought this:


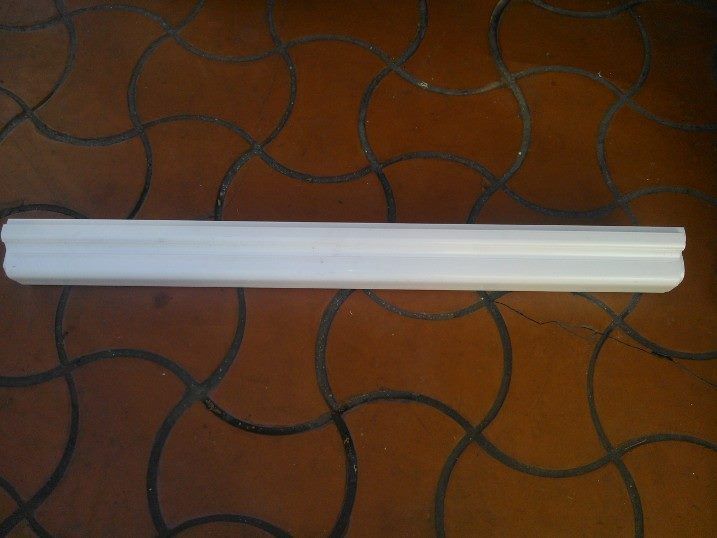
    YEAH, it's a rain gutter.

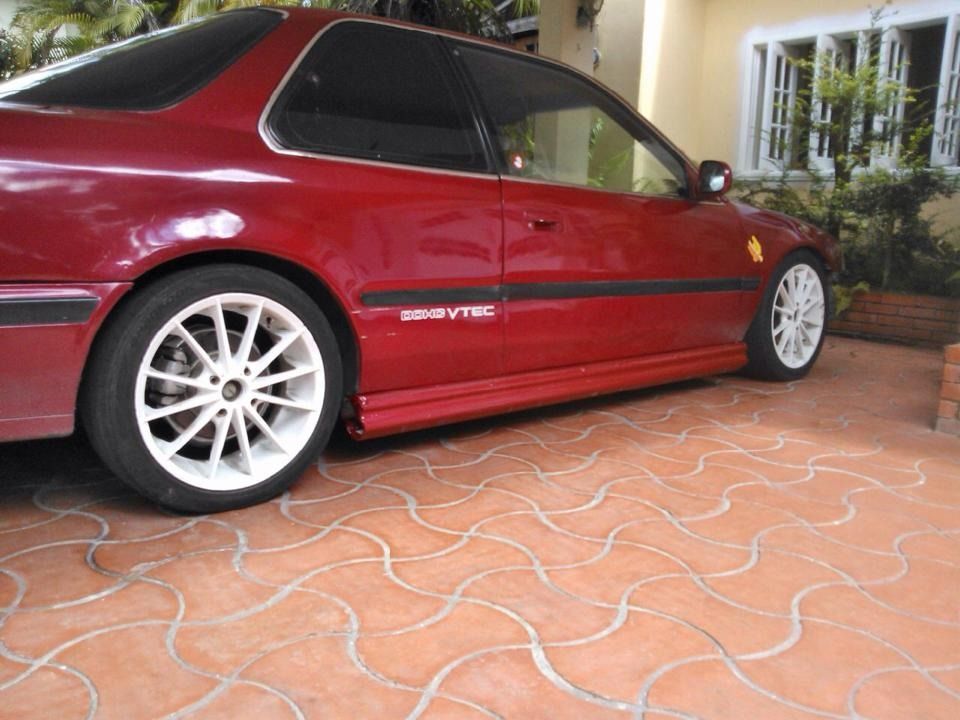
    So, after measuring and cutting it to the right length (77 inches for each side), I decided to just go ahead and screw it directly on the OEM side skirt to see how it would turn out. This is the 1st fitment test.


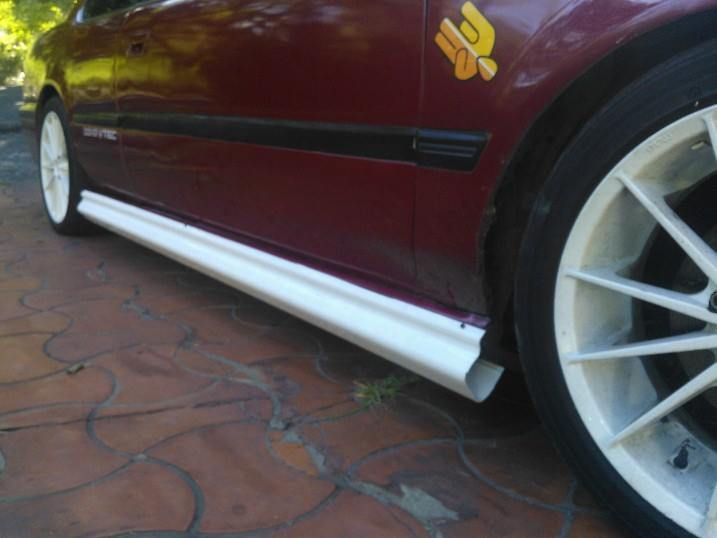
    After a few adjustments and several F#$% ups, I got it to a position I liked.


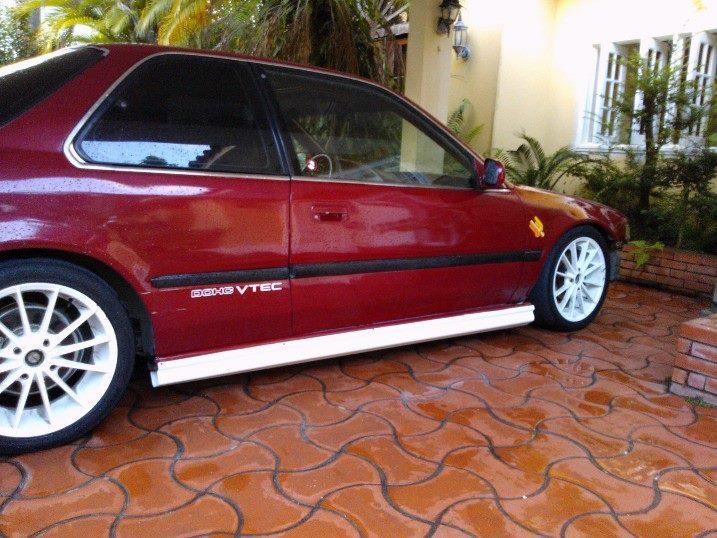
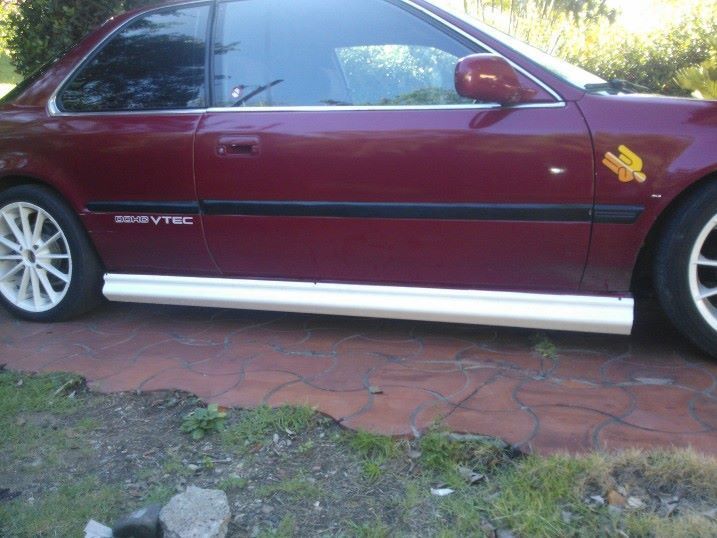
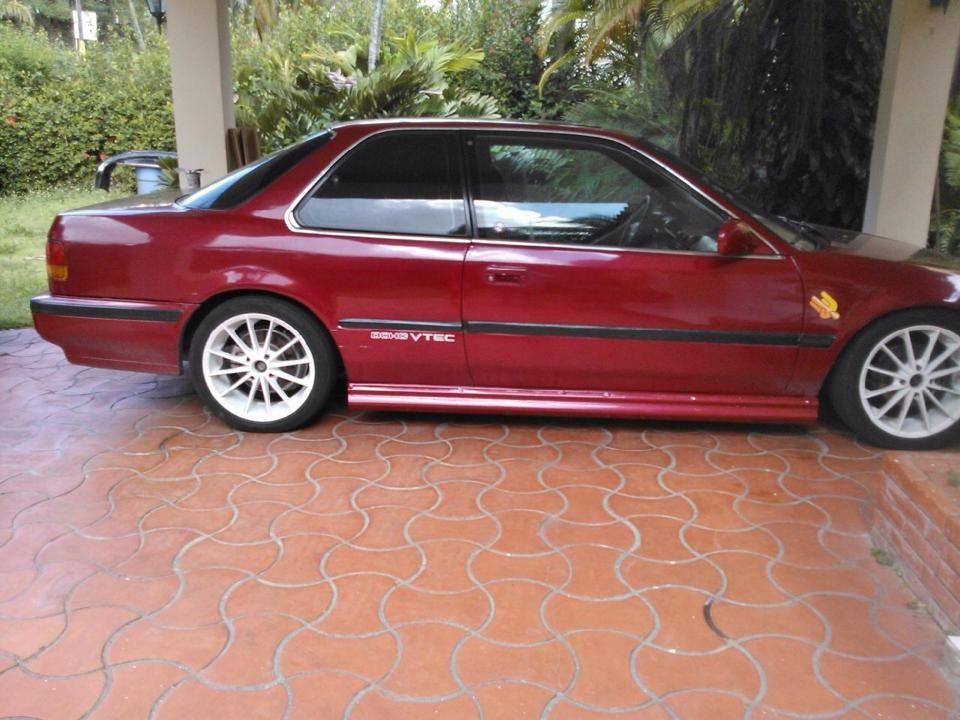
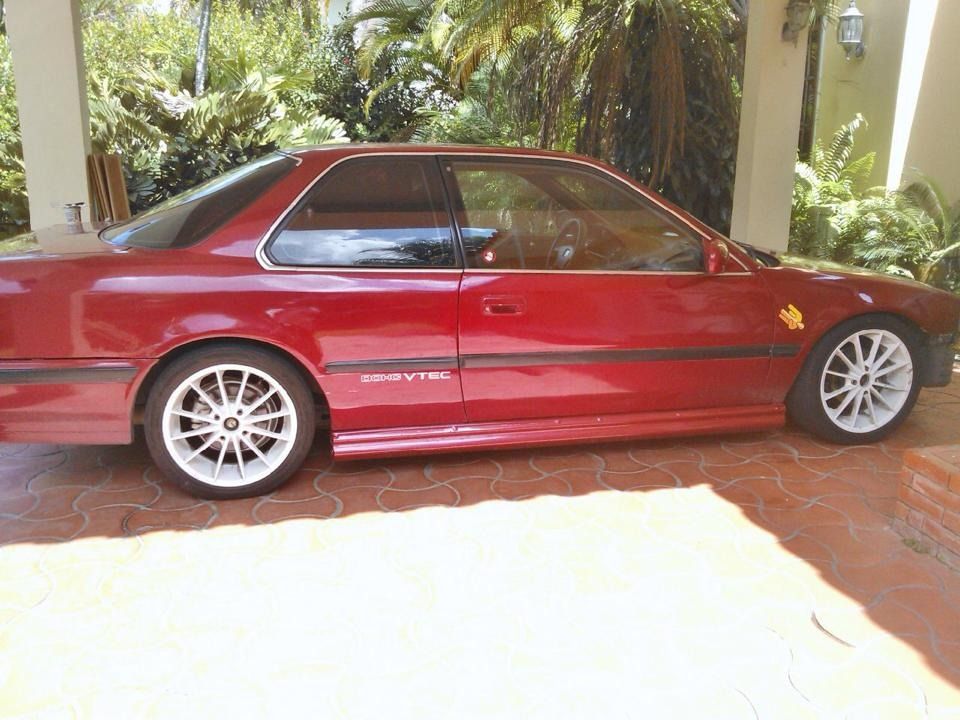
    And this is the end result. NOTICE that it's quite coarse and not painted. I decided to wrap it with vinyl since It's a beta version. Vinyl is cheaper and will reveal flaws and weaknesses. I've had it mounted for the past week and it still holds on. If it after 2 more weeks I see no major weakness, I will proceed and paint.


    and that's about it.
    Will post more once I'm done.

    #2
    I think with a bit more trimming on the front to match the wheel well angle, and potentially sealing the ends of the gutter so you couldn't see behind it... This thing would look like it was made for it. Also when a speed bump destroys it, it's not a $400 fiberglass repair!

    Comment


      #3
      when are the garage door gasket lips getting installed?

      Comment


        #4
        ...ok...

        Comment


          #5
          That actually looks pretty good nice job.
          My 90 coupe Mr thread....
          http://www.cb7tuner.com/vbb/showthread.php?t=178452

          Comment


            #6
            It looks surprisingly good for rain gutters.

            Click for my Member's Ride Thread
            Originally posted by Stephen Fry
            'It's now very common to hear people say, "I'm rather offended by that", as if that gives them certain rights. It's no more than a whine. It has no meaning, it has no purpose, it has no reason to be respected as a phrase. "I'm offended by that." Well, so fucking what?' —Stephen Fry
            Eye Level Media - Commercial & Automotive Photography: www.EyeLevelSTL.com

            Comment


              #7
              It aces the "10-foot test", anyway. Looks good!
              My Members' Ride Thread - It's a marathon build, not a sprint. But keep me honest on the update frequency!

              Comment


                #8
                FRIENDS
                DONT LET
                FRIENDS
                ROLL ON
                ROTA'S

                Comment


                  #9
                  Originally posted by CB7NWDD View Post
                  I think with a bit more trimming on the front to match the wheel well angle, and potentially sealing the ends of the gutter so you couldn't see behind it... This thing would look like it was made for it. Also when a speed bump destroys it, it's not a $400 fiberglass repair!
                  Exactly.

                  Comment


                    #10
                    I would have kept it white to play off the rims myself, love the look and nice ingenuity

                    Comment


                      #11
                      I'm honestly surprised with how it turned out. I think if you closed off the ends you could pass them off as legitimate skirts. Not bad at all.

                      Comment


                        #12
                        New pics of DIY rain gutter side skirts

                        It's been a while since I last came here.
                        After some time I decided to take on CB7NWDD's advice and apply some elbow grease on my DIY rain gutter side skirts.
                        After roughly 4 hours, this is the result. (Nevermind the front bumper, it's still a work in progress.)


                        The looks changed dramatically, and I'm very satisfied with the result. Will keep it black for a while until I complete the front bumper.
                        Last edited by backtobasicscb7; 05-14-2015, 09:59 AM.

                        Comment


                          #13
                          Before and after pics

                          BEFORE
                          [IMG][/IMG]

                          AFTER
                          [IMG][/IMG]
                          Last edited by backtobasicscb7; 05-14-2015, 10:30 AM.

                          Comment


                            #14
                            Bonus, my DIY front bumper WORK IN PROGRESS.
                            I'm still in the process of tweeking, cutting and adjusting. As a family man with a full time management job, I have little time to work on it.
                            The reflective tape is there for reference purposes. (Sorry for the shitty cel phone pic)

                            Last edited by backtobasicscb7; 05-14-2015, 10:31 AM.

                            Comment


                              #15
                              A few of the pics aren't showing up, probably a hosting issue... But I like it even more now that you've painted it black. It's noticable, without being obtrusive.

                              Comment

                              Working...
                              X