
Well, after installing my own headlights I realized there was no one stop thread to get the info. Here's my attempt to bring all the info together so you only have to bookmark one thread. If there's anything you think I've left out, tell me and I'll add it in 
jdm headlight FAQ A must read for everyone. It can answer pretty much any question you could have.
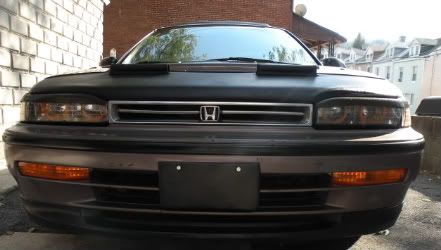
First you need some JDM headlights

Preperation for Installation
Alright, next thing you need are the bulbs for the JDM headlight bulbs. They use different bulbs from the USDM headlights.
Low Beams: USDM use 9006, JDM use H4
High Beams: USDM use 9005, JDM use H1
The H4 bulbs fit fine in the socket on the JDM Headlights fine, but the H1 bulbs are too small to fit in the high beam socket by themselves. So you need 2 bulb holders (one for each High beam bulb). This not only holds the bulb in place in the headlight housing, but also converts the connection on the back of the bulb making it similar to an H4 bulb
Bulb Holder Example from AirRide Accord

Next Thing to work on is preparing to wire up the JDM headlights. The bulbs that are used in JDM headlights use a different connector than the USDM bulbs. Now you could be like me and buy the small parts required to make the conversion harness. OR you could be smart and save some money and just by it from Password JDM
http://passwordjdm.com/PasswordJDM-B...s-P1768C0.aspx

No joke, those are better than what I ended up with and they would have cost less money, even with shipping.
If you feel so inclined to do it yourself here are some ways to do it.
You will HAVE to get 4 H4 Sockets to connect to the back of the H4 bulbs and the H1 bulb holders (which have H4 connections on the back, minus the top post which is unsed on the high beams)

From here you can do two things.
1. Splice these connectors into the OEM headlight harness. This is what I did, I'll include the links to the pics but urge everyone to just buy the harness from PassJDM. You'll be much more satisfied
http://img223.imageshack.us/img223/4166/dsc01862pf9.jpg
http://img223.imageshack.us/img223/4562/dsc01863kt7.jpg
http://img213.imageshack.us/img213/6959/dsc01864xl7.jpg
http://img227.imageshack.us/img227/5109/dsc01865ir2.jpg
http://img85.imageshack.us/img85/4055/dsc01866cm7.jpg
http://img213.imageshack.us/img213/1282/dsc01867xh0.jpg
http://img227.imageshack.us/img227/9238/dsc01868ur0.jpg
http://img85.imageshack.us/img85/605/dsc01869bw6.jpg
http://img223.imageshack.us/img223/5038/dsc01870bj8.jpg
2. Or buy 9006 and 9005 sockets to create a conversion harness like Password JDM sells. suvlights.com sells these sockets if you really want some.
J-specCb4 says you can also use the headlight connectors from a Lincoln Towncar instead
As for the corner lights, the JDM headlights use different connections. If you want the corners to come on when the headlights are on, then you can use the connector that served that function in your old corners (the one closer to the front of the vehicle) However, if you want to have the corners act as blinkers, then you have to do a little cutting on the bulb holder. The OEM holders have a larger nipple on the outter edge, which wouldn't fit in the JDM lights. I cut it along the two lines in the picture. After that it fit, that means no wire cutting or splicing for the corners. I've heard that some have been able to fit it without cutting, but incase this is an issue for you I've included it.

Some of you may be lucky enough to have your seller include all of this stuff with the headlights. If that's true for you I despise you
Either way, now you are ready to begin the installation. WOOT
jdm headlight FAQ A must read for everyone. It can answer pretty much any question you could have.
First you need some JDM headlights
Preperation for Installation
Alright, next thing you need are the bulbs for the JDM headlight bulbs. They use different bulbs from the USDM headlights.
Low Beams: USDM use 9006, JDM use H4
High Beams: USDM use 9005, JDM use H1
The H4 bulbs fit fine in the socket on the JDM Headlights fine, but the H1 bulbs are too small to fit in the high beam socket by themselves. So you need 2 bulb holders (one for each High beam bulb). This not only holds the bulb in place in the headlight housing, but also converts the connection on the back of the bulb making it similar to an H4 bulb
Bulb Holder Example from AirRide Accord
Next Thing to work on is preparing to wire up the JDM headlights. The bulbs that are used in JDM headlights use a different connector than the USDM bulbs. Now you could be like me and buy the small parts required to make the conversion harness. OR you could be smart and save some money and just by it from Password JDM
http://passwordjdm.com/PasswordJDM-B...s-P1768C0.aspx
No joke, those are better than what I ended up with and they would have cost less money, even with shipping.
If you feel so inclined to do it yourself
here are some ways to do it.You will HAVE to get 4 H4 Sockets to connect to the back of the H4 bulbs and the H1 bulb holders (which have H4 connections on the back, minus the top post which is unsed on the high beams)
From here you can do two things.
1. Splice these connectors into the OEM headlight harness. This is what I did, I'll include the links to the pics but urge everyone to just buy the harness from PassJDM. You'll be much more satisfied
http://img223.imageshack.us/img223/4166/dsc01862pf9.jpg
http://img223.imageshack.us/img223/4562/dsc01863kt7.jpg
http://img213.imageshack.us/img213/6959/dsc01864xl7.jpg
http://img227.imageshack.us/img227/5109/dsc01865ir2.jpg
http://img85.imageshack.us/img85/4055/dsc01866cm7.jpg
http://img213.imageshack.us/img213/1282/dsc01867xh0.jpg
http://img227.imageshack.us/img227/9238/dsc01868ur0.jpg
http://img85.imageshack.us/img85/605/dsc01869bw6.jpg
http://img223.imageshack.us/img223/5038/dsc01870bj8.jpg
2. Or buy 9006 and 9005 sockets to create a conversion harness like Password JDM sells. suvlights.com sells these sockets if you really want some.
J-specCb4 says you can also use the headlight connectors from a Lincoln Towncar instead
Originally posted by J-specCb4
Some of you may be lucky enough to have your seller include all of this stuff with the headlights. If that's true for you
I despise youEither way, now you are ready to begin the installation. WOOT


 **Don't b scared be prepared for the worst**
 compare the brackets from the jdm headlights to ur stock ones when they finally arrive, and see if you do in fact need to make the cut. [IMG]http://www.****.com/pics/jdmheads/cut.jpg[/IMG]
Comment