
How I did my blackout headlights and installation
Allow me to preface this by stating that you may notice similarities with this thread and others, such as the DIY Custom Black Housing Headlights thread and the DIY Bumper Removal : How To thread . I used them as guidelines for this project.
First off I purchased a pair of OEM 92-93 CB headlights with brackets off of eBay for $30.
After removing the brackets, clips that hold the glass to the reflector, and bulbs that came with it, I preheated the oven to 225 degrees. Placing the headlight on a cookie sheet with a few sheets of wet newspaper on it, I baked the headlight for 12 minutes. This got the heavy-duty industrial adhesive that keeps the glass sealed against the reflector nice and soft. Using a large flathead screwdriver, the two pieces came apart fairly easily. Having a towel between the screwdriver and the headlight helps to keep the headlight from being chipped.
Once apart, use a razor knife to cut away any stray strings of gray industrial adhesive.
Now comes the torturous task of masking the reflectors. Be sure to use a good quality masking tape, as using a cheap brand may leave glue on the chrome, or may even pull the chrome off the plastic. Take your time and do it right, or the end result will be poor.
Having masked the reflector with the tape, PlastiKote flat black fast dry engine enamel was used. If the edges of the masking tape were not pressed down firmly, the spray will get underneath and will make the project look very amateur. Several people, I have read, have done many thin coats of paint. With the PlatiKote fast dry paint I did one thin coat, one heavier coat after 5 minutes, and another coat same as the second 5 minutes after that. Allowing the paint to dry overnight will prevent any of the paint peeling up when the masking tape is removed.
Once the tape is removed, I reassembled the headlights. A 1/4" bead of clear silicon sealant was put around where the headlight glass meets the plastic reflector. I used the clips keep the two parts together as the silicon gel cured. 24 hours later, the lights were ready for installation.
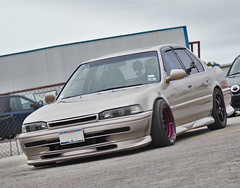
One before, and one after:

Following the instruction in the Bumper Removal thread, I took off the grille, corner lights and bumper lights. The two bolts in the engine compartment come out easily with a 12mm combination wrench, and the 4 behind the bumper cover are easily accessable thru where the bumper lights were. A 12" ratchet extension allows easy access to the 2 bolts on either side of the bumper. There's supposed to be 2 clips underneath on the air dam that need to come out. Mine had fallen out so it was not necessary to remove them. Once you have those 6 bolts and two clips out, the bumper cover pulls straight out. Use two hands, as its large and unweildy.
Your results should look like this: (the white wire hanging down is for the bumper-mounted driving lights)

After getting the bumper off, put it somewhere soft, such as on grass:

Five bolts each attach the headlight mounting bracket to the car. Remove these 5 bolts and the headlight comes off easily. After disconnecting the headlight bulb wires, I set the headlights aside and attached the wires to the other set of lights that I had already blacked out. After putting the 5 bolts in each headlight it looks like this:

At this point, the horn and lower stock airbox plumbing is easily accessable. If you are going to put in airhorns or take out the airbox for weight reduction, now would be a good time to do so. I did neither.
Reinstallation of the bumper is just the oppposite of removal. Be sure to allow the grooves on the sides of the inside of the bumper to go over the tabs in the body of the car so that the bumper sides are not loose. If you get it together and realize that you did not do this step, then get your ratchet back out, as the bumper has to be basically take off again to realign the tabs and gooves for proper fitment. I made this mistake and added 5 minutes to the overall time spent on the project.
After tightening the bolts down thru the bumper lens hole and in the engine compartment, it was time for reinstallation of all the small stuff such as bumper and corner lights, and the grille.
It should look like this:

Anywhere along the lines after you have the blacked out headlights on, you can test them to see if you have good bulbs. In the car I currently have Philips Cool Blue 9006 low beams and aftermarket plazma blue 9005 high beams
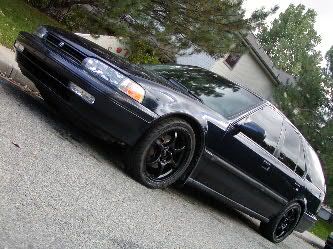
End result (minus corner lights that are being partially blacked out):

When its dark I checked the headlight aim, and the blackout treatment got rid of a lot of stray light and reduced light pollution.
The headlights were already aimed well, so no adjustment was necessary. Visibility is just as well as OEM and am pleased with the results.
Removing the bumper was easy. Don't let anyone fool you- its easy. I had it off very quickly.
The worst part was masking the reflectors. It sucks and its time consuming. If done right the results will be worth the hassle.
Allow me to preface this by stating that you may notice similarities with this thread and others, such as the DIY Custom Black Housing Headlights thread and the DIY Bumper Removal : How To thread . I used them as guidelines for this project.
First off I purchased a pair of OEM 92-93 CB headlights with brackets off of eBay for $30.
After removing the brackets, clips that hold the glass to the reflector, and bulbs that came with it, I preheated the oven to 225 degrees. Placing the headlight on a cookie sheet with a few sheets of wet newspaper on it, I baked the headlight for 12 minutes. This got the heavy-duty industrial adhesive that keeps the glass sealed against the reflector nice and soft. Using a large flathead screwdriver, the two pieces came apart fairly easily. Having a towel between the screwdriver and the headlight helps to keep the headlight from being chipped.
Once apart, use a razor knife to cut away any stray strings of gray industrial adhesive.
Now comes the torturous task of masking the reflectors. Be sure to use a good quality masking tape, as using a cheap brand may leave glue on the chrome, or may even pull the chrome off the plastic. Take your time and do it right, or the end result will be poor.
Having masked the reflector with the tape, PlastiKote flat black fast dry engine enamel was used. If the edges of the masking tape were not pressed down firmly, the spray will get underneath and will make the project look very amateur. Several people, I have read, have done many thin coats of paint. With the PlatiKote fast dry paint I did one thin coat, one heavier coat after 5 minutes, and another coat same as the second 5 minutes after that. Allowing the paint to dry overnight will prevent any of the paint peeling up when the masking tape is removed.
Once the tape is removed, I reassembled the headlights. A 1/4" bead of clear silicon sealant was put around where the headlight glass meets the plastic reflector. I used the clips keep the two parts together as the silicon gel cured. 24 hours later, the lights were ready for installation.
One before, and one after:
Following the instruction in the Bumper Removal thread, I took off the grille, corner lights and bumper lights. The two bolts in the engine compartment come out easily with a 12mm combination wrench, and the 4 behind the bumper cover are easily accessable thru where the bumper lights were. A 12" ratchet extension allows easy access to the 2 bolts on either side of the bumper. There's supposed to be 2 clips underneath on the air dam that need to come out. Mine had fallen out so it was not necessary to remove them. Once you have those 6 bolts and two clips out, the bumper cover pulls straight out. Use two hands, as its large and unweildy.
Your results should look like this: (the white wire hanging down is for the bumper-mounted driving lights)
After getting the bumper off, put it somewhere soft, such as on grass:
Five bolts each attach the headlight mounting bracket to the car. Remove these 5 bolts and the headlight comes off easily. After disconnecting the headlight bulb wires, I set the headlights aside and attached the wires to the other set of lights that I had already blacked out. After putting the 5 bolts in each headlight it looks like this:
At this point, the horn and lower stock airbox plumbing is easily accessable. If you are going to put in airhorns or take out the airbox for weight reduction, now would be a good time to do so. I did neither.
Reinstallation of the bumper is just the oppposite of removal. Be sure to allow the grooves on the sides of the inside of the bumper to go over the tabs in the body of the car so that the bumper sides are not loose. If you get it together and realize that you did not do this step, then get your ratchet back out, as the bumper has to be basically take off again to realign the tabs and gooves for proper fitment. I made this mistake and added 5 minutes to the overall time spent on the project.
After tightening the bolts down thru the bumper lens hole and in the engine compartment, it was time for reinstallation of all the small stuff such as bumper and corner lights, and the grille.
It should look like this:
Anywhere along the lines after you have the blacked out headlights on, you can test them to see if you have good bulbs. In the car I currently have Philips Cool Blue 9006 low beams and aftermarket plazma blue 9005 high beams
End result (minus corner lights that are being partially blacked out):
When its dark I checked the headlight aim, and the blackout treatment got rid of a lot of stray light and reduced light pollution.
The headlights were already aimed well, so no adjustment was necessary. Visibility is just as well as OEM and am pleased with the results.
Removing the bumper was easy. Don't let anyone fool you- its easy. I had it off very quickly.
The worst part was masking the reflectors. It sucks and its time consuming. If done right the results will be worth the hassle.


Comment