Announcement

Collapse
1 of 2 < >

ANY BUYING/SELLING IN THIS FORUM WILL RESULT IN AN INSTANT BAN!

Read the rules: http://www.cb7tuner.com/vbb/showthread.php?t=43956

Myself, and the other mods have been very nice and lenient with the rules. We have been deleting threads, and giving out warnings. Some members didn't get the clue and re-posted over and over... Now ANY member buying or selling in this section will be banned... No IF's AND's or BUT's.
2 of 2 < >

Beginner Forum Rules - EVERYBODY read! (old and new members alike!)

Beginners start here. Once you have 30 worthwhile posts (off topic doesn't count) you may post outside of the Beginner forums. Any "whoring" (posting simply to raise your post count) will return your count to 0, or result in a ban.

These are the rules. Read them. Live by them.

1) Absolutely NO flaming! "Flaming" is an outright attack on a member. ALL questions are encouraged to be asked here, no matter how basic. Members with over 30 posts will be subject to a ONE WEEK ban if caught flaming in this forum (and yes, moderators can read deleted posts). Members with under 30 posts will be subject to a ONE DAY ban.

2) Use appropriate language. Racial or sexual slurs will not be tolerated. A ban will be issued at the discretion of the cb7tuner.com staff.

3) No items may be sold in the Beginner forums. Any "for sale" threads will be deleted.

4) Temporarily banned members will be PERMANTLY banned if they are found posting on another account.

The rules can and will be added to. Any updates will be marked in the title.

The rules for the overall forum can be found here:
http://www.cb7tuner.com/vbb/forumdisplay.php?f=144
Read them. You will be expected to follow them.
See more
See less

dashboard removal

Collapse
X
 
  • Filter
  • Time
  • Show
Clear All
new posts

    dashboard removal

    Has anyone ever removed a dashboard and took pics b'cuz I want 2 remove mine without screwing anything up.
    NEW CB


    old Darkcloud : 1990 Accord EX MRT

    new
    DARKCLOUD : 90 ACCORD EX MRT

    #2
    http://media.honda.co.uk/car/owner/m.../400/14-51.pdf
    14-51.pdf (application/pdf Object)

    thats the first part of it, i havent searched for the entire dash yet but i hope that helps

    Comment


      #3
      Thanks hit me up if there's more 2 it.
      NEW CB


      old Darkcloud : 1990 Accord EX MRT

      new
      DARKCLOUD : 90 ACCORD EX MRT

      Comment


        #4
        yeah i have been wondering how to take it out also because I recently painted my interior and I didn't quite get all the way in the front where the window meets the dash and you can notice it pretty well. I need some help.

        Comment


          #5
          dude, ur car looks exactly like mine, i have the driver side caps off too. i thought it was mine for a second

          Comment


            #6
            Originally posted by accordconor
            http://media.honda.co.uk/car/owner/m.../400/14-51.pdf
            14-51.pdf (application/pdf Object)

            thats the first part of it, i havent searched for the entire dash yet but i hope that helps
            bump

            Comment


              #7
              Buy a haynes. They have pictures for every step of the removal along with instructions. I found that I needed to take the steering wheel off too, which the manual didn't make too clear at first. But everything else was very clear. LABEL your screws and such that you use... DO IT. There are so many, on your first time you will get confused. I am.
              Click for my ride thread.

              Comment


                #8
                It's really not that hard to do if you're patient and you'll want a friend there to help you with the actual removal when you're ready.

                If this is a '92-'93 disconnect the airbag first!!!!!

                To start of you'll take out the shifter console. Unthread the shift knob and take out 4 screws that hold it in.
                Then get your head in the floor board and look around behind the radio area while one of your hands turns the temperature control knob. The lever you see moving is the lever you disconnect.
                Now disconnect all three connectors by the fuse box in the driver's foot well.
                Pry off the emblem on the steering wheel exposing a 19mm socket that will need a long extension and remove the steering wheel a few inches and disconnect the connector on the back. (different procedure for '92'93).
                Once that's off you'll need to remove the plastic covering over the column with the 5 screws underneath.
                Now I can't remember exactly the number of screws to remove on this step but you'll figure it out. Just remove the signal/wiper combination switch.
                Once all of that is done take out the clock carefully to expose the mounting bolt. It is a 10mm bolt. There are two more on each side underneath the plastic plugs and the last two are on the metal bracket connecting the dash to the shifter tunnel.
                Just have a friend help you pull it out and you're good.

                I may have forgotten something but that's pretty much as good as I can do from memory.
                My Members' Ride Thread - It's a marathon build, not a sprint. But keep me honest on the update frequency!

                Comment


                  #9
                  You have to take off the bezel, which is like 12 screws or something. Before taking off the dash. I'd do the steering wheel and the plastic around shifter first.
                  Click for my ride thread.

                  Comment


                    #10
                    search for the DIY.

                    Comment


                      #11
                      Originally posted by rAwRLEN
                      search for the DIY.
                      I've never seen one...? Maybe I missed it. Would be nice if there was one.
                      Click for my ride thread.

                      Comment


                        #12
                        I just did this

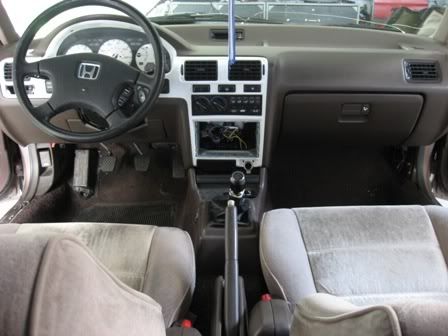
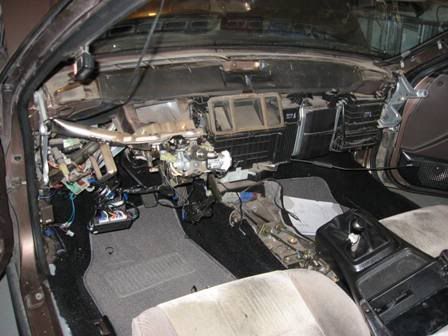
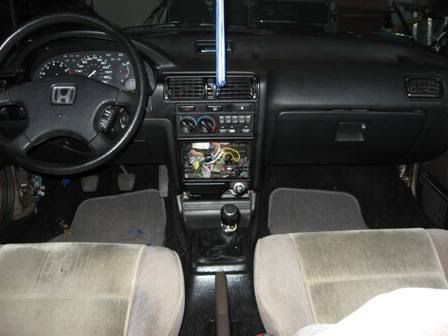
                        I will write a DIY sometime next week when I get back from Seattle. But it is really easy. The only tip I can give you off hand is to pull the top trim pieces and pull the dash from the driver side (steering wheel) first. Pull it STRAIGHT out not up or anything. That is the only way to get around the Key ignition. I would have to say the hardest part of the entire thing is getting the clock out without breaking it. I broke mine

                        Before


                        Nothing


                        After


                        If you have any specific questions before I write the DIY just ask
                        Last edited by Ghetto_CB7; 08-19-2007, 11:17 PM.

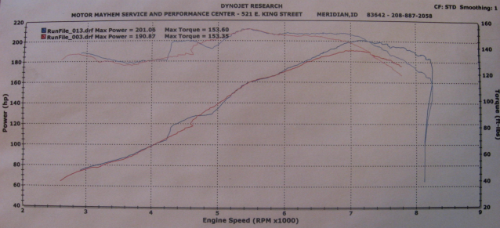
                        201 Whp H22a with bolt ons, see the progress from stock f22a to now HERE

                        Comment


                          #13
                          Yeah, write it up. I liked the overall finish.
                          F22A1 = Now, NA : Soon, Turbo
                          My Member's Thread
                          Arcadia Green #14

                          Comment


                            #14
                            i did it once, i'll never do it again so much wiring and stuff

                            Comment


                              #15
                              dont forget the three wiring connectors under the radio... the overall procedure is really simple though. Just take your time, alot of stuff needs to come off, but its all simple... just need a phillips and a couple sockets.

                              label your shit... it will make it way easier. and the guage pod is tricky to get back in... play with it, it'll go.
                              RIP


                              Bought from : LosiRacer2, h22anow

                              Comment

                              Working...
                              X