
I got a few request for how I did this, so here's the DIY. Someone please feel free to snag the images and host. When my site needs more space I will have to delete.
Tools Required but not essential
1-Punch or similar object to tap emblem.
1-Hammer
1-Assortment of sandpaper, I used 600-800.
1-Can primer, I used filler type to conceal scratches.
1-Can desired color, Duplicolor has tons of selections.
I used SEM Bumper Coater 39273. It's OEM for older BMW's.
Has a nice color to it, with metallic.
1-Can clear topcoat, if desired. I opted for the gloss look.
1- Flathead screwdriver.
1-Thinner, Mineral Spirits or Denatured Alcohol to wipe down the badge.
Estimated time-1.5-2 hours, let badge dry overnight.
Difficulty Level - 1
1. Here's the OEM chrome badge, not very appealing.

2. Next, open the trunk and find the access hole for the badge.

3. Using a punch or similar item, you will tap on either side of the emblem the plastic pins. Be gentle, it doesn't take much.

4. You'll notice that the badge will pop up. Once it does, take the flathead screwdriver and gently work the badge off. There is adhesive holding the badge on the top and bottom which you'll be replacing.

5. Once the badge is off, take the 600 grit paper and start sanding down the chrome. It's important that you get it all scuffed or the paint will not stick very long. Once you have sanded with 600, switch to 800 and sand again. You can use a flat object, such as the screwdriver, to get into the tight places. Just wrap the sandpaper around the tip. Once sanded, the badge should look like the picture below.

6. Once sanded, you'll want to clean the badge with mineral spirits, denatured alcohol or thinner.
7. Once cleaned, begin the paint process. Coat the badge with 2-3 coats of primer and let it dry.
8. Paint the badge your desired color. As known, several light coats are better than one heavy coat. I applied around 5 coats to my badge letting it tack between coats.
9. Once the paint has dried a little more than standard tack, you can hit it with the clear topcoat. I applied 4 coats as a topcoat, letting each one tack before spraying the next.

10. Once dry, the next day, cut small pieces of 3M double sided adhesive and place them on the top and bottom of the badge in the factory locations.
11. Press the emblem back into the factory holes.

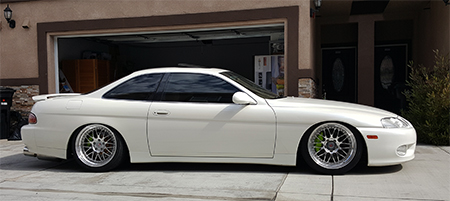
Here's the finished product. Worth the time, definately goes along with the rest of my look.

Tools Required but not essential
1-Punch or similar object to tap emblem.
1-Hammer
1-Assortment of sandpaper, I used 600-800.
1-Can primer, I used filler type to conceal scratches.
1-Can desired color, Duplicolor has tons of selections.
I used SEM Bumper Coater 39273. It's OEM for older BMW's.
Has a nice color to it, with metallic.
1-Can clear topcoat, if desired. I opted for the gloss look.
1- Flathead screwdriver.
1-Thinner, Mineral Spirits or Denatured Alcohol to wipe down the badge.
Estimated time-1.5-2 hours, let badge dry overnight.
Difficulty Level - 1
1. Here's the OEM chrome badge, not very appealing.
2. Next, open the trunk and find the access hole for the badge.
3. Using a punch or similar item, you will tap on either side of the emblem the plastic pins. Be gentle, it doesn't take much.
4. You'll notice that the badge will pop up. Once it does, take the flathead screwdriver and gently work the badge off. There is adhesive holding the badge on the top and bottom which you'll be replacing.
5. Once the badge is off, take the 600 grit paper and start sanding down the chrome. It's important that you get it all scuffed or the paint will not stick very long. Once you have sanded with 600, switch to 800 and sand again. You can use a flat object, such as the screwdriver, to get into the tight places. Just wrap the sandpaper around the tip. Once sanded, the badge should look like the picture below.
6. Once sanded, you'll want to clean the badge with mineral spirits, denatured alcohol or thinner.
7. Once cleaned, begin the paint process. Coat the badge with 2-3 coats of primer and let it dry.
8. Paint the badge your desired color. As known, several light coats are better than one heavy coat. I applied around 5 coats to my badge letting it tack between coats.
9. Once the paint has dried a little more than standard tack, you can hit it with the clear topcoat. I applied 4 coats as a topcoat, letting each one tack before spraying the next.
10. Once dry, the next day, cut small pieces of 3M double sided adhesive and place them on the top and bottom of the badge in the factory locations.
11. Press the emblem back into the factory holes.
Here's the finished product. Worth the time, definately goes along with the rest of my look.


 my H emblem doesnt even have adhesive on the back soo you can pry it off with your fingers and the clips dont break if your careful...soo i do that everytime i wax my car and i wont have that white crap stuck in there


Comment