Announcement

Collapse
No announcement yet.

INT: 10 min gauge cluster mod

Collapse
X
 
  • Filter
  • Time
  • Show
Clear All
new posts

    INT: 10 min gauge cluster mod

    Alright boys and girls. Everyone wants a nice, classy looking interior in their Accord.

    A popular interior mod is the ever good looking chrome trim rings for the gauge cluster. However, these range in prices from $30-70.

    I can have you do it for less than $16 CDN.

    1. Buy yourself a roll of 1/8" Chrome trim. I found this stuff at Canadian Tire, see link below:
    http://www.canadiantire.ca/AST/brows....jsp?locale=en

    2. Remove gauge cluster

    3. Pop the front cover off the gauge cluster, by undoing the clips that hold the cover on.

    4. Lift the black face plate off.

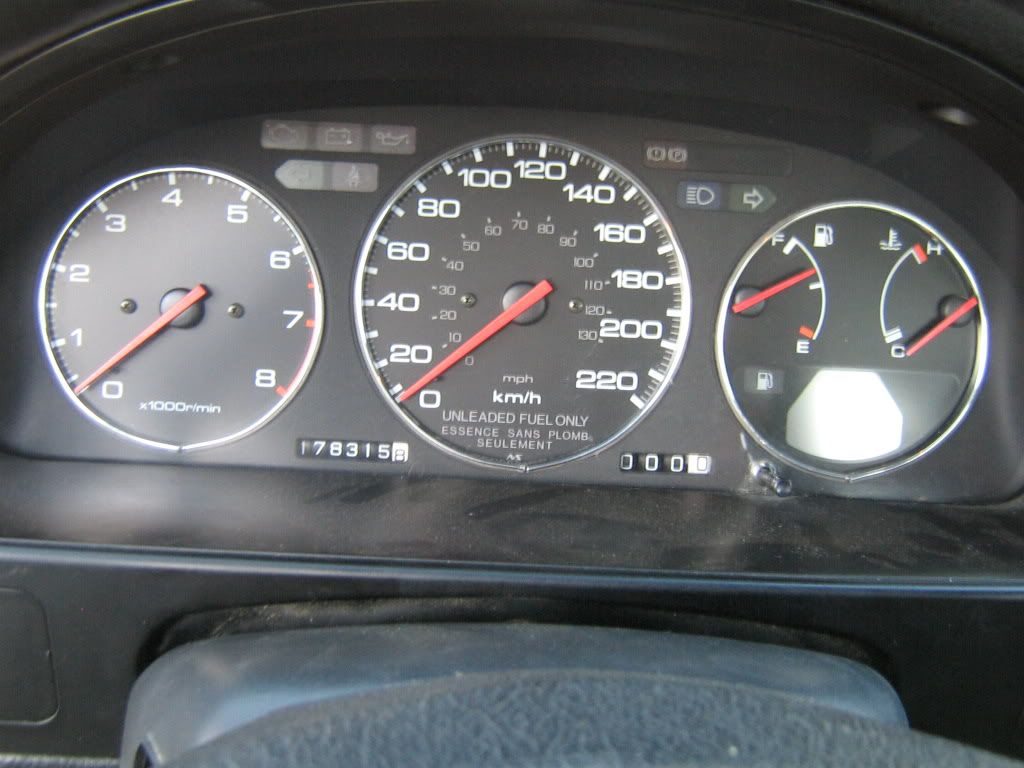
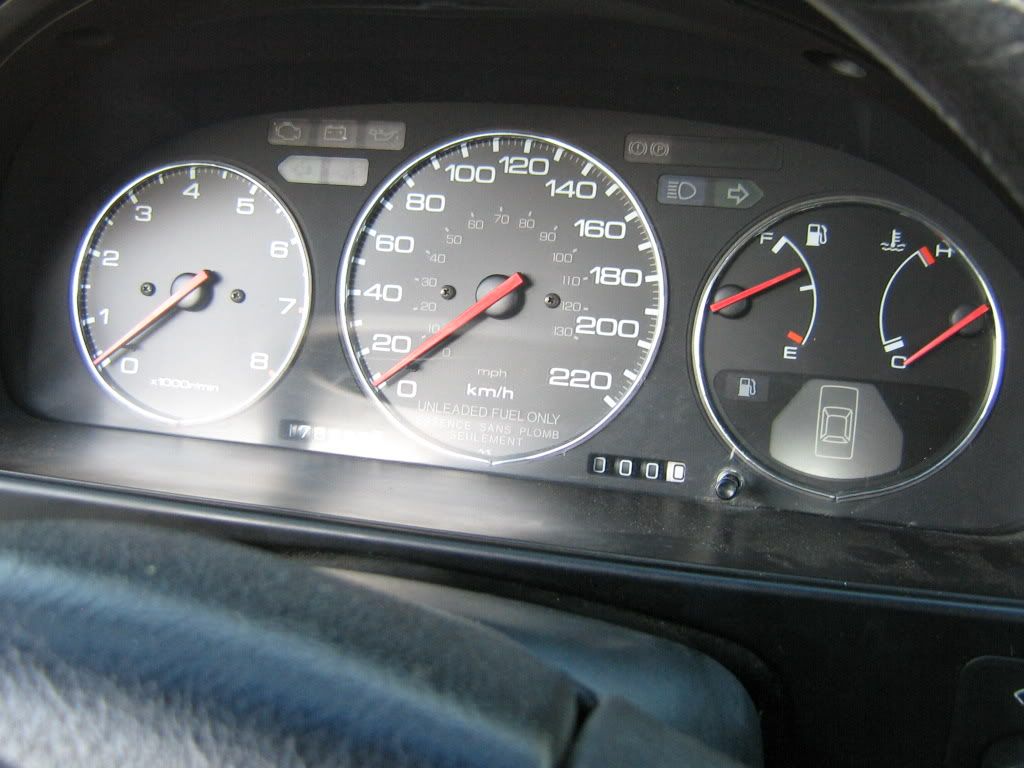
    5. Begin installing the chrome strip. It simply sticks in place. Work your way around and try and make a nice joint at the bottom.

    6. Do all 3 rings.

    7. Put it all back together.

    8. Enjoy.

    While I had mine apart, I also did my needles red, using a red permanent marker.

    This whole thing took me about 10 mins once the cluster was out of the car. Very easy to do, cost effective, and looks just about as good as the real deal.


    #2
    Nice. This car gets better and better everyday!

    Comment


      #3
      Looks great! Besides the break in the trim at the bottom.

      Could the chrome be pulled off its backing, then overlapped to make it look like one piece?
      "My FOR SALE thread - Click here"

      MEMBERS RIDE

      99 SILVERADO

      WHEEL FLIP

      Comment


        #4
        I'm sure maybe if I was to glue it or silicone or maybe even heat it and melt it together, it may eliminate the seam, but when I put it together, I couldn't think of any way to eliminate it.

        I have a few inches left over that I could experiment with ways to join it together.

        But, because this is a DIY, this leaves the rest up to anyone who tries it.
        Last edited by crazymikey; 03-04-2012, 11:38 PM.

        Comment


          #5
          god i was to late but nice good job

          paypal info:leonardorivera50@yahoo.com

          Comment


            #6
            Look sick dude.... I Love the look this give with the prelude steering wheel....

            This is mine, I Have purchase them...they are designed for the 90-93 cb7 gauge cluster....


            I Love your result Crazymickey.... for the HALF Price you get almost the same result.......

            Great Result and Good work Dude!!!

            Excellent DIY.... I think a lot of people would love this!
            Last edited by WhiteShift; 03-07-2012, 12:27 PM.

            Comment


              #7
              I like your CF overlay. Is that a proper CF overlay? I have some of the fake stick on CF I was thinking about using for the same thing, but it takes away from the OEM look.

              Comment


                #8
                mine is a real carbon fiber... not a sticker.. he has 3/16 inch thickness..
                Last edited by WhiteShift; 03-08-2012, 02:24 PM.

                Comment


                  #9
                  i like this....good write up mikey you alway seem to find ways to get the high end look at prices that dont burn holes in the cb enthusiast pocket


                  http://www.cb7tuner.com/vbb/showthread.php?t=189897 MRT
                  http://www.cb7tuner.com/vbb/showthre...09#post3003309 EF hatch build

                  Comment


                    #10
                    My needles are red, my numbers r red. Every 500rpm and 1k line is red. Bezel is metallic silver, same as my intake manifold.. when u turn ur parkin lights on it lights up orange, I took the film off the bulbs and painted them clear orange.. I keep the dimmer low. On high its pretty. But with this simple freakin mod it will make my diy cluster more sick looking. Thanks for doin this..


                    Wats th size of the trim. How was the packaging look. I see these but idk which ones to get.
                    **Blk Housed Slut Crew Member #1**

                    **Don't b scared be prepared for the worst**
                    Da Drizzle's Sedan - Dr. Diy's Blk Housed Thread

                    '90 2Tone Coupe-Car Heaven_'89 Lude-Junk Yard
                    Mostly Usdm, some Jdm,Edm,&Puerto Rican RICE

                    Comment


                      #11
                      Originally posted by redlined302 View Post
                      i like this....good write up mikey you alway seem to find ways to get the high end look at prices that dont burn holes in the cb enthusiast pocket
                      Thanks I'm glad that I am able to find cheap and creative ways to do things right. This in turn helps me save money, and the rest of you too.

                      Comment


                        #12
                        Please answer my last question.

                        The size is it like 1/8th inch? Don't mean 2 b a pest but I want 2 do this asap.
                        **Blk Housed Slut Crew Member #1**

                        **Don't b scared be prepared for the worst**
                        Da Drizzle's Sedan - Dr. Diy's Blk Housed Thread

                        '90 2Tone Coupe-Car Heaven_'89 Lude-Junk Yard
                        Mostly Usdm, some Jdm,Edm,&Puerto Rican RICE

                        Comment


                          #13
                          Yes, sorry, it's 1/8. Smallest size they make it in.

                          Comment


                            #14
                            Hey Mikey,
                            2 questions:
                            1) What's the total length used on all 3 rings?
                            2) Do you glue the rings on actual dial gauges themselves after removing the black cover? Or do you put the ring on the black cover itself?
                            I am thinking of painting that black cover another color, I have white and red, which color would stand out and better styling?

                            Thanks.

                            Comment


                              #15
                              Actual length? No clue. I just stuck on as much as I needed and cut off the excess.

                              If you want to find out, do some math.

                              The trim sticks on. I stuck it onto the inside edge of the black faceplate that covers the gauges.

                              I would leave the faceplate black, or carbon fibre like Whiteshift's above photo. Personally I don't like anything else. Looks tacky and distracting.

                              Comment

                              Working...
                              X