

This DIY is pretty straightforward. Ideally, this should be done on a 92-93 front bumper, because the EDM fog light templates help you align my templates. The sweet thing about these foggies is that you're able to use the 90-91 CB fog harness for plug-and-playability. Another plus to this retrofit is that you do not destroy your ability to reuse the bumper for OEM CB fog lights - you're simply cutting into the area that will be removed for OEM fog lights.
These fog lights aren't common, but they're readily available online (aftermarket).

I can't guarantee your results with this DIY alone. You're going to have to use your own better judgement to help you make decisions, and you're going to have to spend a decent amount of time on the project.
This goes without saying, but for every DIY project you do, you're only going to get out of it what you put into it. If you don't think you're up to cutting holes in your bumper, I suggest looking into another fog alternative!

Materials Needed:
-94-97 Integra fog lights WITH BRACKETS (98-01, I cannot verify).
-Two printed copies of my templates (see below).
-Ruler with CM and MM measurements (precision, son).
-Scissors (to cut out my templates, and cut shrouds).
-Glue (to glue the templates onto the bumper).
-Razor blades (to cut your bumper with).
-Dremel, or any other rotary tool (to smoothen the edges on your cuts).
-Door trim (to use as "shrouds").
-Heavy-duty double-sided tape, or glue (to keep shrouds in place).
-Power Drill with 3/8" drill bit (cut into Integra fog housings, for mounting).
-Six 1.25" pipe bolt-downs to use for ghetto custom Teg-CB brackets (Lowe's, $1.50 for a 4 pack).
-Selection of screws and bolts (to get everything bolted down to the bumper).
-Time, patience, perseverance, a good attitude.

Here's the template. Simply print and cut them out. This is where your grade school scissor skills are gonna come back to haunt you!
Next, align the crosshairs on the underside of the bumper. You're going to want to make sure the templates are straight. Be sure the horizontal crosshair line is parallel with the horizontal garnish in your bumper's mouth, and be sure the vertical line is parallel with something else vertical on the bumper. Then, once you know the template is straight, center each side into the EDM cutout sections.
Sorry, but I didn't take photos of the cutting process.


A good marker for this is as follows:
-The printed template is ≈1cm above the bottom of the EDM templates.
-The horizontal crosshair should be ≈2mm above this little "circle" print.
-The oval fog template should be ≈2mm to the left of this little "circle" print.

Once you have your location verified, use some glue to secure the template to the bumper. Make sure you have the whole thing glued down securely, so it won't move while you're cutting the holes out.
Begin cutting. Pop the holes out with the razor blade, and fine-tune the cuts with a Dremel. Use the fog lights between fine-tuning for mock-up purposes and cutting reference.
Once the holes are cleaned up, measure their vertical and horizontal diameters to ensure proper fitment. The horizontal diameter should be ≈7cm. The vertical diameter should be ≈6cm. Measure the perimeter of your cut-outs, and cut your door trim to fit the holes as shrouds. Secure the trim with your choice of glue or double-sided tape.
Take the fog lights and place them into the cut-outs, but in opposite directions (i.e., Left light into right hole, Right light into left hole). Take your hardware store pipe bolt-downs, and bend them to fit any two of the bottom OEM bracket mounting locations to the bottom corner of each bracket.

#############################################################################################################################
#############################################################################################################################
UPDATE:
ikayto made a great point here. Replacing the pipe tie-down method with metal plumber's tape. You'll find it in the same area at the hardware store. It essentially does the same thing for its intended purpose.

Probably less expensive, too.
Originally posted by ikayto
View Post

#############################################################################################################################
Then, drill holes at the bottom of the brackets, and use machine screws fitted with washers to get them secure. Thread locker is optional, as are nuts for the screws for extra security. See the above photo for drilling/tapping reference.

The reason why I suggested flipping the lights is to use the adjuster bolt as a location for the top mounting bracket (see below photo). You can use a nut to clamp a pipe tie-down to this bolt, and then simply line up the other end of the pipe tie-down to the inner bumper bolt locations.

Depending on what you're using for customized brackets, you may want to extend the size of the holes to fit the bumper screws through the brackets. This is when your power drill or Dremel may become handy again.

With the fogs bolted onto the bumper via your custom brackets, place the bumper back on the car for final aiming and adjustment. The bumper bolts must be screwed in properly to ensure your new fogs' security and aim adjustment. You should be able to reach under the bumper and adjust each fog's direction. The nice thing about these pipe tie-downs is that they're flexible enough to be directed, yet retain their shape. It most certainly isn't the most advanced bracket solution, but it gets the job done cheaply, and effectively.
Done, son.
----------
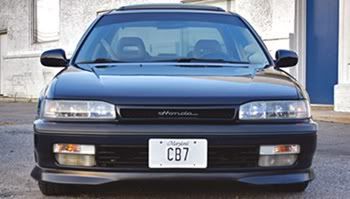
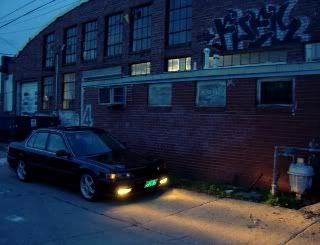
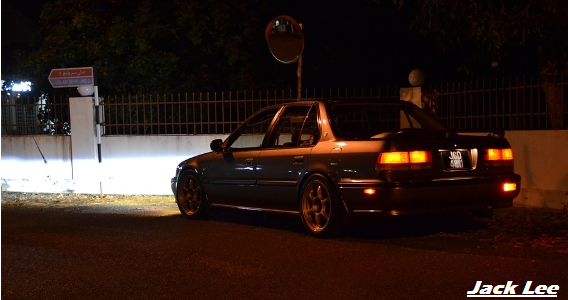
Output photos, as requested:


 **Don't b scared be prepared for the worst**


Comment