
Hey everybody my clutch started slipping a little while ago, so I decided to replace it and the flywheel too while I was down there, I did not replace the rear main oil seal because I don't have I right tools. I found a couple of DIY's on here on how to do this { http://www.cb7tuner.com/vbb/showthread.php?t=83702 } and { http://cb7tuner.com/vbb/showthread.php?t=148387 } but there are no pictures. So I took some picture while I did it, but since this is my daily driver sometimes forgot the pictures in favor of getting back on the road quicker. This means that this is an incomplete DIY under no circumstances should you rely on this as your sole reference read those other threads and go buy a haynes or helms.
Notes: This was performed on a 1993 Accord EX with a F22A6 and a manual transmission all stock, with 248K miles on it
First step to this job is to buy a manual and study it until your eyes bleed.
Once you can see again you can start by jacking the front of car up as high as you can get it and support it on jack stands, after you chalk the back wheels or experience the world from 2 dimensions. Take both front wheels off. Next remove every thing on the top side of the trans. such as the air filter box, battery, battery holder, there is a radiator hose in there too I ended up disconnecting it but you might be able to just pull it out of its holder/standoff and leave it connected to the cooling sys. and also remove the splash guard from underneath the car. all of this is just prep work and can rally be done in almost any order.
Next up is to get the transmission off the car, which is the hard part of doing the clutch.
Start by draining the transmission fuild from out of the tranny
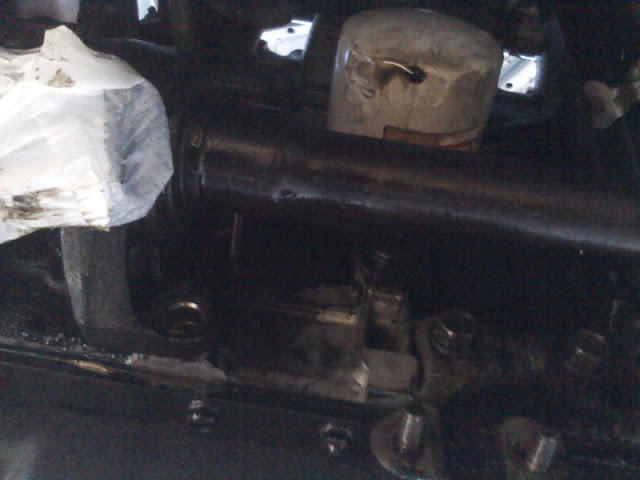
Then remove the starter motor and grounding wire

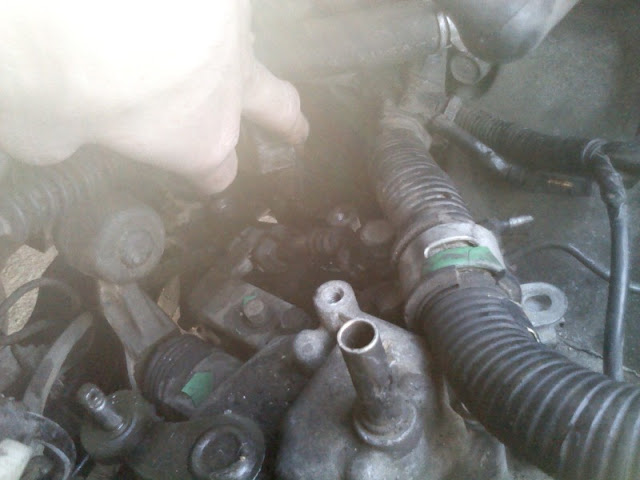
Then there is a sensor of some sort with some power steering lines going to it, it is way in the back of the tranny in the dark spot where my finger is pointing. There is'nt really a clear line of sight to it i just had to find it by feel, its held down by one 10mm bolt its kinda of snug to pull out but when you pull it out there is a shaft with a gear that sticks in to the casing on the trans. My hayne's said it was unnecessary to disconnect the power steering lines from it.
Now take off the center cross beam and get the exhaust out of the way
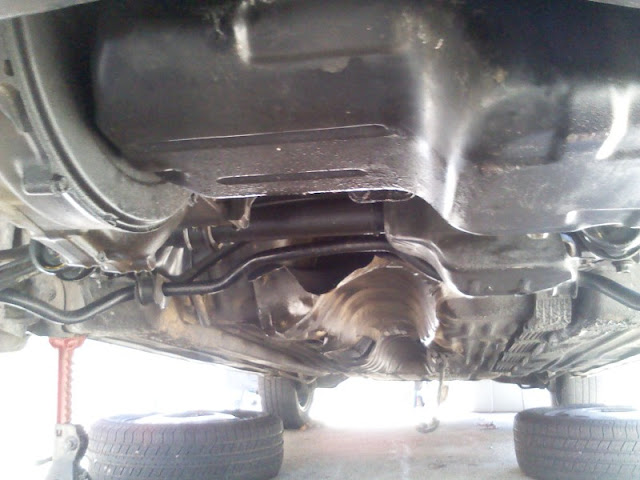
I took off the entire exhaust cause mine rusted into a one piece unit, if you drop the forward cross member(the one that the radius rods are attached to) down an inch or two you will have more room to slide the down pipe out.
Now its time to disconnect the axels from the tranny. to do this it is not necessary to break the axel nuts loose. All I did was disconnect the lower ball joints on each wheel then you can swing the whole steering knuckle out while the axel slides out of the tranny or half shaft depending on which side you are on, you are going to need to disconnect both axels. Then take off the half shaft by removing the 3 bolts on the bracket near wear the driver side axel connected to it then slide it out of the differential.
Now take off the fly wheel inspection cover

Now disconnect the shifter cables and the cable holder
and all clutch line going from top of the tranny kinda under the distributor to the clutch release piston and all the electrical wires you can find and the clutch release piston.
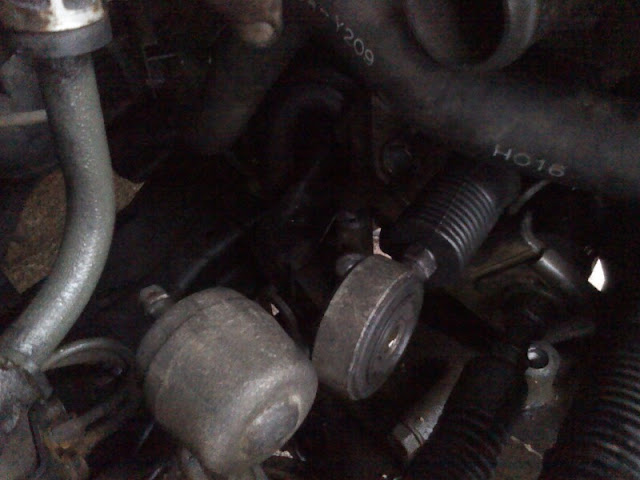
Now remove all the suspension parts that are in the way of the transmission on the passenger side which would be the radius rod the damper fork and the shock/spring.
Next up is to remove the transmission mount(engine mount on the passenger side), now would be a good time to support the engine either with an engine hoist or a jack with a block of wood underneath and the transmission with a transmission jack.
Now that everything is out of the way start removing the transmission to engine bolts there are 3 on the top side 4 on the bottom and one through the rear engine mount(keep track of these bolts they are all different sizes and need to be put back in the same places). Once you double check to see that every thing is disconnected from the tranny, you can pull the tranny away from the motor. Now the clearance when you take it off is really tight so in order to get the tranny off i lower the engine a little bit while leaving the driver side engine mounts connected(I didn't know which bolt on the rear mount was the tranny so i ended up removing all of them) so that the whole engine/tranny combo tilts down towards the passenger side to get more room to pull it off. Once the input shaft on the trans is clear of the clutch drop the whole thing out through the bottom of the car, when i did this i found that the forward cross member got in the way so i ended up removing that too which required the removal of the driver side radius rod the forward engine mount and brake booster i think it was but that didn't need complete removal leave the lines connected.
Now that the transmission is out you can see the clutch. Looking at the preesure plate there is and extra hole on one of the flanges

make a note of the alignment of this extra hole to the flywheel and the flywheel alignment pin i pointed out the alignment pin hole and the dirt that got through that hole
[IMGhttp://lh3.ggpht.com/_C-cIZq7B5iE/TUdI-0qUlPI/AAAAAAAAAHc/vcPBXIrrZKg/s640/1220101405b.jpg[/IMG]
To keep the flywheel from turning while i removed the bolts on the flywheel and pressure plate i just stuck a wrench on the other end of the crank shaft on the driver side.
If you have the tools now would be a prime time to change the rear main oil seal.
Now just put the flywheel on with thread-lock on the bolts and use a clutch alignment tool the should come with the clutch kit and follow the directions that came with the kit be sure to check the alignment of that extra hole on the flange of the pressure plate and it should look like this

While the transmission is out you will have tons of room in the engine bay to have a look around and look for other things to fix, And now just do every thing in reverse and fill up the transmission fluid. and you should be ready to go. Sorry if i left out a couple of steps I did this job a few weeks ago and forgot some of what i did. This is a really big job that took me weeks to do because i only got an hour of work in at time between work and school and what not.
Notes: This was performed on a 1993 Accord EX with a F22A6 and a manual transmission all stock, with 248K miles on it
First step to this job is to buy a manual and study it until your eyes bleed.
Once you can see again you can start by jacking the front of car up as high as you can get it and support it on jack stands, after you chalk the back wheels or experience the world from 2 dimensions. Take both front wheels off. Next remove every thing on the top side of the trans. such as the air filter box, battery, battery holder, there is a radiator hose in there too I ended up disconnecting it but you might be able to just pull it out of its holder/standoff and leave it connected to the cooling sys. and also remove the splash guard from underneath the car. all of this is just prep work and can rally be done in almost any order.
Next up is to get the transmission off the car, which is the hard part of doing the clutch.
Start by draining the transmission fuild from out of the tranny
Then remove the starter motor and grounding wire
Then there is a sensor of some sort with some power steering lines going to it, it is way in the back of the tranny in the dark spot where my finger is pointing. There is'nt really a clear line of sight to it i just had to find it by feel, its held down by one 10mm bolt its kinda of snug to pull out but when you pull it out there is a shaft with a gear that sticks in to the casing on the trans. My hayne's said it was unnecessary to disconnect the power steering lines from it.
Now take off the center cross beam and get the exhaust out of the way
I took off the entire exhaust cause mine rusted into a one piece unit, if you drop the forward cross member(the one that the radius rods are attached to) down an inch or two you will have more room to slide the down pipe out.
Now its time to disconnect the axels from the tranny. to do this it is not necessary to break the axel nuts loose. All I did was disconnect the lower ball joints on each wheel then you can swing the whole steering knuckle out while the axel slides out of the tranny or half shaft depending on which side you are on, you are going to need to disconnect both axels. Then take off the half shaft by removing the 3 bolts on the bracket near wear the driver side axel connected to it then slide it out of the differential.
Now take off the fly wheel inspection cover
Now disconnect the shifter cables and the cable holder
and all clutch line going from top of the tranny kinda under the distributor to the clutch release piston and all the electrical wires you can find and the clutch release piston.
Now remove all the suspension parts that are in the way of the transmission on the passenger side which would be the radius rod the damper fork and the shock/spring.
Next up is to remove the transmission mount(engine mount on the passenger side), now would be a good time to support the engine either with an engine hoist or a jack with a block of wood underneath and the transmission with a transmission jack.
Now that everything is out of the way start removing the transmission to engine bolts there are 3 on the top side 4 on the bottom and one through the rear engine mount(keep track of these bolts they are all different sizes and need to be put back in the same places). Once you double check to see that every thing is disconnected from the tranny, you can pull the tranny away from the motor. Now the clearance when you take it off is really tight so in order to get the tranny off i lower the engine a little bit while leaving the driver side engine mounts connected(I didn't know which bolt on the rear mount was the tranny so i ended up removing all of them) so that the whole engine/tranny combo tilts down towards the passenger side to get more room to pull it off. Once the input shaft on the trans is clear of the clutch drop the whole thing out through the bottom of the car, when i did this i found that the forward cross member got in the way so i ended up removing that too which required the removal of the driver side radius rod the forward engine mount and brake booster i think it was but that didn't need complete removal leave the lines connected.
Now that the transmission is out you can see the clutch. Looking at the preesure plate there is and extra hole on one of the flanges
make a note of the alignment of this extra hole to the flywheel and the flywheel alignment pin i pointed out the alignment pin hole and the dirt that got through that hole
[IMGhttp://lh3.ggpht.com/_C-cIZq7B5iE/TUdI-0qUlPI/AAAAAAAAAHc/vcPBXIrrZKg/s640/1220101405b.jpg[/IMG]
To keep the flywheel from turning while i removed the bolts on the flywheel and pressure plate i just stuck a wrench on the other end of the crank shaft on the driver side.
If you have the tools now would be a prime time to change the rear main oil seal.
Now just put the flywheel on with thread-lock on the bolts and use a clutch alignment tool the should come with the clutch kit and follow the directions that came with the kit be sure to check the alignment of that extra hole on the flange of the pressure plate and it should look like this
While the transmission is out you will have tons of room in the engine bay to have a look around and look for other things to fix, And now just do every thing in reverse and fill up the transmission fluid. and you should be ready to go. Sorry if i left out a couple of steps I did this job a few weeks ago and forgot some of what i did. This is a really big job that took me weeks to do because i only got an hour of work in at time between work and school and what not.

Comment