
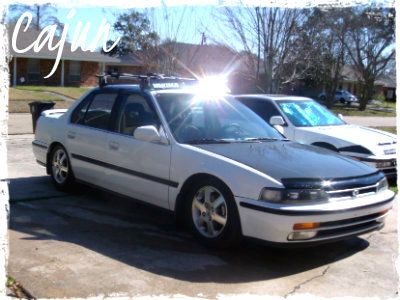
Hello there members, this is a DIY project, this DIY will cover on how to make red/clears for those who can't find the "red/clears" from depo, for those that have "all clear" tail lights you can make this happen  , this is great for the 92-93 CB7. I used the lens painter, it comes out way much better. I'am not responsable for any damages or if it came out wrong.
Tools needed:
Masking tape
some newspaper (if needed)
JDM lens painter or krylon stained glass paint
all clear tail lights of course
8mm or 1/4, wrench and ratchet socket
some stands
rubbing alcohol
laquer thinner
Grit sanding paper (1000)
and of course patience
Step 1. Start by finding some stands to put you tails on, or a table.

Step 2. Clean the tails lights with rubbing alcohol.
step 3. Start putting masking tape on the part you dont want to paint. (outside of course)


Step 4. get a little piece of sanding paper (1000 grit) and start sanding down the parts of the tail lights you want to color (the top of course) do not sand them to much, just sand them until they fog up a little.
stap 5. Clean the tails again with rubbing alcohol were you sanded.
step 6. Start shaking the can of the "JDM lens painter" or krylon glass paint. (lens painter comes out way much better)

Step 7. Start painting, be cuatious tho, don't over spary and do not spary to close or paint will darken to much.
Step 8. Wait about 6 hours till it all dries out, they should look somthing like this:


Step 9. Use laquer thinner for any part that you over painted or if the glue from the masking tape melted in you tails.

Step 10. Remove the stock tails with an 8mm wrench, or 1/4 ratchet & socket.
Step 11. Remove all the wires and remove the parts need for you new tails from the stock tails.
Step 12. Clean the area were your new tails will be.
Step 13. Be sure you put your gasket in your new tails (I used my stock ones)
Step 14. Bolt the new tails up and clean them.
Final step 15. If they look somthing like this, step back and tell you girlfriend to give a kiss for doing a good job


, this is great for the 92-93 CB7. I used the lens painter, it comes out way much better. I'am not responsable for any damages or if it came out wrong.Tools needed:
Masking tape
some newspaper (if needed)
JDM lens painter or krylon stained glass paint
all clear tail lights of course
8mm or 1/4, wrench and ratchet socket
some stands
rubbing alcohol
laquer thinner
Grit sanding paper (1000)
and of course patience
Step 1. Start by finding some stands to put you tails on, or a table.
Step 2. Clean the tails lights with rubbing alcohol.
step 3. Start putting masking tape on the part you dont want to paint. (outside of course)
Step 4. get a little piece of sanding paper (1000 grit) and start sanding down the parts of the tail lights you want to color (the top of course) do not sand them to much, just sand them until they fog up a little.
stap 5. Clean the tails again with rubbing alcohol were you sanded.
step 6. Start shaking the can of the "JDM lens painter" or krylon glass paint. (lens painter comes out way much better)
Step 7. Start painting, be cuatious tho, don't over spary and do not spary to close or paint will darken to much.
Step 8. Wait about 6 hours till it all dries out, they should look somthing like this:
Step 9. Use laquer thinner for any part that you over painted or if the glue from the masking tape melted in you tails.
Step 10. Remove the stock tails with an 8mm wrench, or 1/4 ratchet & socket.
Step 11. Remove all the wires and remove the parts need for you new tails from the stock tails.
Step 12. Clean the area were your new tails will be.
Step 13. Be sure you put your gasket in your new tails (I used my stock ones)
Step 14. Bolt the new tails up and clean them.
Final step 15. If they look somthing like this, step back and tell you girlfriend to give a kiss for doing a good job


 **Don't b scared be prepared for the worst**


Comment