
Hello forum. This is my first DIY so if there is lack of info, please bare with me, and of course, PM me.
Now like always, I am not responsible for any damages done to your beloved CB. DO AT YOUR OWN RISK...
So there was no DIY on this particular maplight and I like it so much due to its sunglasses case. So here we go...
I forgot to mention. This couldnt have been possible without the help of Darkcloud... He provided the MAPLIGHT!!! THANKS BRO!!!
Things used..
Cereal box
Gorrilla glue/silicone
Dremmel or knife
Scrap metal strips
Self tapping screws
Wire
Shrink wrap
Sauder Iron and sauder
So first off you need the template. You can use whatever you want to make it, I used a cereal box. Once that is done fit it on the headliner.
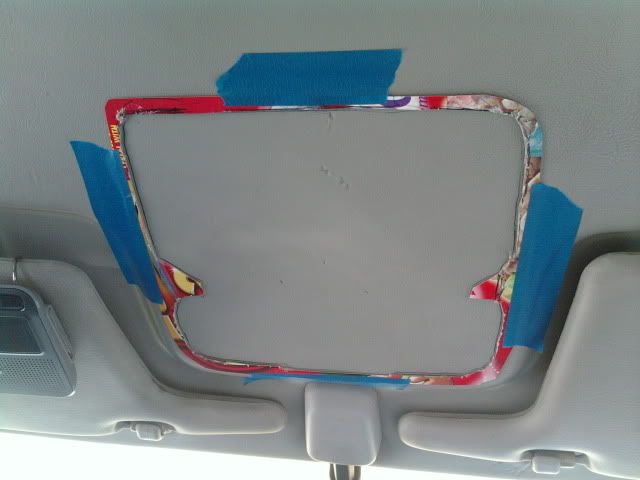
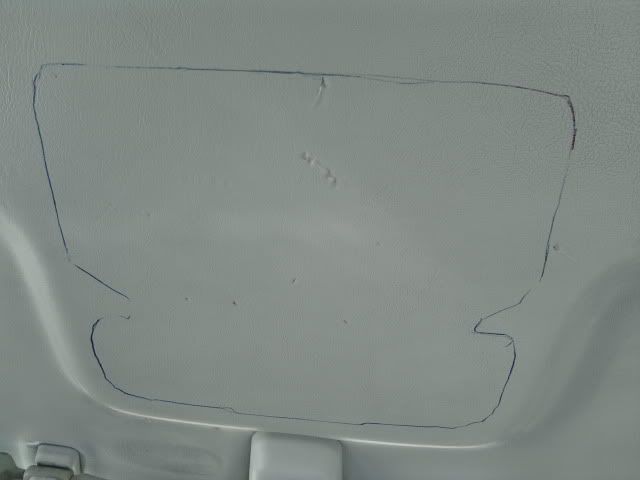
Once thats done, trace it.
Then... Get the cuttin...
This is what you should have after you trim to desired spec.
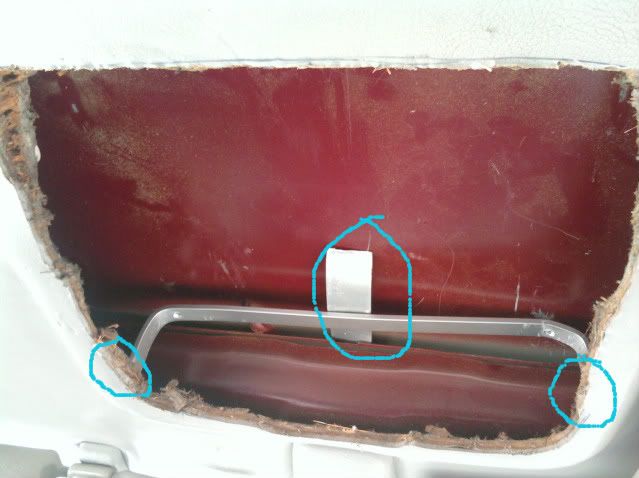
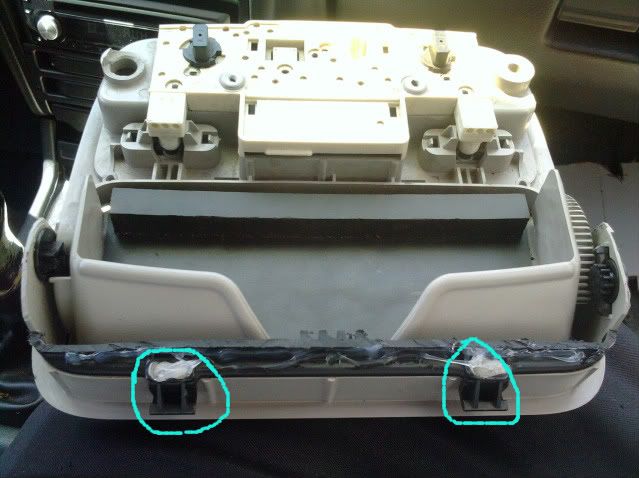
Now the bracket you see, is obviously not there. Go out to Home Depot or whatever and buy some flexible metal strips. You need to manufacture your own backet. Once done find a way to fit it right to the wholes on the light fixtures and tap them. Then find a way to get it to stay up. You welders shouldnt have a problem with that. I just used another piece of metal(circled) and wedged it in the roof itself. Those circles indicate where you can attach it. The edge is too shallow for bolts or screws but try if you want.
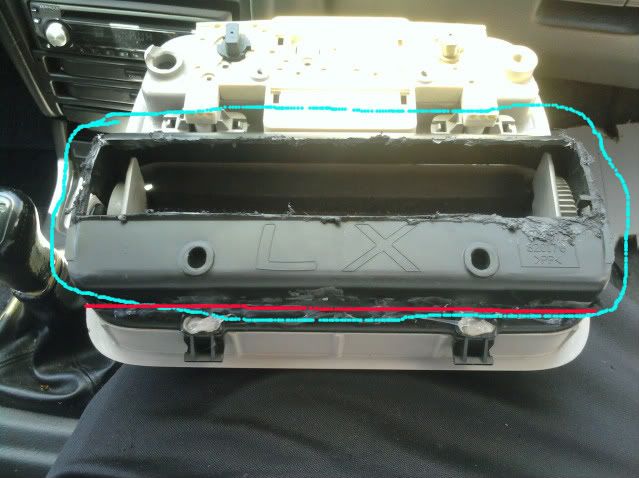
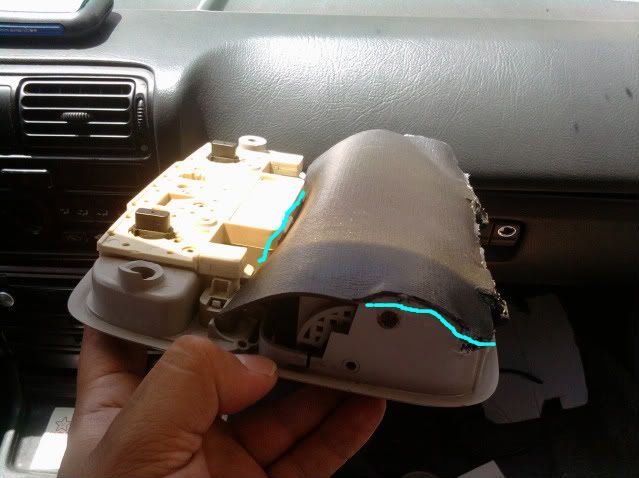
Now the maplight itself is kind of bulky. It has this black pocket that hits the roof. If you dont mind the gap, just leave it on. I took it off, now if youre not sure what im referring to, its outlined in cyan. The red is where I used the dremmel, everything else is just glued.
This is what you should have...
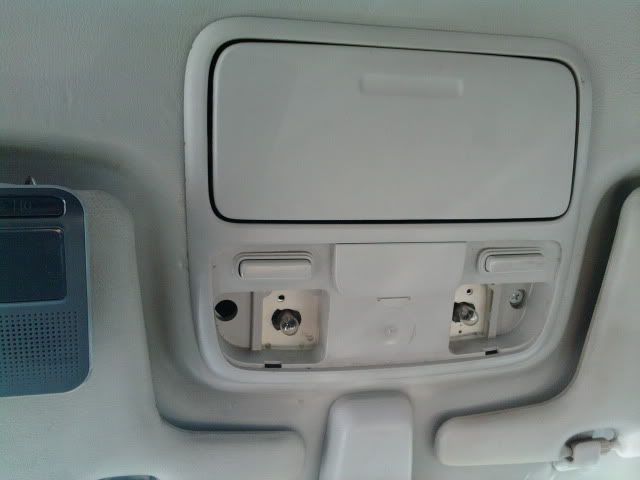
The circled, are tabs that must stay on. They will help keep the maplight up and in place. Now when I saw the end result, I decided to make some "insulation", with the heat and all. So I used some tool box drawer liner for that. I used Gorilla glue to stick it on and silicone to seal it right.

The back can be left alone or glued to the back of the maplight.
The wiring is easy. Two wires. I didnt want to make mine turn on with the doors open. Kinda defeats the purpose of maplight. But to each its own. Now put everything back together, stand back and enjoy how great this looks!!! This instal wasnt hard at all. It was very fun!!
Now like always, I am not responsible for any damages done to your beloved CB. DO AT YOUR OWN RISK...
So there was no DIY on this particular maplight and I like it so much due to its sunglasses case. So here we go...
I forgot to mention. This couldnt have been possible without the help of Darkcloud... He provided the MAPLIGHT!!! THANKS BRO!!!
Things used..
Cereal box
Gorrilla glue/silicone
Dremmel or knife
Scrap metal strips
Self tapping screws
Wire
Shrink wrap
Sauder Iron and sauder
So first off you need the template. You can use whatever you want to make it, I used a cereal box. Once that is done fit it on the headliner.
Once thats done, trace it.
Then... Get the cuttin...
This is what you should have after you trim to desired spec.
Now the bracket you see, is obviously not there. Go out to Home Depot or whatever and buy some flexible metal strips. You need to manufacture your own backet. Once done find a way to fit it right to the wholes on the light fixtures and tap them. Then find a way to get it to stay up. You welders shouldnt have a problem with that. I just used another piece of metal(circled) and wedged it in the roof itself. Those circles indicate where you can attach it. The edge is too shallow for bolts or screws but try if you want.
Now the maplight itself is kind of bulky. It has this black pocket that hits the roof. If you dont mind the gap, just leave it on. I took it off, now if youre not sure what im referring to, its outlined in cyan. The red is where I used the dremmel, everything else is just glued.
This is what you should have...
The circled, are tabs that must stay on. They will help keep the maplight up and in place. Now when I saw the end result, I decided to make some "insulation", with the heat and all. So I used some tool box drawer liner for that. I used Gorilla glue to stick it on and silicone to seal it right.
The back can be left alone or glued to the back of the maplight.
The wiring is easy. Two wires. I didnt want to make mine turn on with the doors open. Kinda defeats the purpose of maplight. But to each its own. Now put everything back together, stand back and enjoy how great this looks!!! This instal wasnt hard at all. It was very fun!!


 ... its no biggy bro. Once you make a stencil its smoooooth sailing... lol..

Comment