
WORKING PROGRESS. I'll update thru out the process.
I got couple gauge from JY .Pull some needles from later models that have light up display type. I got some from mazda, maxima, infiniti. what ever I can get my hand on them.
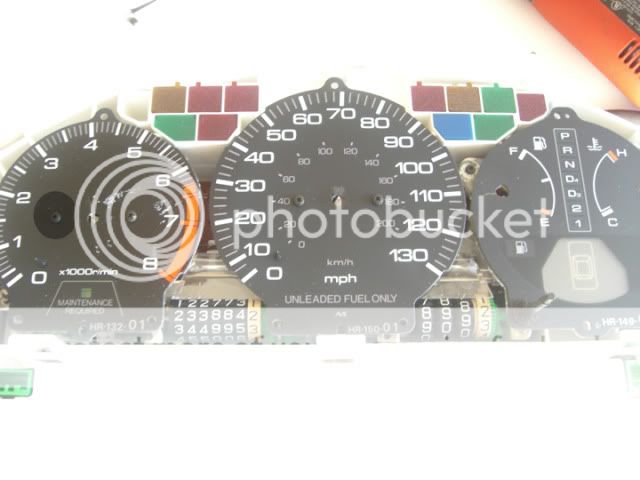
first of is to take your old one out and put jy one on. testing it making sure every thing is working order so I know I am working with good gauge.

open up the back side. most gauge will have burn spot. 19 year old electrical parts. its day are number. but it seem to work ok. just note to yourself that.

remove these crew to inspect back circuit board.
I have open 4 gauges. all of them have burn mark. but seem to work ok but keep my finger cross.


depend on what brand of gauge you get. if you turn the RPM / Speed needle clock wise. this one will stop just a tat past 6 oclock.
so you know where it should be when you put new needle in.


Now taking out the needle. some people pull it off and take chance on killing the motor 50/50 shot.
I cut the plastic out to be safe. masking tape that gauge face so you don't scratch it by accident.
carefully cut the plastic piece out with dremel cuter.


carefully clip out the rest of plastic

with all the needle remove. remove screw holding the gauge.
gas/temp side just peel it off and there are 2 more screw behind it.

remove screws holding motors and mileage gauge and back circuit board should come off.


label the motor, and here are the rest of your light source. gear indicator, abs, turn etc..


the easy part are done.
now I'll start replacing the gear indicator, door, trunk, etc
this is 3mm white led small enough compare to original bulbs
PRACTICE ON YOUR SOLDERING SKILL BECAUSE YOU WILL DO A LOT OF IT


I opt to use flashing red led for the reverse so it will flash red when on reverse gear.

next moving on to the rest of indicator like ABS, Turn Signal, High beam etc.
just remove the top circuit board and begin replacing bulbs with leds


I use 8mm white on this one


I got couple gauge from JY .Pull some needles from later models that have light up display type. I got some from mazda, maxima, infiniti. what ever I can get my hand on them.
first of is to take your old one out and put jy one on. testing it making sure every thing is working order so I know I am working with good gauge.
open up the back side. most gauge will have burn spot. 19 year old electrical parts. its day are number. but it seem to work ok. just note to yourself that.
remove these crew to inspect back circuit board.
I have open 4 gauges. all of them have burn mark. but seem to work ok but keep my finger cross.
depend on what brand of gauge you get. if you turn the RPM / Speed needle clock wise. this one will stop just a tat past 6 oclock.
so you know where it should be when you put new needle in.
Now taking out the needle. some people pull it off and take chance on killing the motor 50/50 shot.
I cut the plastic out to be safe. masking tape that gauge face so you don't scratch it by accident.
carefully cut the plastic piece out with dremel cuter.
carefully clip out the rest of plastic
with all the needle remove. remove screw holding the gauge.
gas/temp side just peel it off and there are 2 more screw behind it.
remove screws holding motors and mileage gauge and back circuit board should come off.
label the motor, and here are the rest of your light source. gear indicator, abs, turn etc..
the easy part are done.
now I'll start replacing the gear indicator, door, trunk, etc
this is 3mm white led small enough compare to original bulbs
PRACTICE ON YOUR SOLDERING SKILL BECAUSE YOU WILL DO A LOT OF IT
I opt to use flashing red led for the reverse so it will flash red when on reverse gear.
next moving on to the rest of indicator like ABS, Turn Signal, High beam etc.
just remove the top circuit board and begin replacing bulbs with leds
I use 8mm white on this one


Comment