Announcement

Collapse
No announcement yet.

Webuilding the Wagon: Main Front Cross Member (and more) Replacement

Collapse
X
 
  • Filter
  • Time
  • Show
Clear All
new posts

    #16
    Originally posted by Raf99 View Post
    That is a funny story about being trapped. Seems that she hit the curb with so much force it destroyed everything on that side of the car, which is pretty hard to think of.
    The more I take apart, the more I find. There was no obvious damage to the knuckle, but it is an odd shape that is tough to determine if it is distorted, so it was changed anyway. The bearing had some play in it, so I removed the bearing/hub/rotor assembly from the knuckle. I figured the rotor wouldn't have taken any of the impact, so I was going to keep it, but the bolts were offset slightly in the holes and each bolt I tried to remove wouldn't break loose before the nut rounded off. Maybe if she was braking at the time, it shifted the rotor on the hub and bound up the bolts? A new bearing/hub/rotor has already been installed, so I guess I'll just scrap the old one.

    Originally posted by cp[mike] View Post
    I've never owned a CB wagon, but there's really no pull-lever to open it? I always assumed the Trunk pull would pop the hatch, is that not the case? Sounds like it should be...
    There is no trunk pull in a wagon, only the gas lever. May be an improvement DIY in the works - rig up a remote pull or at least one in the hatch directly.

    Got started on disassembly of the steering rack this evening; taking photos as I go.
    Last edited by Fleetw00d; 02-19-2016, 11:37 PM.
    90 LX 4dr 5 spd 396,014 (sold 1/1/2022) - MRT: http://www.cb7tuner.com/vbb/showthread.php?t=201450
    08 Element LX FWD AT 229,000 - MRT: fleetw00d : 2008 Honda Element LX - CB7Tuner Forums

    Comment


      #17
      Having a tow dolly is what got me started. Paid 300 for it, used it for a few years, and sold it for 300 once I bought a trailer. Well worth it, if I add up all the times I used it, it paid itself off and then some. Same with the trailers I've had, paid 1k for my current trailer and 50 a year for plate. Well worth it for all the times I would have paid for tows.
      1992 Oldsmobile Custom Cruiser

      1986 Chevrolet C10|5.3L|SM465|Shortbed|Custom Deluxe

      1983 Malibu Wagon|TPI 305|T5 5 speed|3.73 non-posi


      1992 Accord Wagon (RETIRED)

      Comment


        #18
        Originally posted by Accrdwgnguy View Post
        Having a tow dolly is what got me started. Paid 300 for it, used it for a few years, and sold it for 300 once I bought a trailer. Well worth it, if I add up all the times I used it, it paid itself off and then some. Same with the trailers I've had, paid 1k for my current trailer and 50 a year for plate. Well worth it for all the times I would have paid for tows.
        Don't encourage me! I use one about once a year. My wife wouldn't be pleased if I started bringing home a project every month!
        90 LX 4dr 5 spd 396,014 (sold 1/1/2022) - MRT: http://www.cb7tuner.com/vbb/showthread.php?t=201450
        08 Element LX FWD AT 229,000 - MRT: fleetw00d : 2008 Honda Element LX - CB7Tuner Forums

        Comment


          #19
          From memory you can remove the light bulb access panels and pull on the handle mech to open the hatch. For future reference.
          sold! But here's my build thread for those interested.

          http://www.cb7tuner.com/vbb/showthread.php?t=206864

          Comment


            #20
            Finally made some progress; rebuilt the power steering gearbox (rack and pinion http://www.cb7tuner.com/vbb/showthre...67#post3252967). Now I can get started on swapping the rack and main cross member.

            March 6: Had a little time today, dropped the flex pipe (two studs came out of the bottom end of the manifold), center beam, sway bar, right front shock/spring assembly. Can't find my puller to separate the tie rod ends without beating on them; may have been left in TX. I guess I'll grab one on the way home from work tomorrow. Ordered a pair of Bilsteins for the front.

            March 7: Couldn't find a small puller like the one I had - it must be around somewhere. Had to make do; I undid the outer tie rod jam nuts and turned the inner tie rods to unthread them from the outers. The rack came out easy enough.

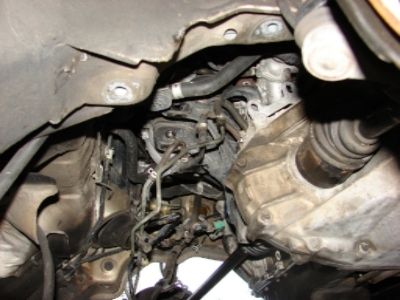
            They must install some of the power steering hoses on the cross member before installing it in the car, or at least before the engine goes in. The OEM service manual doesn't even have a description of how to change this cross member. It is very difficult to access the clips and clamps that hold the lines to the cross member. I thought about disconnecting the hoses from the lines to the power steering vehicle speed sensor and two of the lines on the left side. The hoses didn't want to come off the tubes, so I reverted to trying to detach the tubes from the cross member. I managed to undo all the clips and remove all but one of the clamps; didn't realize I missed it until I tried to drop the cross member, took it off then. I left the rear engine mount attached to the cross member, unfortunately, one of the power steering line hooked underneath it as I tried to drop the cross member. It sure would be nice to have a lift! I tried to take pictures as I went, but I couldn't keep stopping to clean my hands before handling the camera, might be easier when it is going back together.

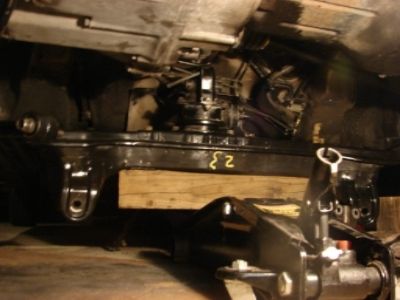
            March 8: Installing the cross member is definitely a two person job. I balanced the beam on a piece of 4x4 and lifted it into place being careful about not bending the power steering lines. The big grommet for the pinion shaft should be attached to the beam somehow before starting - it is very difficult to put/keep it in place after the fact. Lining up the engine mount wasn't as much trouble as I thought it would be. With a little persuasion, there is a hole in the beam and the underside of the body where I could use a breaker bar, I was able to center the beam on the body. Right front shock arrived today; swapped the spring and top hat over.


            March 9: Installed the right front shock/spring assembly, fork, and radius rod to lower control arm bolts. Rough measurement indicates that the knuckle is now in the correct position in the wheel well. Left front shock arrived today, swapped the spring and top hat over, partial installation in car.

            March 10: Tried to rig a tarp over the front of the car like a tent so I could still work while raining. Saw enough to know that one of the power steering lines is hooked over the base of the rear engine mount. I could reach it, but couldn't do much manipulating to free it. The tarp started allowing water through so I called it quits and went inside to pay bills. Better luck tomorrow, the weather is supposed to be more cooperative. Best course of action is probably to let the beam down an inch or two to relieve pressure on the line and provide more access - it is only four bolts.

            March 11: Dropped the beam and managed to free the line. Beam back in place, clamped lines down. Installed rack and pinion assembly. Completed assembly of left suspension components. May finally finish it tomorrow.

            March 12: Good news and bad news. Got it all back together (except PS line cover so I could check for leaks). Good news: no leaks. Bad news: No power assist regardless of engine speed. I guess I inadvertently created a manual rack! Trying to think of what I screwed up; didn't have any parts left over (I don't think). I may just swap the control valve assembly from the rack assembly I took off - some of the pistons and springs came out of the one I rebuilt, maybe I didn't get them back in the correct locations.

            Got it finished in time to get to Tire Discounters only to have them call me and say "we can't align it because the bushing on the right rear control arm is shot." I couldn't get there before it was going to close (prepaid, told them to lock the key in the car). I asked if they were sure it was the control arm and not the bushing on the knuckle. "It is the control arm." They said they would align it after the bushing was replaced. I asked them to at least set front toe because that was what I had apart - they did that. When I got it home, I pulled both right side control arms and the bushings were fine. The shock to knuckle bushing was indeed cracked, but it has little or nothing to do with the alignment of the rear wheel. Grrrrr! I guess I'll go ahead and install new bushings.

            March 13: Good news: after swapping the valve body from the rack I took off, I seem to have assist again. Bad news: Small puddle of fluid under the car this morning. I found the hose to pipe connection on the return line from the valve body wet with fluid. I replaced the old wire clamp that had dug deep into the hose with a screw type hose clamp; so far so good.

            I looked at the alignment sheet from yesterday. Right side caster is only 0.8 degrees; it is supposed to be 2.0 to 4.0 degrees. Measurements based on the frame repair dimensions in the OEM manual indicate the bolt heads for the front cross member on the right side are about 1/4 inch further back than the left side. The center beam was also tight going in. The original front cross member was yanked back some in the accident. I'll drop the cross member and check that the bolts are perpendicular to the underside of the frame box. If not, maybe I can "adjust" the nuts in the frame box by threading a bolt in and pulling it forward; this should result in the cross member being further forward when bolted in.

            Right rear camber is -1.2, left is dead nuts at -0.6. Any one ever make small adjustments in rear camber by putting spacers under the mounting point for the upper control arm? Based on some measurements and calculations, I need about 0.18 inches to get back to -0.6 degrees.
            Last edited by Fleetw00d; 08-01-2017, 09:38 PM.
            90 LX 4dr 5 spd 396,014 (sold 1/1/2022) - MRT: http://www.cb7tuner.com/vbb/showthread.php?t=201450
            08 Element LX FWD AT 229,000 - MRT: fleetw00d : 2008 Honda Element LX - CB7Tuner Forums

            Comment


              #21
              Doing excellent work, sir. I need to get a daily so I can FINALLY get around to "restoring" my coupe the right way.


              '98 Prelude resto/mod thread

              Comment


                #22
                The "budget" rear camber kit is getting some hardware store washers and using them to space out the arms. Harbor Freight sells a alignment shim kit for under $10, they are the type of shims that were used on older American cars to align the body panels and suspension. Both options have their drawbacks, the shims are open on one end so they could fall out, but come in different thicknesses. The washers won't fall out but only come in one thickness.
                1992 Oldsmobile Custom Cruiser

                1986 Chevrolet C10|5.3L|SM465|Shortbed|Custom Deluxe

                1983 Malibu Wagon|TPI 305|T5 5 speed|3.73 non-posi


                1992 Accord Wagon (RETIRED)

                Comment


                  #23
                  Stopped back by Tire Discounters with a diagram; they indicated it is the ball joint on the upper arm that had play in it. With the car on jack stands and the spring out, I couldn't get much movement by hand. I suppose a bad ball joint could account for camber issues. Ordered a set of Moog upper arms from Rock Auto, might as well replace them together.

                  March 21: Freaky fast delivery; ordered arms Thursday, arrived early Friday afternoon before I left for TX. Installed them Sunday night. There was a fair amount of play in the ball joint on the passenger side. Got the lower shock mount bushings this evening, but didn't get a chance to start installation.

                  March 23: Had a little time today, got the lower shock mount bushing on the right rear knuckle replaced. I should be able to get the lower left done tomorrow and get the rear end back together.

                  March 25: Installed the lower shock mount bushing on the left side last night. This morning I dropped the front cross member to try to "adjust" the right mounting point - didn't seem to do much. I removed the shim from the right radius rod. Reinstalled everything, then took it to Tire Discounters to complete the alignment they started a week ago. They were able to get everything in spec except the right front caster. Removing the shim and whatever else I did got the caster from 0.8 up to 1.6, better, but not into spec range of 2 to 4. Left side is 2.1. Thinking about creating a custom radius rod by cutting the shoulder back a little.

                  March 27: Straightened the tow hooks (the right one was shaped like a hook), sanded em down, painted, reinstalled.

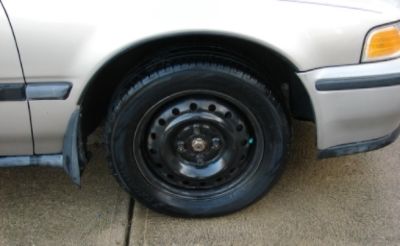
                  Right front wheel back in its correct position:


                  The accident trashed the wheel cover on the right front, one of the others had a pretty good crack in it as well, so I was down to two. Picked up an identical set at O-Reilly's (yeah, cheap plastic ones) so I have two spares. Oh, how I wanted to put a set of aluminum wheels on it.

                  Drove it to church this evening, seems to be a low growl from the right front above about 40 mph, doesn't seem to change with turning, braking, or accel/decel. Will an axle growl? The wheel bearing was new OEM Honda after the accident. I'm hoping it is not the transmission; I don't recall how much play there is in the axle and whether that would have prevented the trans from taking part of the hit.

                  April 19: Still growling, still can't decide what it is. Jacked up the right wheel, started it, put it in gear. Using a stethoscope, there was more noise at the transmission housing when it shifted to 3rd than listening at the top of the knuckle (just above the spinning tire) for wheel bearing noise - of course the wheel bearing was unloaded. I may try to find somewhere with a dyno so I can run it loaded and attempt to listen.

                  April 20: Talked to a local transmission shop; they have a device that allows them to monitor up to four sensors that they place on the vehicle to attempt to isolate noise. Couldn't find anyone close with a dyno - they probably won't let you anywhere near the car while running anyway.
                  Last edited by Fleetw00d; 08-01-2017, 09:39 PM.
                  90 LX 4dr 5 spd 396,014 (sold 1/1/2022) - MRT: http://www.cb7tuner.com/vbb/showthread.php?t=201450
                  08 Element LX FWD AT 229,000 - MRT: fleetw00d : 2008 Honda Element LX - CB7Tuner Forums

                  Comment


                    #24
                    Got it back from the trans shop; they say the noise is coming from the differential area, likely damage from the accident. "It will only get worse and I can't say how long it will last." I guess I better get the spare trans ready with new axle seals, torque converter seal and might as well do rear main while doing the swap.

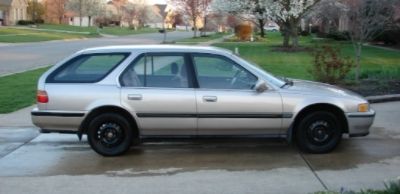
                    May 12: That simple? Because I plan to sell the 93 LX sedan, I decided to swap the OEM 12 spoke aluminum wheels/tires from the sedan to the wagon and put the wagon steelies on the sedan. The noise seems to have followed the tires! Great test of the repairs on the wagon - I drove it to Florida and back this Tuesday and Wednesday - ran great, steered great.
                    Last edited by Fleetw00d; 09-04-2016, 11:15 PM.
                    90 LX 4dr 5 spd 396,014 (sold 1/1/2022) - MRT: http://www.cb7tuner.com/vbb/showthread.php?t=201450
                    08 Element LX FWD AT 229,000 - MRT: fleetw00d : 2008 Honda Element LX - CB7Tuner Forums

                    Comment


                      #25
                      This thread is pretty much identical to what I did to my driver's side front wheel, maybe a touch worse than mine..... My subframe/crossmember is slightly bent where my lower control arm mounts to it, I really hope the ripple effect didn't go any farther than that. I've replaced the lower control arm, the radius rod, the knuckle, and wheel bearing.
                      Next to replace is shock fork, steering rack with tie rod ends, and subframe. I really hope that's the end of the damage.

                      What church do you attend?
                      I'm faster then a prius

                      Comment


                        #26
                        Be patient when doing the subframe. The higher in the air you can get it, the easier it will be to get to the clips for the power steering tubes and hoses. If you have leaks at the wire hose clamps, replace them with wider strap clamps.
                        90 LX 4dr 5 spd 396,014 (sold 1/1/2022) - MRT: http://www.cb7tuner.com/vbb/showthread.php?t=201450
                        08 Element LX FWD AT 229,000 - MRT: fleetw00d : 2008 Honda Element LX - CB7Tuner Forums

                        Comment


                          #27
                          Originally posted by fleetw00d View Post
                          Be patient when doing the subframe. The higher in the air you can get it, the easier it will be to get to the clips for the power steering tubes and hoses. If you have leaks at the wire hose clamps, replace them with wider strap clamps.
                          I don't believe I am going to have access to a lift... So it will all be jack stands.

                          I actually decided to try no power steering, since this rack is toast anyways, and I'm loving it! I'll be getting rid of all of the power steering lines running everywhere. I didn't realize there were that many little lines running everywhere!
                          I'm faster then a prius

                          Comment

                          Working...
                          X