
this is thanks for always helping me out ! <3 cb7tuner
DISCLAIMER: attempt this DIY only if you feel competent enough to complete the task at hand. i am not responsible for any injuries to yourself or damages to your car.
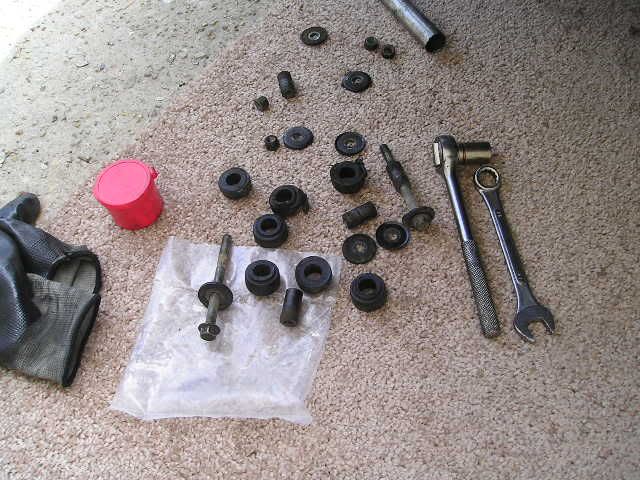
ok to the point. this is replacement of Front Sway Endlinks ( i used aftermarket energy suspension ) you can purchase the endlinks alone at autozone for around 15$ they are universal from the other threads i've read. they are also 15-20$ depending on where u shop online.
EDIT FOR CLARIFICATION: i purchased a full kit which usually run 100$ ( ebay has these. you will have to do your own research to locate a full kit other than. hope this clears things up)
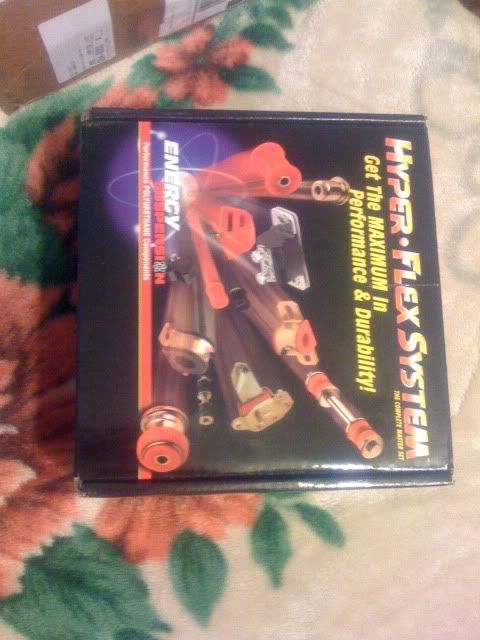
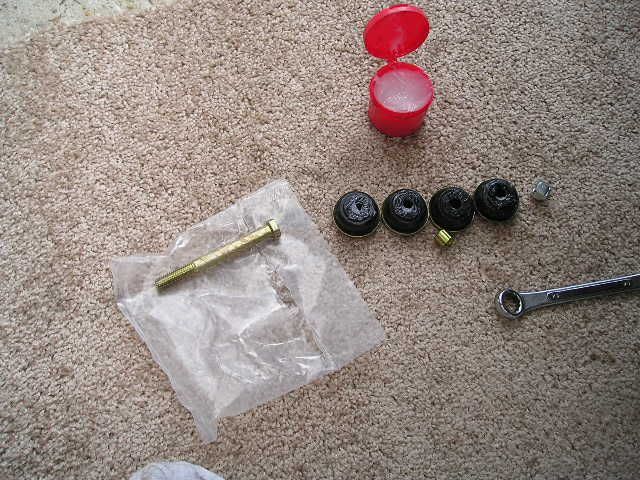
ok we are looking at the stack on the right side of the image the 29 -22

this is the master kit. like i said b4 u can buy just the endlinks for 15$
JOB TIME
total time spend from tool collecting to finish clean up 1 hour
total actual replacement time 20 minutes ( faster if u have help )
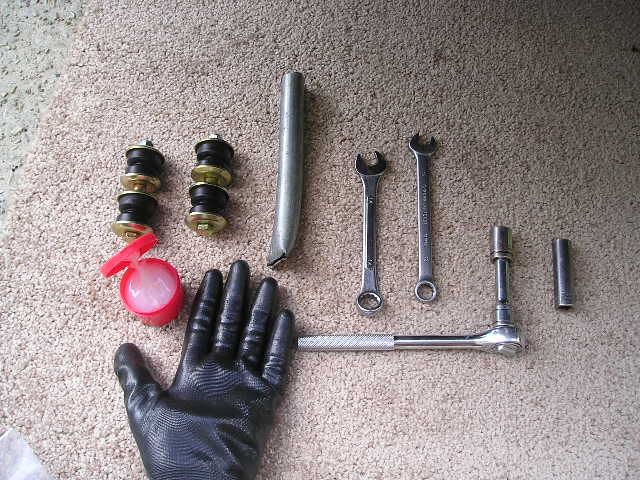
TOOL TIME
jacks
jack stands
chalk
12mm(for oem)
12mm wrench
14mm(for ES)
14mm wrench
lube (comes with master kit)
gloves
safety glasses (not pictured)
carpet ^___^ !@!
and complete endlinks for driver and passenger sides
optional extensions and breaker bar (i did not use)
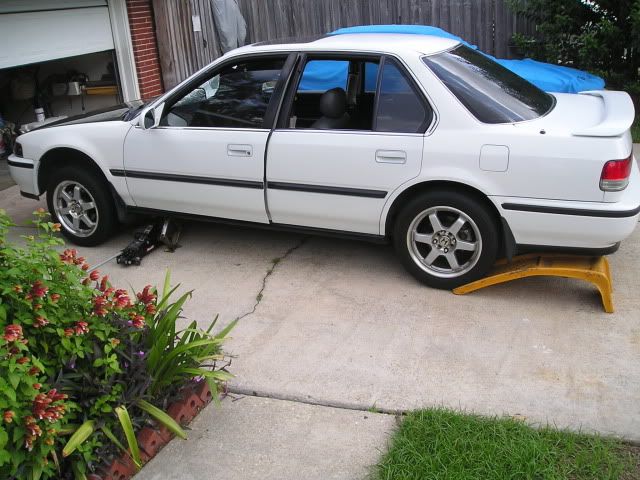
1st and foremost S A F E T Y
other than gloves, glasses, etc, always properly secure your car ESP IF UR WORKING UNDERNEATH IT.
jacks on both sides with back up jacks and a ramp for a chalk for me.
ALWAYS PULL YOUR Emergency BRAKE
ok lets take a look at the job at hand
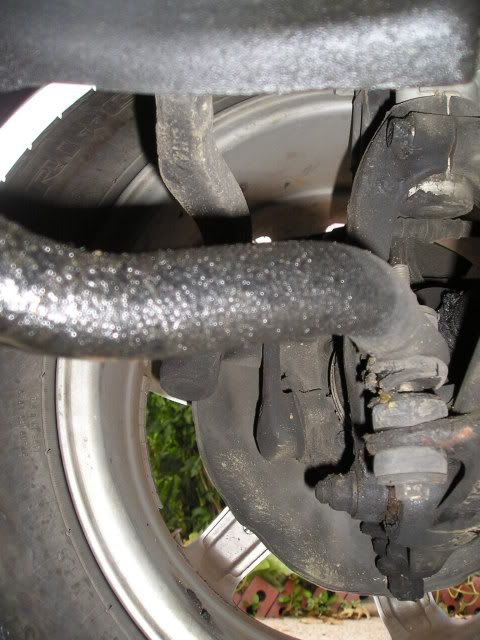
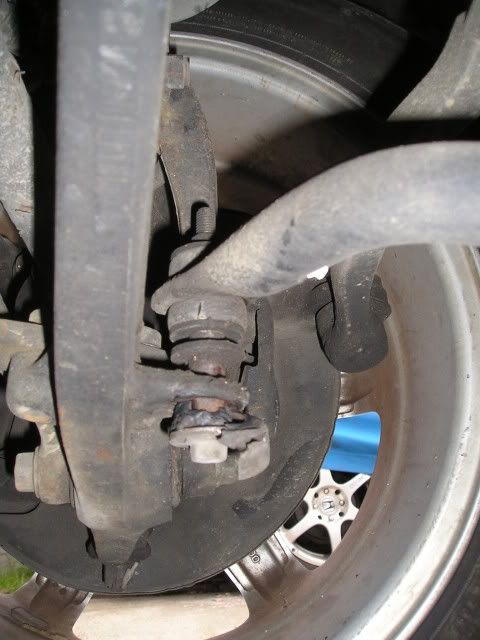
yeeeeeaaaaaahhhh as u can see these oem ones are done. -__-;;
place the 12mm on the top nut and get your 12mm ratchet on the bottom and turn counter clockwise, the top wrench will eventually catch on a part of the car giving u a helping hand.
do this to both sides and remove all components
lube up the bushings on the top and bottom and dont forget the bolt ( not the threads though ), i used the washers as contaminant protectors and this setup helps alot during install.
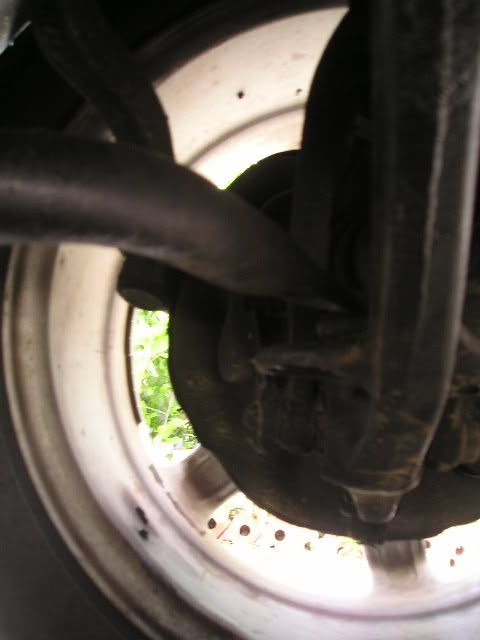
with both sides empty you are free to move the bar about freely.
empty
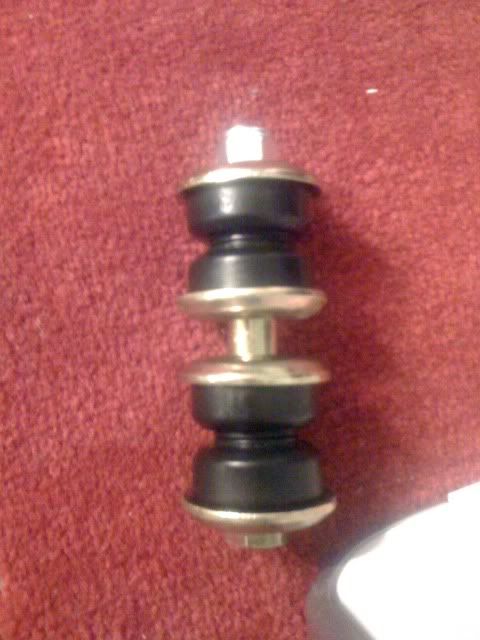
put a washer bushing combo on the bolt and begin threading from the bottom.
next bushing washer on top of the lower control arm hole. then the little collar, then washer bushing, sway bar hole bushing washer and nut.
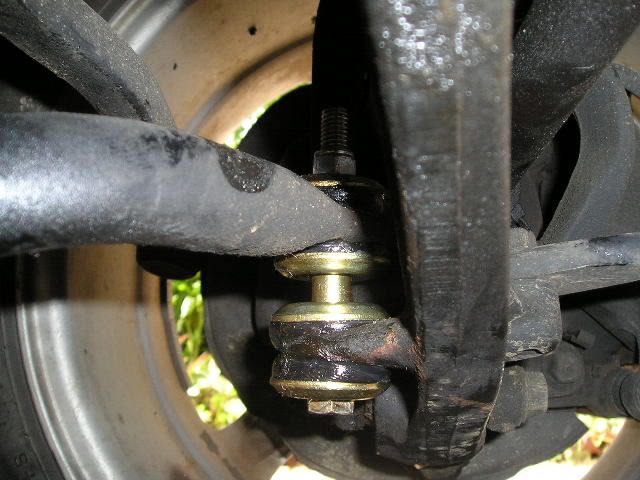
correct setup
on the car ( IMO i wouldnt put them any looser than this. im just phobic i guess. )
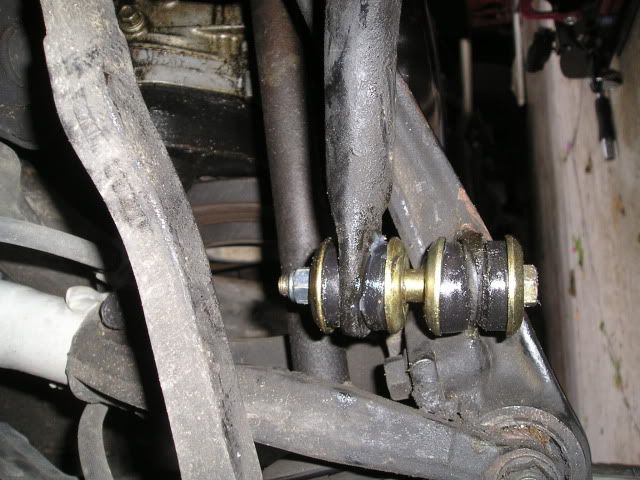

edit ( do not tighten them as much as the pix below. compare the excess thread to the pix above. thanks to ronald_type-r for the advice. )
do urself a favor and DO NOT tighten the 1st set down. place both setups on the bar 1st then begin to tighten. if not, u will have a hell of a time with the sway bar fitting the 2 inside bushings washers and that single collar in.
tighten both sets down and double check your work.
old bushings -__-;;;
now check your tire pressure on all 4 tires and go drive your car slowly around the neighborhood and thoroughly ensure total safety before going out on public roads. lo_dit: "you'll probably want to get an alignment after this is done, that goes for any suspension components you touch."
hope this helps some members out, most of you probably have already done this if u have an aftermarket sway. and if not then shame on U ^___^ **
please post up if i have forgotten anything or have anything you would like to add thanks again
update: i took her out for a ride and instant gratification. it doesnt ride like shit anymore. i feel 110% safer turning esp in rain. just a better overall feel from the old worn out crap i had.
hondafan81 "I agree with only tightening the endlinks by hand until you can not rotate any of the washers inbetween. Another tip is to lubricate the entire length of the long thru-bolt with anti-seize so that you can take these apart in the future. Over time in corrosive environments the spacers, thru-bolt and washers seize to one another and need to be cut off."
DISCLAIMER: attempt this DIY only if you feel competent enough to complete the task at hand. i am not responsible for any injuries to yourself or damages to your car.
ok to the point. this is replacement of Front Sway Endlinks ( i used aftermarket energy suspension ) you can purchase the endlinks alone at autozone for around 15$ they are universal from the other threads i've read. they are also 15-20$ depending on where u shop online.
EDIT FOR CLARIFICATION: i purchased a full kit which usually run 100$ ( ebay has these. you will have to do your own research to locate a full kit other than. hope this clears things up)
ok we are looking at the stack on the right side of the image the 29 -22
this is the master kit. like i said b4 u can buy just the endlinks for 15$
JOB TIME
total time spend from tool collecting to finish clean up 1 hour
total actual replacement time 20 minutes ( faster if u have help )
TOOL TIME
jacks
jack stands
chalk
12mm(for oem)
12mm wrench
14mm(for ES)
14mm wrench
lube (comes with master kit)
gloves
safety glasses (not pictured)
carpet ^___^ !@!
and complete endlinks for driver and passenger sides
optional extensions and breaker bar (i did not use)
1st and foremost S A F E T Y
other than gloves, glasses, etc, always properly secure your car ESP IF UR WORKING UNDERNEATH IT.
jacks on both sides with back up jacks and a ramp for a chalk for me.
ALWAYS PULL YOUR Emergency BRAKE
ok lets take a look at the job at hand
yeeeeeaaaaaahhhh as u can see these oem ones are done. -__-;;
place the 12mm on the top nut and get your 12mm ratchet on the bottom and turn counter clockwise, the top wrench will eventually catch on a part of the car giving u a helping hand.
do this to both sides and remove all components
lube up the bushings on the top and bottom and dont forget the bolt ( not the threads though ), i used the washers as contaminant protectors and this setup helps alot during install.
with both sides empty you are free to move the bar about freely.
empty
put a washer bushing combo on the bolt and begin threading from the bottom.
next bushing washer on top of the lower control arm hole. then the little collar, then washer bushing, sway bar hole bushing washer and nut.
correct setup
Originally posted by Night Wolf
View Post
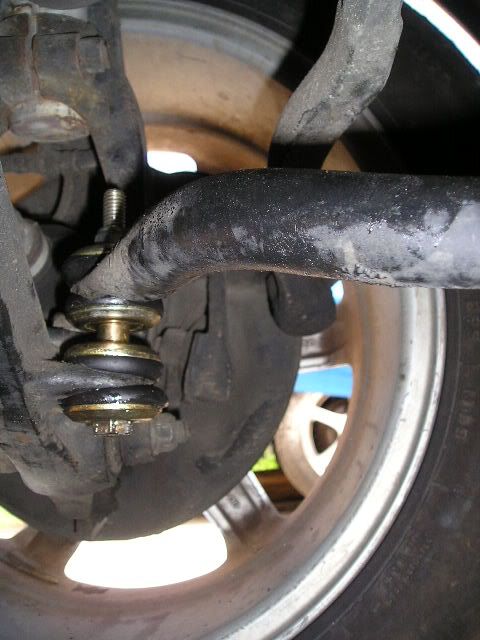
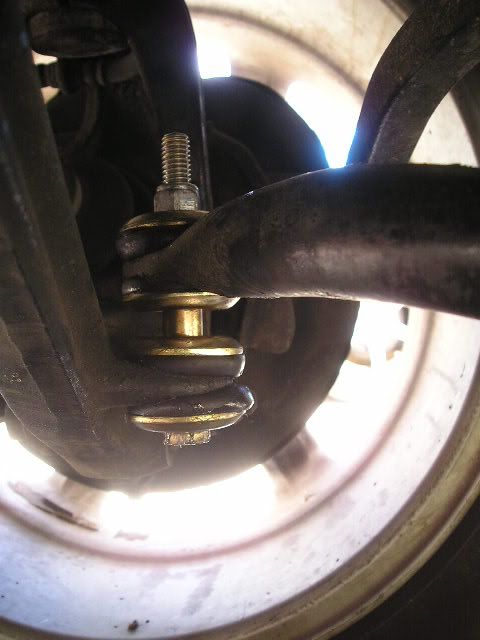
on the car ( IMO i wouldnt put them any looser than this. im just phobic i guess. )
edit ( do not tighten them as much as the pix below. compare the excess thread to the pix above. thanks to ronald_type-r for the advice. )
do urself a favor and DO NOT tighten the 1st set down. place both setups on the bar 1st then begin to tighten. if not, u will have a hell of a time with the sway bar fitting the 2 inside bushings washers and that single collar in.
tighten both sets down and double check your work.
old bushings -__-;;;
now check your tire pressure on all 4 tires and go drive your car slowly around the neighborhood and thoroughly ensure total safety before going out on public roads. lo_dit: "you'll probably want to get an alignment after this is done, that goes for any suspension components you touch."
hope this helps some members out, most of you probably have already done this if u have an aftermarket sway. and if not then shame on U ^___^ **
please post up if i have forgotten anything or have anything you would like to add thanks again
update: i took her out for a ride and instant gratification. it doesnt ride like shit anymore. i feel 110% safer turning esp in rain. just a better overall feel from the old worn out crap i had.
hondafan81 "I agree with only tightening the endlinks by hand until you can not rotate any of the washers inbetween. Another tip is to lubricate the entire length of the long thru-bolt with anti-seize so that you can take these apart in the future. Over time in corrosive environments the spacers, thru-bolt and washers seize to one another and need to be cut off."


 You know you're only supposed to hand-tight that nut right? turn by hand until it's tight, then use a socket wrench and do one full turn or something..That's it!!! By the time you're done, those bushings should still look like this installed:
 .
.
Comment