This being the fourth GReddy lip that I'm fitting on the car, I figured I would document my methods for installation. Keep in mind this is just my personal method that I developed way back in the day by looking at pictures of other members cars and a bit of trial and error. This method can definitely be used for the fitment of other lips not originally designed for our cars. This specific thread will detail the installation of a Greddy lip originally for a BB6 Prelude. Not all of the tools that I will show or list are completely necessary, but I feel their use gives the best overall outcome. The amount of time and effort that you invest in fitting, measuring, and securing everything in place will have a direct correlation with your overall outcome. Different materials used in the construction of your chosen lip will be more or less flexible and therefore will also have an impact on the final result.
For this particular installation, I have chosen to purchase a "replica" GReddy lip. This is for multiple reasons, the most important of which is the durability. Being that the replica is made from fiberglass rather than ABS plastic (as the real things are), I loose the flexibility, forgiveness, and better fitment of the ABS during install, but gain a significant amount of durability. The ABS plastic that the originals are made from is notoriously fragile. That being said, the finish of the replica product is nowhere near the quality that you can expect from the real thing. I am not condoning the purchase of "fake" parts, just giving you the facts I have learned from my own experience as well as that of other members. Do what you will with the information.
Recommended tools for installation:
-Drill and appropriately sized drill bits
-Rivet gun
-Cutting wheel (a multitude of other tools can be used to the same effect)
-10mm wrench or socket/ratchet
-Project clamps
Recommended hardware:
-3/16" rivets
-3/16" washers
OEM parts that will be needed:
-Stock lip spoiler
-Associated fasteners for stock lip
You'll start off with your new lip, an OEM lip in acceptable condition, and your hardware. Painting can be done before or after installation, but for best fit and finish, it is recommended to paint once the installation has been completed.

The idea here is to essentially sandwich the new lip in between the bumper and the OEM lip. Center your factory lip underneath your new lip. For the exacting installer, you can use clamps to hold everything in place. Begin to drill holes through both lips for your rivets. I recommend drilling in the midpoint between the holes where the factory hardware normally goes. You can begin to install the rivets as you drill each hole to maintain your center and shape more easily.

You can ultimately use as many or as little rivets as you feel confident with.

Here is an image showing why I prefer to use the washers in tandem with the rivets. This has a much better clamping force than compared to a rivet installed into just the plastic of the OEM lip. If you don't drill a prefect hole, the washers will spread the load out better and make the installation a bit more forgiving. There are also multiple kinds of rivets out there, these are just the cheapest and most readily available style found in almost any hardware store. The choice is yours to make.

After the lips are riveted together in the position that you want them in, it's time to start drilling holes into the new lip for the factory hardware to pass through. Use the stock lip as a guide.


Now comes the time to fasten the ends of the new lip to the ends of the oem lip. Due to this particular lip not having an edge to pinch between the factory lip and the bumper, a fastener must be used to connect them together. This is the part that the installer can use the most creativity with. I chose to use the rivets again, but screws and retainers, panel bond, or many other ways of fastening can be used for whatever result you desire.

Next, you need to trim the rear edges of the new lip that overhang the OEM lip as these sections will interfere with mounting.

Once done, go ahead and make a rough cut on the ends so that you can begin to mount the lip onto the bumper. if your car is jacked up with the front wheels off, you can skip this step. If you so choose, you can cut the edges off of the trimmed sections and re/attach them to your lip, but I don't have any experience with fiberglass or bodywork, so I chose to just leave a clean cut edge.

Go ahead and mount your combination onto your front bumper utilizing all the factory mounting hardware. Admittedly, this step can be somewhat complicated depending on the thickness of your chosen lip.

Make your final trim on the wheel well edges.

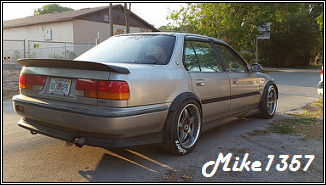
Now with your basic installation complete, you can choose to paint the lip or add whatever accessories you choose. Removing or installing the lip will be as easy as an OEM lip would be. Sit back and enjoy. Your mileage will vary. Lol.

For this particular installation, I have chosen to purchase a "replica" GReddy lip. This is for multiple reasons, the most important of which is the durability. Being that the replica is made from fiberglass rather than ABS plastic (as the real things are), I loose the flexibility, forgiveness, and better fitment of the ABS during install, but gain a significant amount of durability. The ABS plastic that the originals are made from is notoriously fragile. That being said, the finish of the replica product is nowhere near the quality that you can expect from the real thing. I am not condoning the purchase of "fake" parts, just giving you the facts I have learned from my own experience as well as that of other members. Do what you will with the information.
Recommended tools for installation:
-Drill and appropriately sized drill bits
-Rivet gun
-Cutting wheel (a multitude of other tools can be used to the same effect)
-10mm wrench or socket/ratchet
-Project clamps
Recommended hardware:
-3/16" rivets
-3/16" washers
OEM parts that will be needed:
-Stock lip spoiler
-Associated fasteners for stock lip
You'll start off with your new lip, an OEM lip in acceptable condition, and your hardware. Painting can be done before or after installation, but for best fit and finish, it is recommended to paint once the installation has been completed.
The idea here is to essentially sandwich the new lip in between the bumper and the OEM lip. Center your factory lip underneath your new lip. For the exacting installer, you can use clamps to hold everything in place. Begin to drill holes through both lips for your rivets. I recommend drilling in the midpoint between the holes where the factory hardware normally goes. You can begin to install the rivets as you drill each hole to maintain your center and shape more easily.
You can ultimately use as many or as little rivets as you feel confident with.
Here is an image showing why I prefer to use the washers in tandem with the rivets. This has a much better clamping force than compared to a rivet installed into just the plastic of the OEM lip. If you don't drill a prefect hole, the washers will spread the load out better and make the installation a bit more forgiving. There are also multiple kinds of rivets out there, these are just the cheapest and most readily available style found in almost any hardware store. The choice is yours to make.
After the lips are riveted together in the position that you want them in, it's time to start drilling holes into the new lip for the factory hardware to pass through. Use the stock lip as a guide.
Now comes the time to fasten the ends of the new lip to the ends of the oem lip. Due to this particular lip not having an edge to pinch between the factory lip and the bumper, a fastener must be used to connect them together. This is the part that the installer can use the most creativity with. I chose to use the rivets again, but screws and retainers, panel bond, or many other ways of fastening can be used for whatever result you desire.
Next, you need to trim the rear edges of the new lip that overhang the OEM lip as these sections will interfere with mounting.
Once done, go ahead and make a rough cut on the ends so that you can begin to mount the lip onto the bumper. if your car is jacked up with the front wheels off, you can skip this step. If you so choose, you can cut the edges off of the trimmed sections and re/attach them to your lip, but I don't have any experience with fiberglass or bodywork, so I chose to just leave a clean cut edge.
Go ahead and mount your combination onto your front bumper utilizing all the factory mounting hardware. Admittedly, this step can be somewhat complicated depending on the thickness of your chosen lip.
Make your final trim on the wheel well edges.
Now with your basic installation complete, you can choose to paint the lip or add whatever accessories you choose. Removing or installing the lip will be as easy as an OEM lip would be. Sit back and enjoy. Your mileage will vary. Lol.