If this is your first visit, be sure to
check out the FAQ by clicking the
link above. You may have to register
before you can post: click the register link above to proceed. To start viewing messages,
select the forum that you want to visit from the selection below.
thats a good idea!! wish i would of thought of this along time ago when i used to cut up harnesses >< i have a few adapters laying around now though since i can never make up my mind which radio i want to leave in my car
lol well if you ever get another cb, you can do this instead.
thats a good idea!! wish i would of thought of this along time ago when i used to cut up harnesses >< i have a few adapters laying around now though since i can never make up my mind which radio i want to leave in my car
not bad if you dont wanna spend $12 on a plug from walmart...nice write up tho
Yeah I just know there's a lot of people out there that are tight on cash. I mean I got my stereo when I had a nice cash flow. But that was 2 years ago and i just now got around to installing it, and now the money is a little tighter. Plus, it only took all of about 10 minutes to make the harness and that $12 I saved will be added to the rear lip fund.
Edit: FYI I looked at the plug n play harness at wally world (walmart) last night when i was there picking up some groceries and the harness wouldn't fit my kenwood and possibly some other aftermarket stereos. So i guess it only works with some.
This is an alternative to cutting up your stock harness in order to make your aftermarket radio work. For those of you who either don't have the money or like to do things yourself. This mod will allow you to play your aftermarket radio or a stock radio.
Disclaimer: I am not responsible for any damage you may do to yourself or your car's wiring. Do this at your own risk.
Tools needed:
screwdriver
mini torch/heat gun
soldering iron
solder
wire stripper
heat shrink tubing
stock radio (for parts)
Step 1:
Take some tubes of the heat shrink tubing that are just slightly bigger than you wires on the aftermarket harness, and cut them into 13-1 inch long tubes.
Step 2:
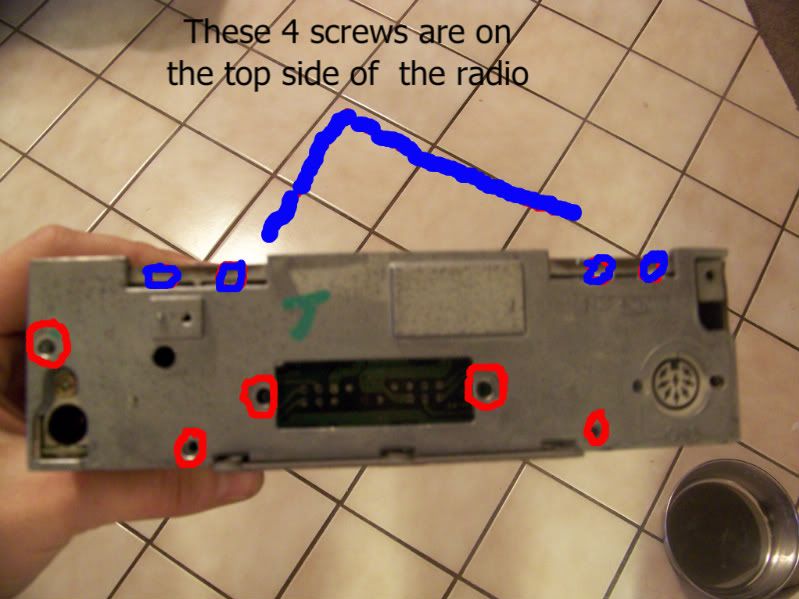
You are going to remove your stock radio. Once removed, on the back of the radio there are about 9 screws you have to remove. Two of them will be holding the grey female radio harness connector to the back of the radio. Remove all the screws in order to take the black plate off.
Step 3:
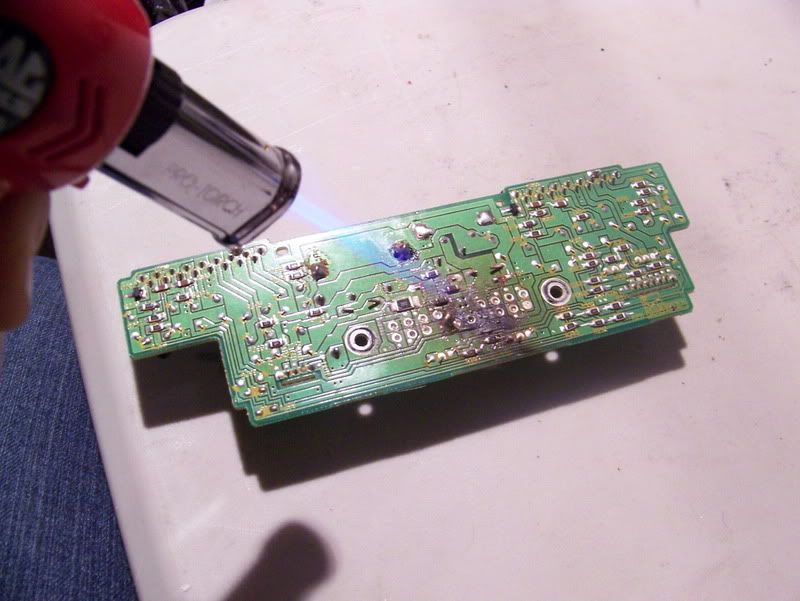
Now you should have the circuit board with the grey female connector attached. you'll notice that the connector pins (on the other side) are held on by solder. So what you will have to do is take your mini torch/heat gun and heat up the solder, while slowly using a flathead screwdriver to pry out the connector.
* this picture is for reference on where you should be heating the circuit board, and dont hold the torch in one spot for too long or you will burn the circuit board.
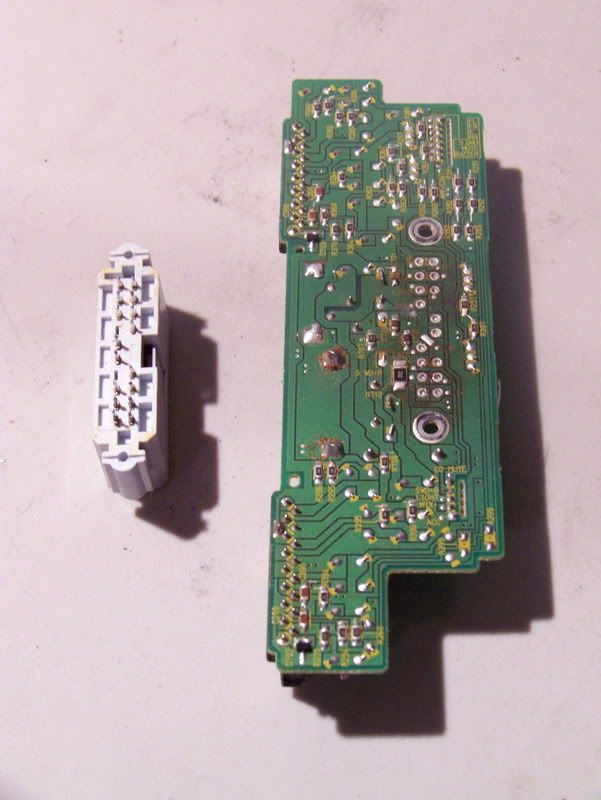
Step 4:
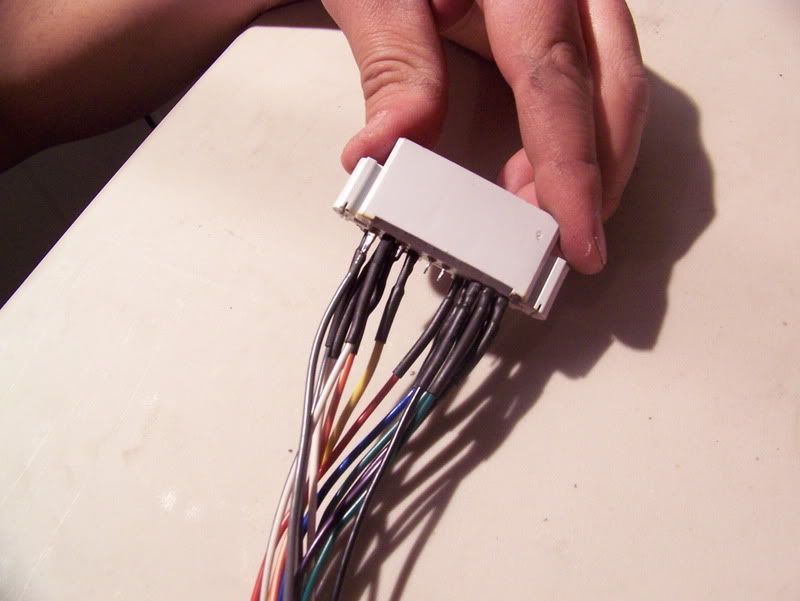
Now the connector should be free from the circuit board. Next you will need to take the harness, that the aftermarket stereo came with, and expose about 1/4 inch of each wire with the wire stripper. You can always expose more if you feel necessary. Next, slip the inch long tubes you cut in the beginning onto each wire. Make sure you slide them close to the bottom, or at least far enough away from where you will be soldering (the exposed wire).
Step 5:
Now you are ready to start soldering. Make sure you know the order the wires go, before you solder. Melt some solder on the exposed part of the 1st wire, then place right next to the corresponding pin on the connector. Now using the soldering iron heat up some of the solder you melted on the wire and transfer it over to the pin. After doing this the wire and the pin should be connected with solder. Blow on the solder a little to harden it. Give the wire a nice little tug. The wire should stay attached to the pin. If not try adding more solder.
Step 6:
Slide the heat shrink tubing up to the part you soldered to the pin. Using the mini torch/heat gun heat up the tubing. If you hold the heat on one spot for too long it may burn the tubing and become useless. It only takes about 1 or 2 seconds for the tubing to shrink. So be careful not to melt/burn the heat shrink tubing.
*No picture for this step
Step 7:
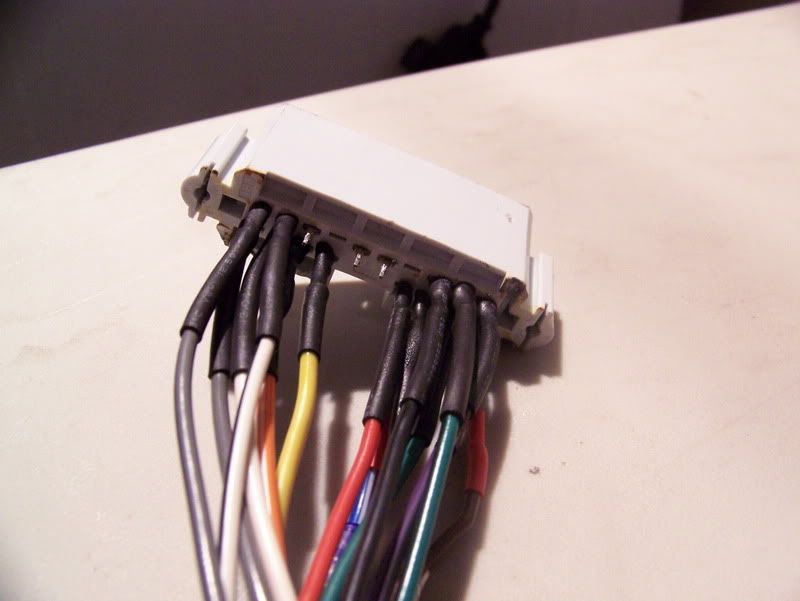
Repeat step 5 & 6 until all wires are attached to the pins and heat shrink is covering your soldered pins/wires.
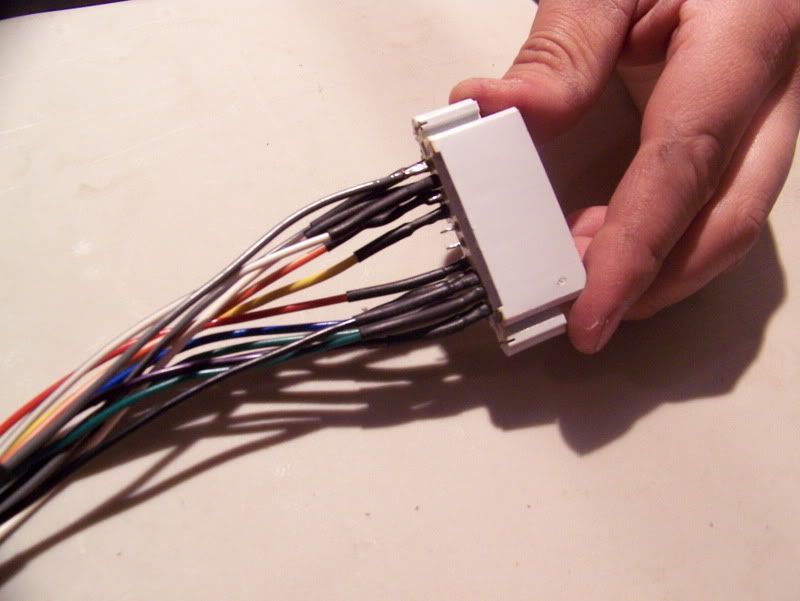
Here is what you should end up with
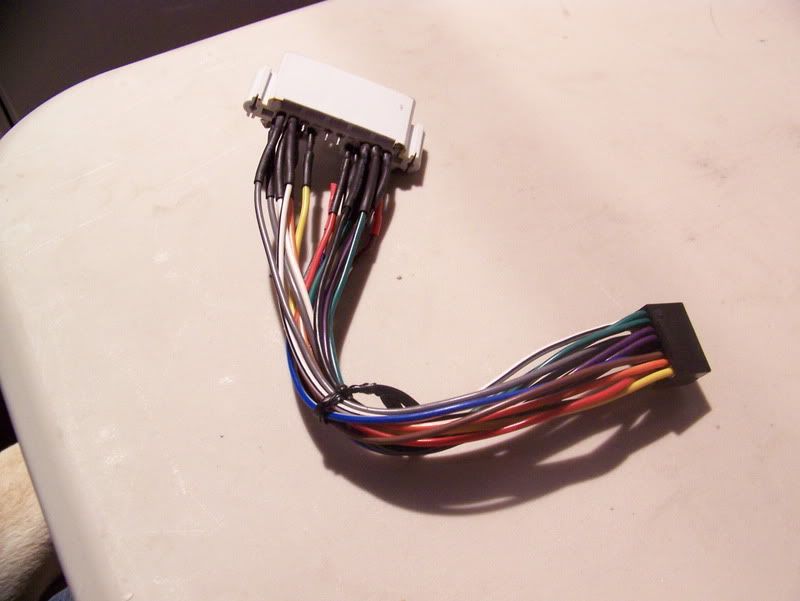
Step 8:
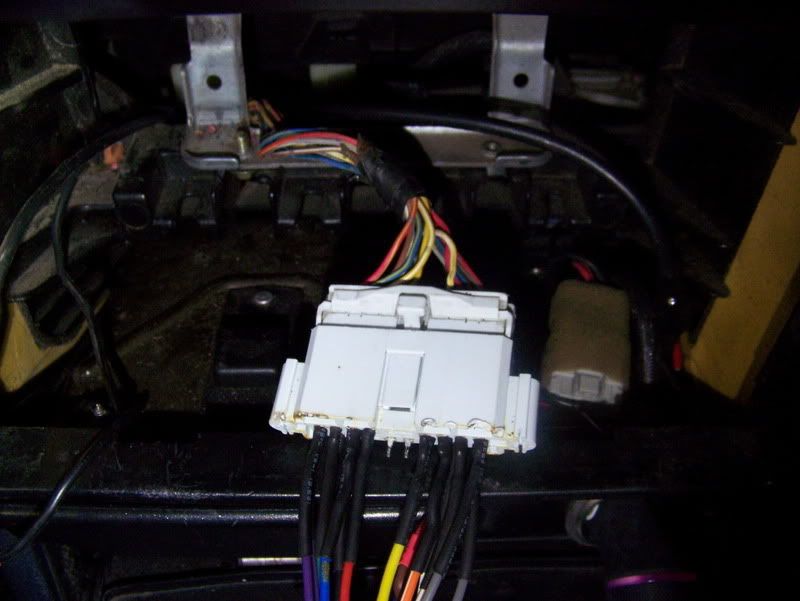
Plug in your new harness to the oem harness and to your aftermarket radio, put everything back together and enjoy!
Now if you decide to return to a stock radio, just find one at the jy and plug it in to your oem harness.


Leave a comment: