Announcement

Collapse
No announcement yet.

EXT: Wiring JDM Headlights

Collapse
X
 
  • Filter
  • Time
  • Show
Clear All
new posts

    EXT: Wiring JDM Headlights

    This is my first DIY thread. I've done lots of DIY projects, but never took any pictures. I'm a visual learner personally so I like lots of pictures. Anyway I hope this helps some people. I did a search and didn't find an offical DIY for this so here it goes...

    I must credit cp[mike] for the original idea. Thanks man!

    My JDM headlights came with all four headlight harnesses (two H4's and two H1's). If yours did not you can get them from SUV Lights.

    Wiring JDM headlights to a USDM CB7
    =======================================
    Disclaimer: I am not responsible if you injure yourself, others,
    or the parts you are working on. Proceed at your own risk.


    Tools/Parts Used
    --------------------
    * Two 9005 male headlight sockets
    * Two 9006 male headlight sockets
    * Wire Stripper
    * Electrical Tape
    * Needle Nose Pliers
    * Scissors


    001
    -----
    I ordered two 9005 and two 9006 male headlight sockets from SUV Lights. Here is a photo of
    each one. The blue socket is 9005 and the white socket is 9006. Total cost: $28.00 shipped.


    002
    -----
    Separate the terminal pins with scissors or wire cutters.


    003
    -----
    Strip a small section of the wires coming from the JDM wire harness and place them into the
    terminal pins as shown.


    004
    -----
    For this next part I used needle nose pliers but I would reccomend barell roll crimpers if you have
    access to them. I just folded one side over the other. And then made sure they were down real
    tight. Repeat this procedure with the other wires.


    005
    -----
    Next you'll insert the pins into the sockets. They should just snap right into place.

    Note:
    9005 (blue socket) goes to H1. This is the highbeam.
    9006 (white socket) goes to H4. This is the lowbeam.


    006
    -----
    To finish it up I wrapped the exposed wires with electrical tape for protection and a cleaner look.


    007
    -----
    Finished product:


    Enjoy! Hope this helps someone out there. Let me know what you guys think and/or anything that I should add or change.
    Last edited by jsinger; 03-22-2010, 03:35 AM.
    RIP:
    1993 Honda Accord LX 5spd Sedan [2005-2007]
    1994 Honda Accord LX 5spd Sedan [2001-2004]
    Currently daily:
    1990 Honda Accord EX 5spd Sedan [2012-Present]

    #2
    so the USDM cb wires don't work on the JDM headlights?

    Comment


      #3
      USDM Headlights use 9005/9006 bulbs.
      JDM Headlights use H1/H4 bulbs.

      Since the connectors are different I chose to make a conversion harness. That way I wouldn't have to deal with cutting wires on the stock harness and keeping it all stock. That way it's clean and more professional and if I ever sold the car or wanted to take the JDM lights out it's just plug ang play. It keeps everything pretty simple.
      RIP:
      1993 Honda Accord LX 5spd Sedan [2005-2007]
      1994 Honda Accord LX 5spd Sedan [2001-2004]
      Currently daily:
      1990 Honda Accord EX 5spd Sedan [2012-Present]

      Comment


        #4
        Great write up!

        I have wanted to do this, but wasn't sure where to get the male sockets! You saved my behind.

        It wouldn't be a bad idea to solder those pins as well. Then they would be that much more secure, but I doubt that it will prove to be an issue.
        The OFFICIAL how to add me to your ignore list thread!

        Comment


          #5
          exactly how i did mine, thanks for taking the pictures and posting up a guide, now i can refer people to it when they ask about it.

          perfect write up! the ONLY difference that i would suggest is in the picture below - instead of cutting the pins along the green lines like you said, id recommend cutting them at the red line. that way that extra bit of bare connection isnt left hanging out of the back of the connector... but then again, you can leave it and use it as extra support holding onto the wire insulation, but make sure its taped up well like you have in the pictures.
          Attached Files


          - 1993 Accord LX - White sedan (sold)
          - 1993 Accord EX - White sedan (wrecked)
          - 1991 Accord EX - White sedan (sold)
          - 1990 Accord EX - Grey sedan (sold)
          - 1993 Accord EX - White sedan (sold)
          - 1992 Accord EX - White coupe (sold)
          - 1993 Accord EX - Grey coupe (stolen)
          - 1993 Accord SE - Gold coupe (sold)
          Current cars:
          - 2005 Subaru Legacy GT Wagon - Daily driver
          - 2004 Chevrolet Express AWD - Camper conversion

          Comment


            #6
            Originally posted by owequitit
            Great write up!

            I have wanted to do this, but wasn't sure where to get the male sockets! You saved my behind.

            It wouldn't be a bad idea to solder those pins as well. Then they would be that much more secure, but I doubt that it will prove to be an issue.
            Yeah, I forgot to mention soldering the connections as an alternative.


            Originally posted by cp[mike]
            exactly how i did mine, thanks for taking the pictures and posting up a guide, now i can refer people to it when they ask about it.

            perfect write up! the ONLY difference that i would suggest is in the picture below - instead of cutting the pins along the green lines like you said, id recommend cutting them at the red line. that way that extra bit of bare connection isnt left hanging out of the back of the connector... but then again, you can leave it and use it as extra support holding onto the wire insulation, but make sure its taped up well like you have in the pictures.
            Yeah that's what I did. I had that extra piece wrapped around the insulation. After I looked at some terminal pins at work though, I too would suggest cutting at the red line as you suggested. The ones at work were pre-cut in the same location.

            Thanks for the positive feedback guys!
            RIP:
            1993 Honda Accord LX 5spd Sedan [2005-2007]
            1994 Honda Accord LX 5spd Sedan [2001-2004]
            Currently daily:
            1990 Honda Accord EX 5spd Sedan [2012-Present]

            Comment


              #7
              I'd say you did pretty good for your first DIY. Great pictures too!
              My Members' Ride Thread - It's a marathon build, not a sprint. But keep me honest on the update frequency!

              Comment


                #8
                good write up, now only if i could afford sum jdm one peices

                My Members Ride Thread
                Originally posted by deevergote
                You have to think outside the box to get IN the box!
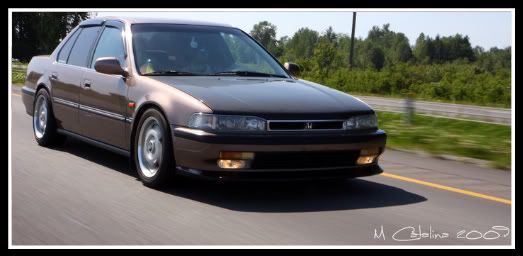
                Comment


                  #9
                  I once went jdm but looks nice but saw no point in it then converted back for one the bulbs where expensive,hard to reach the corner bulbs and such then i went back but great writeup though i give you that

                  Comment


                    #10
                    Thank-you
                    I used this from beginning to end.
                    It was perfect.

                    CB3 formerly hondaracer33

                    Comment


                      #11
                      Originally posted by hondaracer33
                      Thank-you
                      I used this from beginning to end.
                      It was perfect.
                      Thank you for using it! I am glad to hear it was useful!
                      RIP:
                      1993 Honda Accord LX 5spd Sedan [2005-2007]
                      1994 Honda Accord LX 5spd Sedan [2001-2004]
                      Currently daily:
                      1990 Honda Accord EX 5spd Sedan [2012-Present]

                      Comment


                        #12
                        Dose it matter witch wire goes in where in the sockets?... I wasen't sure if it mattered or not.
                        Btw, Great DIY!
                        Drivin a Yota now, The CB7 is still for sale.
                        Don't kinfe when you can BLOW THEIR FACE OFF with an M1014!
                        Always playin Camp Of Duty: Lagfire 2!

                        Comment


                          #13
                          great DIY for ur first one
                          " The value of life can be measured by how many times your soul has been deeply stirred " - Soichiro Honda

                          Comment


                            #14
                            Originally posted by JDMHondaGuy
                            Dose it matter witch wire goes in where in the sockets?... I wasen't sure if it mattered or not.
                            Btw, Great DIY!
                            As far as I know, no it doesn't matter. That or I just got lucky the first try on all four plugs. If you discover otherwise, just switch the terminals.

                            Originally posted by AlmightyAccord
                            great DIY for ur first one
                            Ty sir!
                            RIP:
                            1993 Honda Accord LX 5spd Sedan [2005-2007]
                            1994 Honda Accord LX 5spd Sedan [2001-2004]
                            Currently daily:
                            1990 Honda Accord EX 5spd Sedan [2012-Present]

                            Comment


                              #15
                              is there a need to re-aim the direction of the headlights? if so how do you do it?

                              Comment

                              Working...
                              X