
Guys the credit goes to BlueShadow from Honda-Tech!!! This is a install on a CRX.
Hi guys,
Today I finished taking out my stock fuel pump and replacing it with my Walbro HP 255lph fuel pump which I bought from lightningmotorsports.com . Installation was pretty easy, but before I actually did it I was afraid I was going to do something wrong. Once you lower the fuel tank and look at it you'll see it's very simple. But even though it's pretty easy I thought I'd write a short how-to so that you guys who want to do this aren't going in blind. I'm including a list of things you might want to have incase a few things break
-spare fuel hose (5/16" or 8mm) a foot or 6 inches should be enough
-some tiny hose clamps for the fuel hose at least 4
-2 washers for fuel bolt p/n 90428-PD6-003
-2 J bolts p/n 17525-SH3-010 (I bought two spares but my stock ones were still good)
-4 J bolt nuts p/n 94002-08000-0S (I bought 4 of these too, but my stock ones were still good)
-2 J bolt washers p/n 94101-08800 (bought some of these but stock ones were also good)
-2 fuel tank support straps p/n 17521-SH3-030 (right) 17522-SH3-020 (left) (buy these only if you think yours are bad or worn--I didn't buy them at all)
-a tool kit, needle nose and snub nose pliers, butt connectors crimping tool (or soldering iron if you want to solder your connections)
-jackstands
-some way to support the fuel tank, I used a transmission jack which had a 4x4" surface area
-spare rags
before I started I drove the car until the fuel gauge was on the E. The tank was light enough for me to move around with that little fuel in there.
-Chock the front tires, and jack the back of the car up
-Remove rear storage bins to access fuel level sender, unplug sender
-Remove gas cap and relieve fuel pressure in the system by SLOWLY loosening service bolt on fuel filter banjo fitting
-Place transmission jack below center of fuel tank (or use a hydraulic car jack, two tire changing jacks or some extra jackstands. Tranny jack or hyd. car jack would be best)
-With fuel tank supported loosen the nuts on the two J bolts about haflway. No need to remove them...you can unhook the J bolt from the chassis once there is enough slack on the strap.
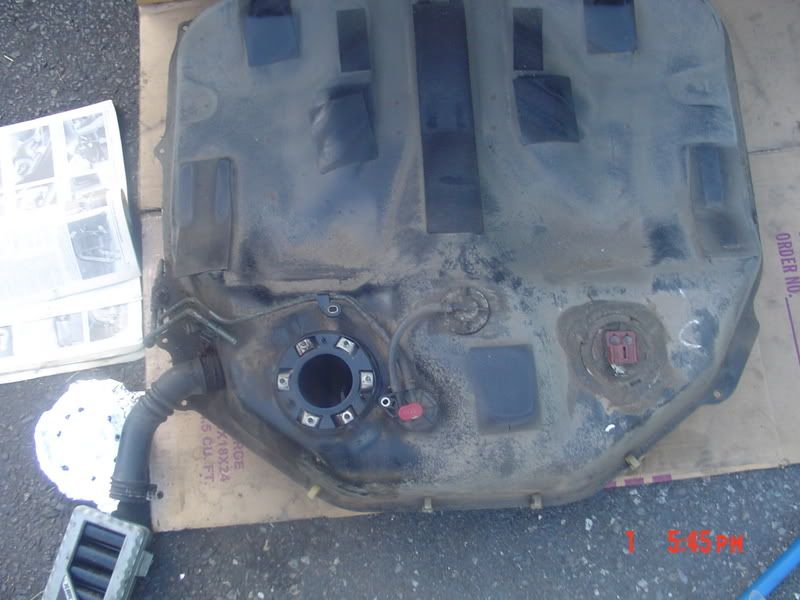
-Look for two bolts that are holding the plastic covers in place to the drivers side of the fuel tank. Unbolt these 2 bolts and set them aside (see pic #2 "plastic fuel line cover).
-Once J bolts are unhooked the tank is supported by the jack. DO NOT DROP TANK ALL THE WAY DOWN YET
-SLOWLY lower fuel tank until you can see top of tank with fuel hardlines. There are two fuel lines going from the chassis to the top of the fuel pump assembly (aka fuel pump bracket), Make sure that the hardline or the banjo bolt line do not get kinked, torn or bent.
-With a 17mm shallow socket SLOWLY loosen the fuel banjo bolt. Do it slowly cause fuel will start to spill out of the banjo bolt. Once the banjo bolt stops leaking take the bolt off and set it aside. Make sure no gunk gets in the fuel line banjo fitting.
-With a 10mm (I think) deep socket unscrew the 6 nuts holding the top of the fuel pump bracket to the fuel tank
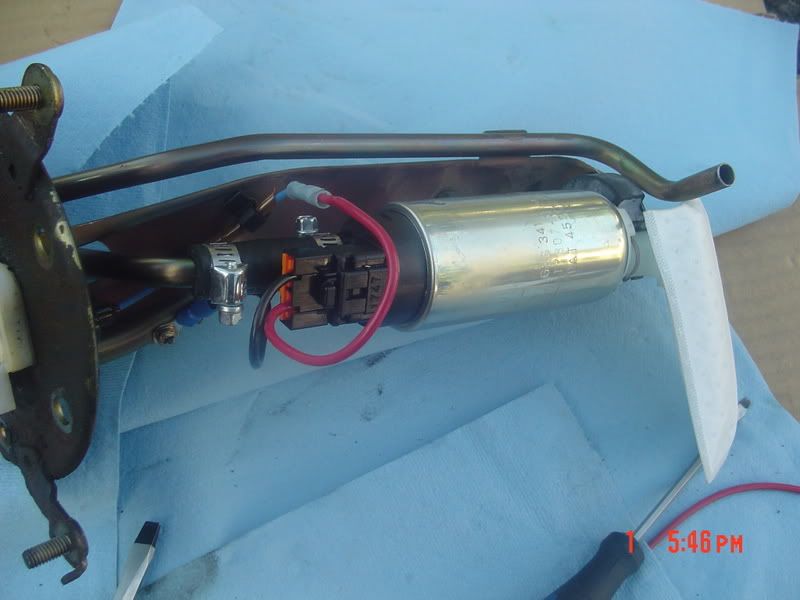
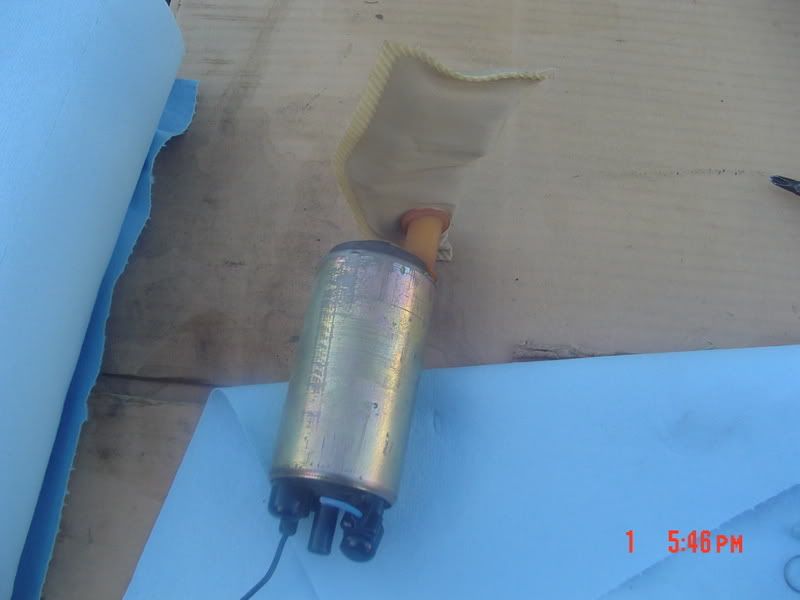
-There is a hardline connected to the top of the fuel pump bracket. you will see that midway through the hardline it is bolted down to the fuel tank. From underneath undo the nut that is holding the hardline to the fuel tank (see pic #1).
-Look at the electrical wiring coming out of the top of the fuel pump bracket it might be held in place on the fuel tank by some plastic C clips, take the wire out of the C clips. Look back at your fuel pump hardline (not the one with the banjo fitting)...follow the hardline away from the fuel pump and you will see that it connects to a rubber fuel line. Undo the fuel line retaining clamp...remove the rubber fuel line from the hardline and be ready for more fuel spillage.
-Raise the fuel pump bracket out of the fuel tank...raise it up towards the driver side of the car. You may have to rotate the pump assembly to get the filter out. Since the hardlines and fuel najo line is no longer hooked up to the top of the fuel pump bracket you can lower the fuel tank a little more to make removal of the fuel pump easier.
-Once the fuel pump assembly is out you'll notice the wiring is still hooked up to it. It is not necessary to nhook the wiring. You can swap out the fuel pump right there behind your left rear tire. Just make sure that the pump is not hanging by the electrical wires.
-IMPORTANT: find the positive and negative wires that are going into the fuel pump. TIP: you can see +/- on the top of the fuel pump--the negative wire is USUALLY the shorter of the two wires and it goes from the plug right to the pump bracket--the positive wire USUALLY goes through a ziptie loop which is attached to the pump bracket and it goes behind the fuel pump cradle. Once you have identified the positive and negative wires REMEMBER THEM.
-Once you have identified the positive and negative wires snip them as close to the fuel pump as possible.
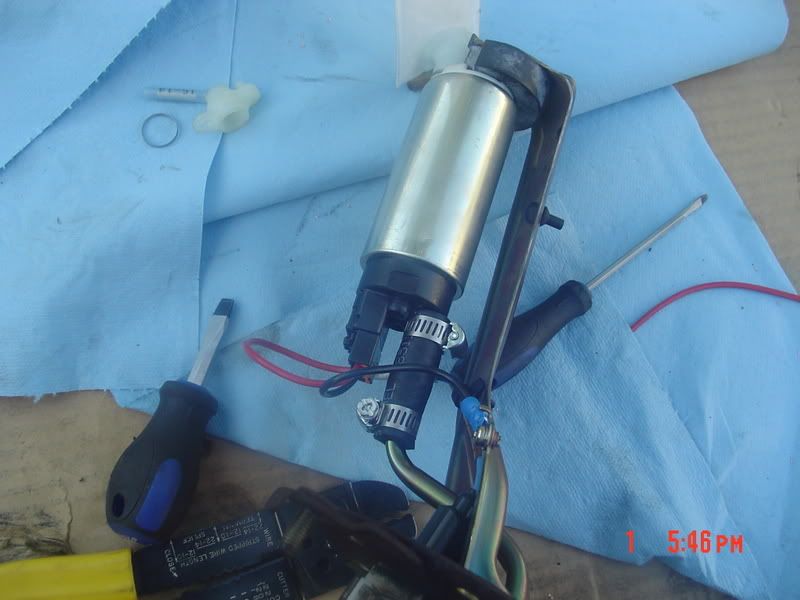
-To remove fuel pump stick a flathead screwdriver through the bottom of the fuel pump cradle and pry the fuel pump out. Dont bent the fuel pump cradle.
-Unhook the fuel pump hose from the bracket nipple
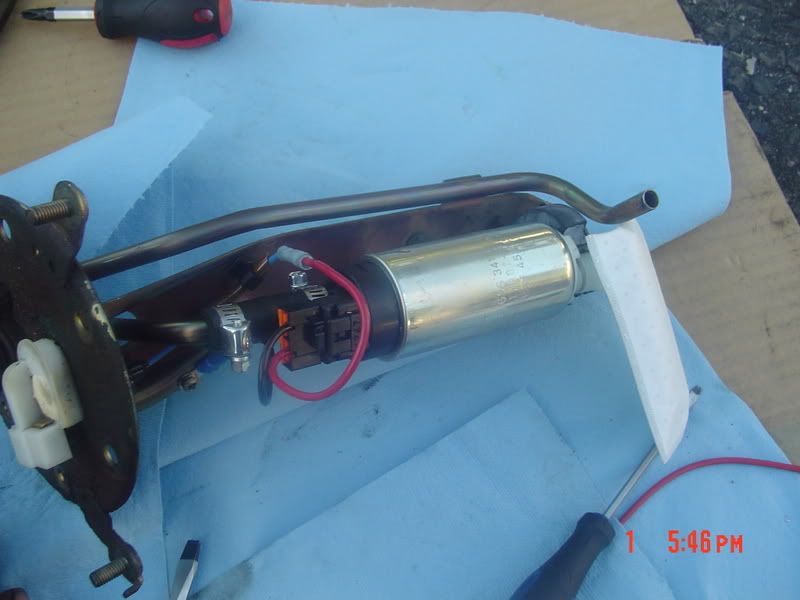
-Assemble your Walbro fuel pump and install the white extension between the fuel pump filter and the bottom of the pump. Make sure the bottom rubber piece is also installed. Hold in next to the bracket assembly and make sure the fuel pump filter is the same height as the old one.
-Take your fuel pump plug and match up the positive wire on your plug to the positive wire on the fuel pump bracket...do the same for the negative wire on the plug and bracket. Take the wiring and solder or crimp the wires together positive to positive and neg to neg. You might have to shorten the wiring on your fuel pump plug so that there is not a lot of wiring around the fuel pump bracket area.
-Install rubber fuel hose on top of fuel pump and install two worm gear clamps
-Install other end of fuel hose to bracket nipple, tighten worm gear clamps
-Push bottom of fuel pump which has rubber piece into the bottom of the fuel pump bracket/cradle
-Plug in your fuel pump plug
-Install fuel pump bracket/assembly back into fuel pump reverse of removal. Before you put the fuel pump assy back on you might wanna put some sealant where the fuel pump bracket meets the fuel tank to help seal it.
-Make sure you didnt mix up the holes, best way to check is to see where the hardlines middle brackets goes. It should go into the hole on the side of the fuel tank.
-Reinstall 6 bolts on top of fuel pump bracket. Tighten bolts in a criss-cross manner. DO NOT OVERTIGHTEN THEM. It only takes 4 foot/lbs or 48 inch/lbs or torque to tighten these bolts.
-Raise fuel tank slightly until you can connect the hardline to the rubber fuel line on the chassis. The stock clamp might be harder to get back on due to the tight space. You might wanna replace it with a worm gear clamp instead.
-Check fuel line with banjo fitting and ensure it is clean and not clogged. Take new washers and the stock banjo bolt and reinstall them. Put one washer on the banjo bolt, put the bolt through the fuel line banjo fitting, put on another washer and screw the bolt into the fuel tank. Just feel around for the hole with your finger...make sure the washer doesn't fall off the banjo bolt. Use your 17mm shallow wrench and torque the banjo bolt to 16 foot/lbs or 192 inch/lbs.
-Take wiring and place it back in C clip that is behind fuel tank
-Raise fuel tank all the way
-Install both J bolts back into the upside down pear/lightbulb shaped notch in the chassis.
-Tighten 2 J bolt nuts
-Reinstall screws onto plastic cover that is on driver side of fuel tank.
-Remove all items and tools out from underneath car
-Lower car to ground
-Reinstall gas cap
-Tighten fuel filter service bolt
-Plug in stock fuel level sender plug. This is the one underneath the rear storage bins.
-Turn key to on position and listen for fuel pump priming up
-Start car and check for leaks under fuel tank area.
Hi guys,
Today I finished taking out my stock fuel pump and replacing it with my Walbro HP 255lph fuel pump which I bought from lightningmotorsports.com . Installation was pretty easy, but before I actually did it I was afraid I was going to do something wrong. Once you lower the fuel tank and look at it you'll see it's very simple. But even though it's pretty easy I thought I'd write a short how-to so that you guys who want to do this aren't going in blind. I'm including a list of things you might want to have incase a few things break
-spare fuel hose (5/16" or 8mm) a foot or 6 inches should be enough
-some tiny hose clamps for the fuel hose at least 4
-2 washers for fuel bolt p/n 90428-PD6-003
-2 J bolts p/n 17525-SH3-010 (I bought two spares but my stock ones were still good)
-4 J bolt nuts p/n 94002-08000-0S (I bought 4 of these too, but my stock ones were still good)
-2 J bolt washers p/n 94101-08800 (bought some of these but stock ones were also good)
-2 fuel tank support straps p/n 17521-SH3-030 (right) 17522-SH3-020 (left) (buy these only if you think yours are bad or worn--I didn't buy them at all)
-a tool kit, needle nose and snub nose pliers, butt connectors crimping tool (or soldering iron if you want to solder your connections)
-jackstands
-some way to support the fuel tank, I used a transmission jack which had a 4x4" surface area
-spare rags
before I started I drove the car until the fuel gauge was on the E. The tank was light enough for me to move around with that little fuel in there.
-Chock the front tires, and jack the back of the car up
-Remove rear storage bins to access fuel level sender, unplug sender
-Remove gas cap and relieve fuel pressure in the system by SLOWLY loosening service bolt on fuel filter banjo fitting
-Place transmission jack below center of fuel tank (or use a hydraulic car jack, two tire changing jacks or some extra jackstands. Tranny jack or hyd. car jack would be best)
-With fuel tank supported loosen the nuts on the two J bolts about haflway. No need to remove them...you can unhook the J bolt from the chassis once there is enough slack on the strap.
-Look for two bolts that are holding the plastic covers in place to the drivers side of the fuel tank. Unbolt these 2 bolts and set them aside (see pic #2 "plastic fuel line cover).
-Once J bolts are unhooked the tank is supported by the jack. DO NOT DROP TANK ALL THE WAY DOWN YET
-SLOWLY lower fuel tank until you can see top of tank with fuel hardlines. There are two fuel lines going from the chassis to the top of the fuel pump assembly (aka fuel pump bracket), Make sure that the hardline or the banjo bolt line do not get kinked, torn or bent.
-With a 17mm shallow socket SLOWLY loosen the fuel banjo bolt. Do it slowly cause fuel will start to spill out of the banjo bolt. Once the banjo bolt stops leaking take the bolt off and set it aside. Make sure no gunk gets in the fuel line banjo fitting.
-With a 10mm (I think) deep socket unscrew the 6 nuts holding the top of the fuel pump bracket to the fuel tank
-There is a hardline connected to the top of the fuel pump bracket. you will see that midway through the hardline it is bolted down to the fuel tank. From underneath undo the nut that is holding the hardline to the fuel tank (see pic #1).
-Look at the electrical wiring coming out of the top of the fuel pump bracket it might be held in place on the fuel tank by some plastic C clips, take the wire out of the C clips. Look back at your fuel pump hardline (not the one with the banjo fitting)...follow the hardline away from the fuel pump and you will see that it connects to a rubber fuel line. Undo the fuel line retaining clamp...remove the rubber fuel line from the hardline and be ready for more fuel spillage.
-Raise the fuel pump bracket out of the fuel tank...raise it up towards the driver side of the car. You may have to rotate the pump assembly to get the filter out. Since the hardlines and fuel najo line is no longer hooked up to the top of the fuel pump bracket you can lower the fuel tank a little more to make removal of the fuel pump easier.
-Once the fuel pump assembly is out you'll notice the wiring is still hooked up to it. It is not necessary to nhook the wiring. You can swap out the fuel pump right there behind your left rear tire. Just make sure that the pump is not hanging by the electrical wires.
-IMPORTANT: find the positive and negative wires that are going into the fuel pump. TIP: you can see +/- on the top of the fuel pump--the negative wire is USUALLY the shorter of the two wires and it goes from the plug right to the pump bracket--the positive wire USUALLY goes through a ziptie loop which is attached to the pump bracket and it goes behind the fuel pump cradle. Once you have identified the positive and negative wires REMEMBER THEM.
-Once you have identified the positive and negative wires snip them as close to the fuel pump as possible.
-To remove fuel pump stick a flathead screwdriver through the bottom of the fuel pump cradle and pry the fuel pump out. Dont bent the fuel pump cradle.
-Unhook the fuel pump hose from the bracket nipple
-Assemble your Walbro fuel pump and install the white extension between the fuel pump filter and the bottom of the pump. Make sure the bottom rubber piece is also installed. Hold in next to the bracket assembly and make sure the fuel pump filter is the same height as the old one.
-Take your fuel pump plug and match up the positive wire on your plug to the positive wire on the fuel pump bracket...do the same for the negative wire on the plug and bracket. Take the wiring and solder or crimp the wires together positive to positive and neg to neg. You might have to shorten the wiring on your fuel pump plug so that there is not a lot of wiring around the fuel pump bracket area.
-Install rubber fuel hose on top of fuel pump and install two worm gear clamps
-Install other end of fuel hose to bracket nipple, tighten worm gear clamps
-Push bottom of fuel pump which has rubber piece into the bottom of the fuel pump bracket/cradle
-Plug in your fuel pump plug
-Install fuel pump bracket/assembly back into fuel pump reverse of removal. Before you put the fuel pump assy back on you might wanna put some sealant where the fuel pump bracket meets the fuel tank to help seal it.
-Make sure you didnt mix up the holes, best way to check is to see where the hardlines middle brackets goes. It should go into the hole on the side of the fuel tank.
-Reinstall 6 bolts on top of fuel pump bracket. Tighten bolts in a criss-cross manner. DO NOT OVERTIGHTEN THEM. It only takes 4 foot/lbs or 48 inch/lbs or torque to tighten these bolts.
-Raise fuel tank slightly until you can connect the hardline to the rubber fuel line on the chassis. The stock clamp might be harder to get back on due to the tight space. You might wanna replace it with a worm gear clamp instead.
-Check fuel line with banjo fitting and ensure it is clean and not clogged. Take new washers and the stock banjo bolt and reinstall them. Put one washer on the banjo bolt, put the bolt through the fuel line banjo fitting, put on another washer and screw the bolt into the fuel tank. Just feel around for the hole with your finger...make sure the washer doesn't fall off the banjo bolt. Use your 17mm shallow wrench and torque the banjo bolt to 16 foot/lbs or 192 inch/lbs.
-Take wiring and place it back in C clip that is behind fuel tank
-Raise fuel tank all the way
-Install both J bolts back into the upside down pear/lightbulb shaped notch in the chassis.
-Tighten 2 J bolt nuts
-Reinstall screws onto plastic cover that is on driver side of fuel tank.
-Remove all items and tools out from underneath car
-Lower car to ground
-Reinstall gas cap
-Tighten fuel filter service bolt
-Plug in stock fuel level sender plug. This is the one underneath the rear storage bins.
-Turn key to on position and listen for fuel pump priming up
-Start car and check for leaks under fuel tank area.


 )
)

Comment