
So Ive been slacking on making this DIY again since we lost it when the site went down but here it goes.
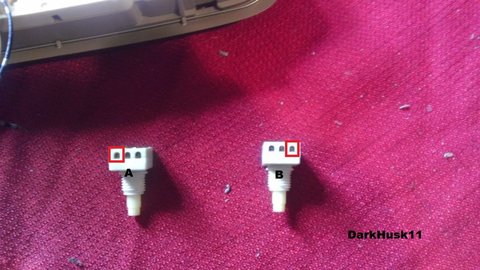
Step 1: Find the buttons that you will be modding and remove them by gently "unplugging them"

Step 2: Label them so you do not get them mixed up. Ex: A & B

Step 3: Now that you have them out identify the spot where you are going to be soldering the wire to. Its the outside ones.
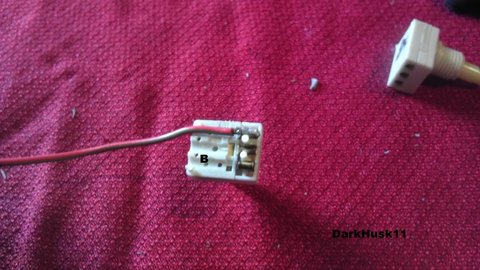
Step 4: Take one and gently pry it open (I used my pocket knife)

Step 5: After you open the top layer of the switch you are going to see the three terminals. Get a piece of wire and stick it through the back and solder it to the terminal you identified earlier.
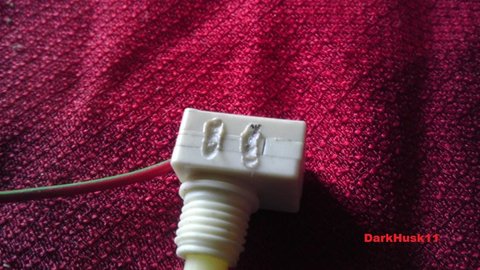
Step 6: You will notice that when you pried open the switch you broke the pins that hold it together. Simply take your soldering gun and melt lines to reinforce.
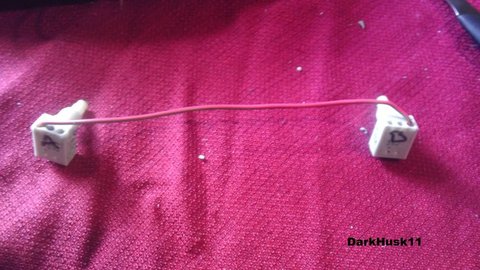
Step 7: Measure the wire to reach the other button and repeat to the other button.

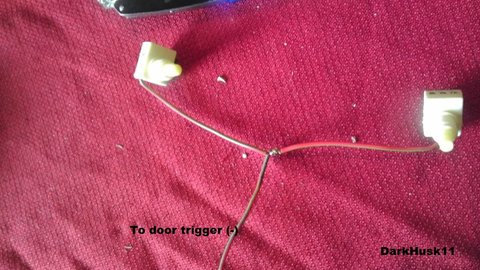
Step 8: You should end up with this.
Step 9: Now with a razor blade cut a piece of the wire coating to reveal the copper wires.

Step 10: Solder a piece of wire and heat shrink or tape it. (this will be the wire going to your maplight.
Step 11: Plug the buttons back in.

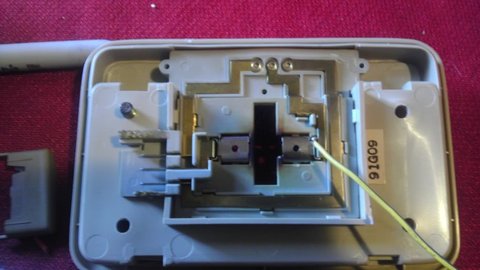
Now that you have your maplight wired up its time to wire it to the domelight.
This method will make the maplights come on when the doors are open and when you turn the dome light on. But the maplights will be individual.
Also it will disable them comming on if the domelight is in the off position.
Simply take your wire and solder it to the right terminal on the domelight.
This is what it looks like installed. Sorry se and ex owners you cant have the sunglass holder

If you have any questions let me know!!
Thanks for looking and comments/feedback's will be welcome
Step 1: Find the buttons that you will be modding and remove them by gently "unplugging them"
Step 2: Label them so you do not get them mixed up. Ex: A & B
Step 3: Now that you have them out identify the spot where you are going to be soldering the wire to. Its the outside ones.
Step 4: Take one and gently pry it open (I used my pocket knife)
Step 5: After you open the top layer of the switch you are going to see the three terminals. Get a piece of wire and stick it through the back and solder it to the terminal you identified earlier.
Step 6: You will notice that when you pried open the switch you broke the pins that hold it together. Simply take your soldering gun and melt lines to reinforce.
Step 7: Measure the wire to reach the other button and repeat to the other button.
Step 8: You should end up with this.
Step 9: Now with a razor blade cut a piece of the wire coating to reveal the copper wires.
Step 10: Solder a piece of wire and heat shrink or tape it. (this will be the wire going to your maplight.
Step 11: Plug the buttons back in.
Now that you have your maplight wired up its time to wire it to the domelight.
This method will make the maplights come on when the doors are open and when you turn the dome light on. But the maplights will be individual.
Also it will disable them comming on if the domelight is in the off position.
Simply take your wire and solder it to the right terminal on the domelight.
This is what it looks like installed. Sorry se and ex owners you cant have the sunglass holder
If you have any questions let me know!!
Thanks for looking and comments/feedback's will be welcome


 Ive read that thread before but could never find and info lol. Should of kept going
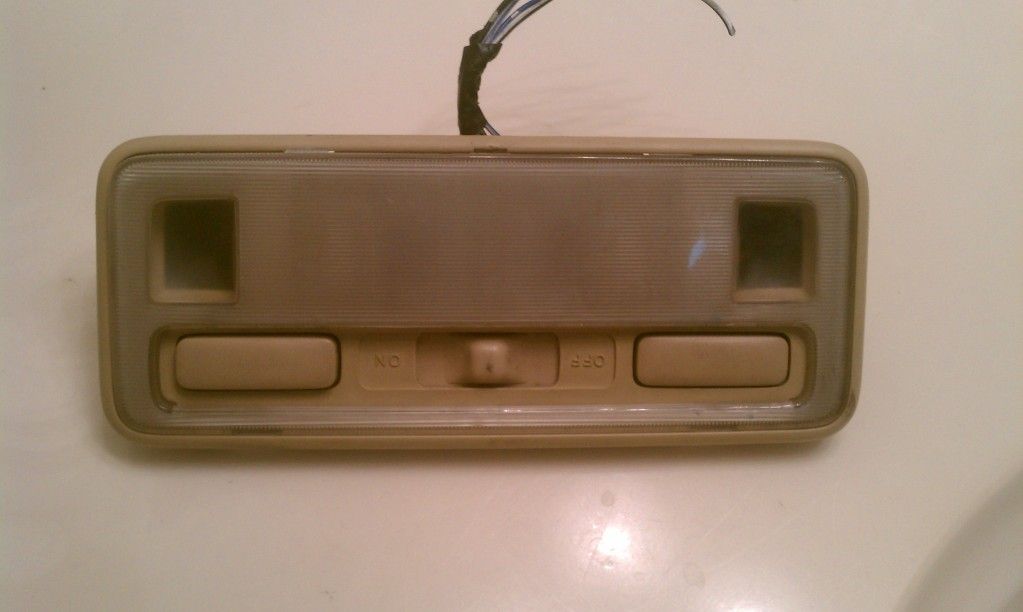


Comment