
OEM wheel buffing/cleaning
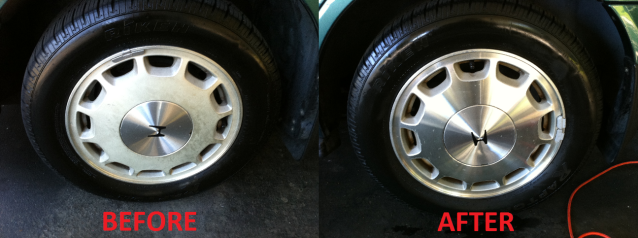
This Diy will cure those nasty yellow, faded oem rims you've been riding on since you bought your cb7, why not save a few buck on new rims and make them as pretty as when they used to be. This will also be very similar to my other DIY on minor scratch repair.
TOOLS:
1. a small bucket with warm soapy water
2. 2000-3000 grit sandpaper
3. paste or liquid compound (preferably Ultimate compound by Meguires)
4. paste or liquid carnuba wax (preferably Meguires)
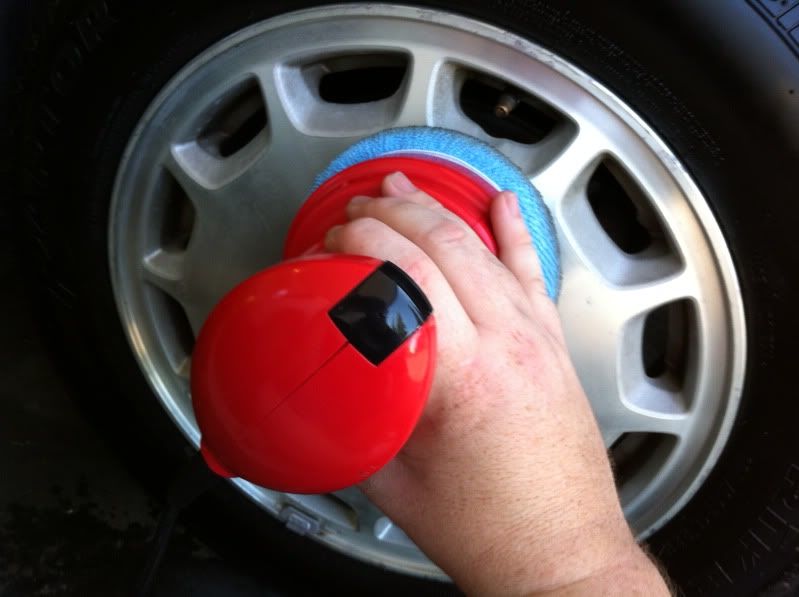
5. 6" orbital buffer with micro fiber pads.
-Substitution: microfiber cloth and elbow grease.
6. 3 separate microfiber cloths, 1 2 and 3.
INSPECTION: before you hop away on this cool DIY, make sure what you have IS fixable, any pits or flaking of the clear coat on the rims will not be cured using this tutorial, your best bet is strip it, sand it, and polish it. Please understand that these wheels gets so much abuse from the elements, it is essential that we take care of it with proper maintenance. this is the first step to keep them clean.
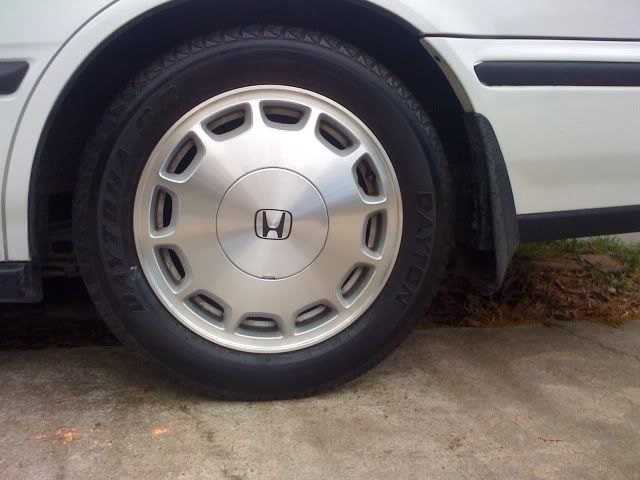
this is what it will look like, this was the best i could achieve with a good wash,

STEP 1: Wash the rim really good, while its soapy use a claybar to get every bit of dirt you can get out. this gives a good base.
STEP 2: find a small inconspicuous area to test this, just in case you make a mistake, but gives you a way to practice.
STEP 3: pullout a small bucket with soapy water. wet down the area.
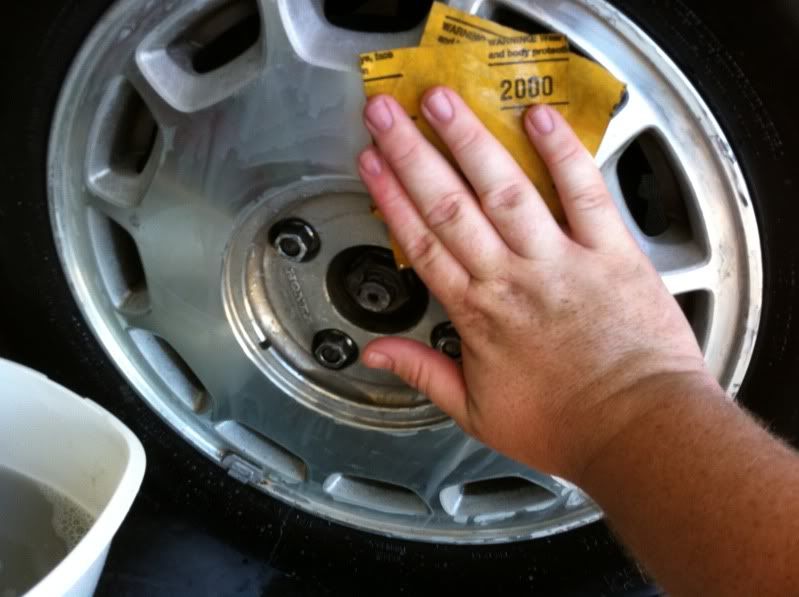
STEP 4: grab your high grit sand paper and sand the whole rim for 10-12 seconds, count it out loud (one, one thousand. ect.), this should give you an even sanded area.
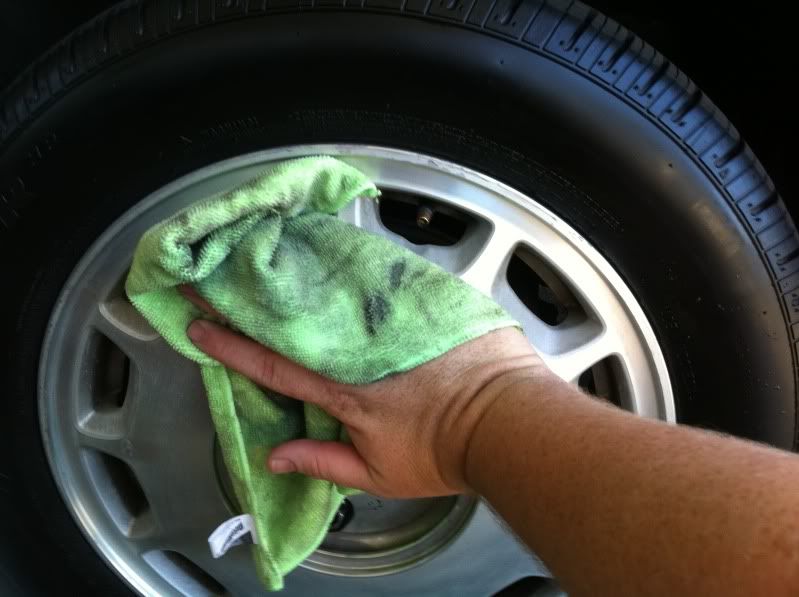
STEP 5: wipe down the water with your #1 cloth. check progress, use your fingers to feel the surface, it should be smooth. if needed, repeat for another 10-12 seconds.
STEP 6: pull out the buffer, compound and #2 cloth. put a small amount of compound on the sanded area, and lightly work it around the whole rim. start buffing...in any direction and in the tight spots till the compound starts to fade a bit. then wipe with #2 cloth.
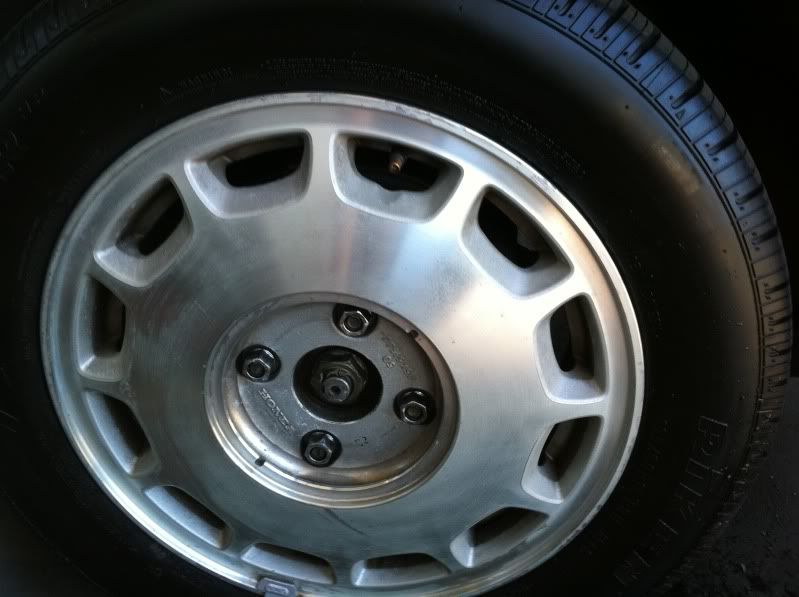
STEP 7: check progress, it should look really good, but you'll want to check with a flashlight, you probably can still see the sanded area. repeat steps 6 and 7 till it is crystal clear. Do not let the compound dry on the rim.
STEP 8: Switch pads on your buffer, and use a small amount of carnuba wax, this will help seal the coat and bring depth to the metal of the rim. once done Let it dry on and glaze over. then wipe with #3 cloth. you should see no scratch and nothing but a very shiny rim

Enjoy:
This Diy will cure those nasty yellow, faded oem rims you've been riding on since you bought your cb7, why not save a few buck on new rims and make them as pretty as when they used to be. This will also be very similar to my other DIY on minor scratch repair.
TOOLS:
1. a small bucket with warm soapy water
2. 2000-3000 grit sandpaper
3. paste or liquid compound (preferably Ultimate compound by Meguires)
4. paste or liquid carnuba wax (preferably Meguires)
5. 6" orbital buffer with micro fiber pads.
-Substitution: microfiber cloth and elbow grease.
6. 3 separate microfiber cloths, 1 2 and 3.
INSPECTION: before you hop away on this cool DIY, make sure what you have IS fixable, any pits or flaking of the clear coat on the rims will not be cured using this tutorial, your best bet is strip it, sand it, and polish it. Please understand that these wheels gets so much abuse from the elements, it is essential that we take care of it with proper maintenance. this is the first step to keep them clean.
this is what it will look like, this was the best i could achieve with a good wash,
STEP 1: Wash the rim really good, while its soapy use a claybar to get every bit of dirt you can get out. this gives a good base.
STEP 2: find a small inconspicuous area to test this, just in case you make a mistake, but gives you a way to practice.
STEP 3: pullout a small bucket with soapy water. wet down the area.
STEP 4: grab your high grit sand paper and sand the whole rim for 10-12 seconds, count it out loud (one, one thousand. ect.), this should give you an even sanded area.
STEP 5: wipe down the water with your #1 cloth. check progress, use your fingers to feel the surface, it should be smooth. if needed, repeat for another 10-12 seconds.
STEP 6: pull out the buffer, compound and #2 cloth. put a small amount of compound on the sanded area, and lightly work it around the whole rim. start buffing...in any direction and in the tight spots till the compound starts to fade a bit. then wipe with #2 cloth.
STEP 7: check progress, it should look really good, but you'll want to check with a flashlight, you probably can still see the sanded area. repeat steps 6 and 7 till it is crystal clear. Do not let the compound dry on the rim.
STEP 8: Switch pads on your buffer, and use a small amount of carnuba wax, this will help seal the coat and bring depth to the metal of the rim. once done Let it dry on and glaze over. then wipe with #3 cloth. you should see no scratch and nothing but a very shiny rim
Enjoy:


Comment