Announcement

Collapse
No announcement yet.

ENG: DIY Solid Polyurethane Engine Mounts- Performance & Repair

Collapse
X
 
  • Filter
  • Time
  • Show
Clear All
new posts

    ENG: DIY Solid Polyurethane Engine Mounts- Performance & Repair

    This is the way my friends and I have learned to upgrade stock, and fix broken

    mounts. I'm sure some of you have seen this before, but I've never seen it

    here on CB7tuner, and we can all use a good cheap fix. This is a cheaper diy

    alternative to buying poly inserts.

    I purchased new OEM type engine mounts to install when I swapped engines.

    Recently I noticed the front mount was broken after only about 5,000 miles of

    use. Apparently stock mounts do not like the engine to rip from 45mph in 5th

    to 45mph in 2nd, oops!

    My front engine (torque) mount had a cracked rubber bushing, AND the metal

    part had become bent out of alignment. That is why this DIY is split into two

    parts. The first part is filling the rubber bushing with polyurethane to make

    it solid. The second part is straightening a bent mount and fixing the

    problems that result from bending.


    Part I: Polyurethane

    Here are the installed before & after pics of the front mount:


    These are the tools, minus the duct tape:


    Not pictured is the dishsoap and toothbrush I used to clean the rubber, a

    plastic knife or card, and the option of a heat gun to speed up the drying

    process of the polyurethane.

    1. Use the square drive tools pictured above (3/8" drive is fine too) to remove

    the front engine mount. I used the 3" extension to reach the top bolt, and the

    6" extension to reach the lower one. To loosen the lower bolt, I slipped the

    large socket with extension over the ratchet handle to basically lengthen it,

    since the breaker bar did not have enough room to work. I was able to get the

    mount off without removing any other parts.

    This is a tube of 3m "windo-weld" I bought for about $16, and is good for 2-4

    mounts:


    2. Clean the mount and let it dry so the polyurethane gets a good chance to

    stick.

    3. Use the urethane and caulk gun to fill the bushing's open areas, starting

    from the middle out on each side.

    4. Smooth out the filled area (if desired) with a plastic knife, gloved finger,

    etc.


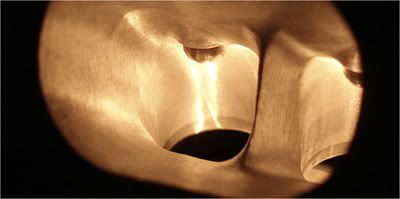
    5. Let the mount dry for at least a day. I dried mine for about 27 hours

    before installing it. During the second half of that time, I used the heat gun

    intermittently at about 400 degrees to heat the metal part of the bushing until

    it was too hot to hold, helping the urethane cure. It should look something

    like this:


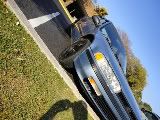
    6. Reinstall the mount securely once the bushing is fully firm.

    Here is mine back in place and ready for more H22 Abuse:


    The H22 Sleeper Sedan, updated 8/14
    After 4 months down...It's back! and tucked.
    Need a Swap or some work done in the DC/MD/VA/WV area?
    PM me and get it done right!

    #2
    Part II: Straightening a bent front mount:


    These are the tools I used for this part:


    1. Place the mount in a vise and straighten it up using your hands to pull and your eyes to check. When I got things

    lined up right, the lower bushing's press-fit became loose.


    Since normal welding would put too much heat into the bushing, I decided to use JB-Weld to keep things in place.

    2. Sand both sides of the loose area and clean.

    3. Mix and apply JB-Weld to the area and allow to dry according to the instructions.

    4. Sand the weld down smooth, I used 220 grit sandpaper.


    5. Prepare the mount for painting- sand, tape off, and clean the area.

    6. Paint the mount according to the instructions on the can.


    7. Reinstall after drying.

    Here is the "finished" pic again:


    This technique will work for most engine mounts, here is an example of a filled front mount for a CRX:


    Now my engine won't rock when I shift hard, giving me traction and reliability. There is no noticeable vibration with

    only a solid front mount, and the power transfers to the wheels better. I can bark into 2nd very easily, and actually

    broke loose when VTEC cut in going uphill in 2nd the other day. Let me know what you guys think.

    The H22 Sleeper Sedan, updated 8/14
    After 4 months down...It's back! and tucked.
    Need a Swap or some work done in the DC/MD/VA/WV area?
    PM me and get it done right!

    Comment


      #3
      The windo-weld poly does not work as well as the McMaster Carr products. The windo-weld poly gets soft and gives over time, not as durable. Just letting you know, but good DIY writeup.
      HondaFan81 For Sale Parts (LOW PRICES ON EVERYTHING)

      Comment


        #4
        bump my boy told me about this I heard it really works on all mounts. The headache is just getting off the mounts lol!

        Comment


          #5
          Originally posted by HondaFan81 View Post
          The windo-weld poly does not work as well as the McMaster Carr products. The windo-weld poly gets soft and gives over time, not as durable. Just letting you know, but good DIY writeup.
          I have yet to see these mounts fail after years of street use, and my new rubber mount didn't last 2 oil changes, but everything wears out eventually.
          The first time I saw this is with the McMaster-Carr stuff. It is harder to work with because it is thinner and leaks as it dries even though it may be a more durable solution. The windo-weld has the consistency of toothpaste and is available at most Auto Parts stores. I didn't really want the vibration of a super hard mount for my CB, and am quite pleased with the stock feel. Thanks for the input and props, this is my first DIY.

          NOTE: You will need the duct tape to make a sealed "bowl" out of your mount if pouring in liquid urethane like that from the above site, but you can pick the hardness rating.
          Last edited by lucid; 10-21-2008, 12:58 AM.

          The H22 Sleeper Sedan, updated 8/14
          After 4 months down...It's back! and tucked.
          Need a Swap or some work done in the DC/MD/VA/WV area?
          PM me and get it done right!

          Comment


            #6
            good write up i've had my F&R mounts filled since feb. i think its great!
            Freedom Is Not Free
            U.S Army 02/08 Medically Discharged

            Comment


              #7
              i have a previously filled front motor being shipped to me by a member and receiving my esp mounts so i hope to get awesome traction
              Maple50175 - you're annoying =P
              Brandoncb7 - I don't mean to come across like an ass but I see why you irritate Aaron now.
              JoshM - Crotch rocket = chick magnet.

              Comment


                #8
                great write up and pictures with labels.

                how a good diy should be done.

                Comment


                  #9
                  Great diy man!. i have one question though. how did you get the mounts out? did you have to pull the engine? and did you fill all of the engine mounts? Im thinkin of doing this myself. thanks in advance
                  My cb7

                  h22a
                  5-spd lsd
                  Lord, grant me the serenity
                  to accept the things I cannot change,
                  the courage to change the things I can,
                  and the wisdom to hide the bodies
                  of those people I had to kill because they pissed me off.

                  Comment


                    #10
                    Originally posted by ikayto View Post
                    great write up and pictures with labels.

                    how a good diy should be done.

                    Thank you, my friend. It takes way less time to do than it does to write, haha .

                    The H22 Sleeper Sedan, updated 8/14
                    After 4 months down...It's back! and tucked.
                    Need a Swap or some work done in the DC/MD/VA/WV area?
                    PM me and get it done right!

                    Comment


                      #11
                      Originally posted by f22a1accord View Post
                      Great diy man!. i have one question though. how did you get the mounts out? did you have to pull the engine? and did you fill all of the engine mounts? Im thinkin of doing this myself. thanks in advance
                      Thanks! For this DIY I only removed the front mount, and got it off with everything else in the car.
                      You could fill all of the mounts, but the ones on the side are pivot points and don't get much stress. They can also add a lot of vibration to the car and dash if solid.
                      For our cars, the front and rear mounts are where the wear and play come in. You should be able to take one mount off at a time, use a jack with a block of wood to hold things up if you remove a side mount. The front and rear can both come off at the same time and the motor will hang just fine on the two side mounts.
                      The rear mount will be a pain to get out with the motor in the car, but it is certainly doable. You'd need to unbolt and remove the rear bracket from the engine and rear mount before you can unbolt the mount itself. It is held in with 3 or 4 bolts going down into the subframe in front of the firewall.

                      The H22 Sleeper Sedan, updated 8/14
                      After 4 months down...It's back! and tucked.
                      Need a Swap or some work done in the DC/MD/VA/WV area?
                      PM me and get it done right!

                      Comment


                        #12
                        sweet thats awesome!
                        Blake.
                        1994 Accord Part out!
                        Me and my step dad's 1991 Accord EX Coupe MRT

                        82 accord-rip, 94 geo-sold, 82 cavilier-rip,81 civic-rip,88 accord- rip, 88 legend- rip, 91 civic- sold,97 geo-sold, 92 accord- sold 94 accord- RIP, 1990 Camry- RIP

                        Comment


                          #13
                          Originally posted by HondaFan81 View Post
                          The windo-weld poly does not work as well as the McMaster Carr products. The windo-weld poly gets soft and gives over time, not as durable. Just letting you know, but good DIY writeup.
                          Have you PERSONALLY seen that happen or is that only crap you've read online? Stop spreading misinformation.

                          Window weld is great and a cheap alternative to buying the polyurethane from McMaster.

                          The ~400whp D series turbo I tuned has yet to break the window weld filled mounts it has. It's been holding up since Novemeber of 07.

                          My front mount on the other hand, filled with 90a urethane from McMaster actually broke in less than a year. Stock f22b.

                          CrzyTuning now offering port services

                          Comment


                            #14
                            Wow! Good to know, d112crzy. Well if it breaks, just redo it again, I guess. Still cheaper.

                            Comment


                              #15
                              wow, awesome write-up!

                              Comment

                              Working...
                              X