If this is your first visit, be sure to
check out the FAQ by clicking the
link above. You may have to register
before you can post: click the register link above to proceed. To start viewing messages,
select the forum that you want to visit from the selection below.
Worked a bit on the Lude today. Just buttoning up stuff mostly.
Installed heater hoses, intermediate shaft and axles, fixed my wiring harness where I broke the power steering switch connector and oil pressure ring off lol.
Oh, and it looks like I'll have to cut the nut off the driver's side UCA. I tried to get it off with my impact and now the nut, just the nut and not the balljoint, spins freely. I might be collecting some Rockauto magnets soon so I can post in that thread.
I'm trying to get it started if not running this weekend so I can get it out my parent's yard. That will speed stuff up a lot!
Only a few things left to do:
Connect the engine harness and fusebox up.
Install the alternator, fuel lines, dizzy, VTEC pressure switch from the USDM motor, tighten the tstat housing back up, radiator and fluids,
valve adjustment and new valve cover gaskets
Connect the downpipe
Prelube the motor with a Harbor Freight drill pump
Then first start!
Try using a big pair of pliers or vise grip on the knuckle and control arm to pinch the taper. That's what I do when balljoints just spin.
There's only one issue with that method, the balljoint isn't spinning. I can literally spin the nut with my fingers, but the joint is stationary. I would bet money that this hardware store nut that's on here is the wrong thread or is stripped out.
I tried to install the wiring harness yesterday and more wires started ripping out of the connector such as the ECT connector and the VTEC solenoid connector. I took a closer look at the engine harness and noticed that quite a few wires were abraded or not in a shape that I would want to install back into the car. Ugh...hurdles
I went to Rywire's site and almost shit a brick. I, personally, don't think wiring is that difficult as long as you are organized and methodical and can source the oem sensor connections. I'm going to try to make my own "Mil-Spec" "Tucked" harness with the help of this website: https://www.rbracing-rsr.com/wiring_ecu.html
New OEM connectors are expensive and hard to find, so I will be reusing the connectors I have, or getting some from the JY. The current harness is removed from its loom. Measurements and schematics are next on the list.
People are just intimidated by the process. I would think the most frustrating part would be de-pinning the old connections without breaking them. Looking forward to the process
Just read through everything. And I'm pretty sure all preludes for sale online are the same story. Great cars but without the proper owner they get beat and abused. I had a friend who treated his prelude the same way. And wow.. they are naturally low, so you must literally be able to touch the ground with the door open.
Some of these parts are getting hard to come by, like the lower engine girdle.
I'm debating on whether or not I should source new pins and boots. I absolutely hate de-pinning connectors, but I know it would be for the best.
Raf, I'm pretty sure I almost scraped the bottom of the door on a curb before. The expensive Ludes are the stock, unmolested ones. I've seen a handful of stock ones rolling around, but they are beaters. The cheap ones either have auto transmissions, (99% failure rate on Ludes) or have been trashed/riced/wrecked.
And the funny part is I need that engine stiffner/flywheel cover. It's one on eBay that's been in my watch list for a minute.
I ordered some Amphenol circular connectors. 2 sets of male and female, 52-pin, solder type connectors. I have a total of 104 pins that can hold up to a 16 awg wire, each. I decided to pull the trigger on these because:
A) They were cheap $15.00 a set, used of course.
B) The solder terminations allow multiple uses and no special crimping or insertion tools compared to the crimp style pins. I can change my mind and re wire everything on a whim. If I mess up some connections, say I put them in the wrong order, I can switch wires around without consequence. I can still use most of the wiring techniques for strain relief, concentric twisting and environment proofing. I think this is the best choice for the DIYer making this kind of harness on a budget.
Now I need an objective, or I'll be tweaking this thing into eternity.
Goal number 1: Create a custom and working harness to get the vehicle mobile, while retaining all stock functionality. This will literally be a replacement harness, with no added features. Something to get the feet wet and still be safe as I will not be cutting into my stock harness just in case I need a back-up plan.
This is going to be a long process as I have to make the engine bay side harness AND the interior side harness WHILE keeping all the critical systems working like the gauge cluster and cooling fans. I'm thinking the best way to do this is to map out the connections that go directly to the ECU and hook them up to the inside circular connector, then just tap into the existing harness for the few remaining signals. Well, whatever I come up with, it needs to be in writing/typing or it's not getting connected.
Parts update:
Racespec is so overpriced for the engine sensor connectors, it's ridiculous! That may be because I'm a peasant though...Even with a reasonably priced connector supplier, the price came out to be over $120 for almost all the connectors, so I'll be sourcing some from the yard for sure and just cleaning, re-pinning and re-sealing them.
For wiring, I'm going to use M22759 spec wire in whatever gauge 20 and above that I can find cheap. Preferably the silver plated wire, but tinned copper wire will work as well.
Wires will be covered in Raychem DR25 covering.
Raychem boot sealing might be the Resintech RT125, depending on costs.
Solder will be Kester leaded solder.
Schematic update:
I was doing this through Excel initially. It works ok for what I needed, but I found a legit schematic maker on the work server, so I'll be redoing it using that program which should allow for easier testing and reproducing to build the harness right the first time.
The longest wire of the stock harness is about 6 ft long. I'm going to order wire assuming that each of the harness connections are 6 ft long which is roughly 50 wires, so a 300ft spool will be ordered. That should give plenty leftover.
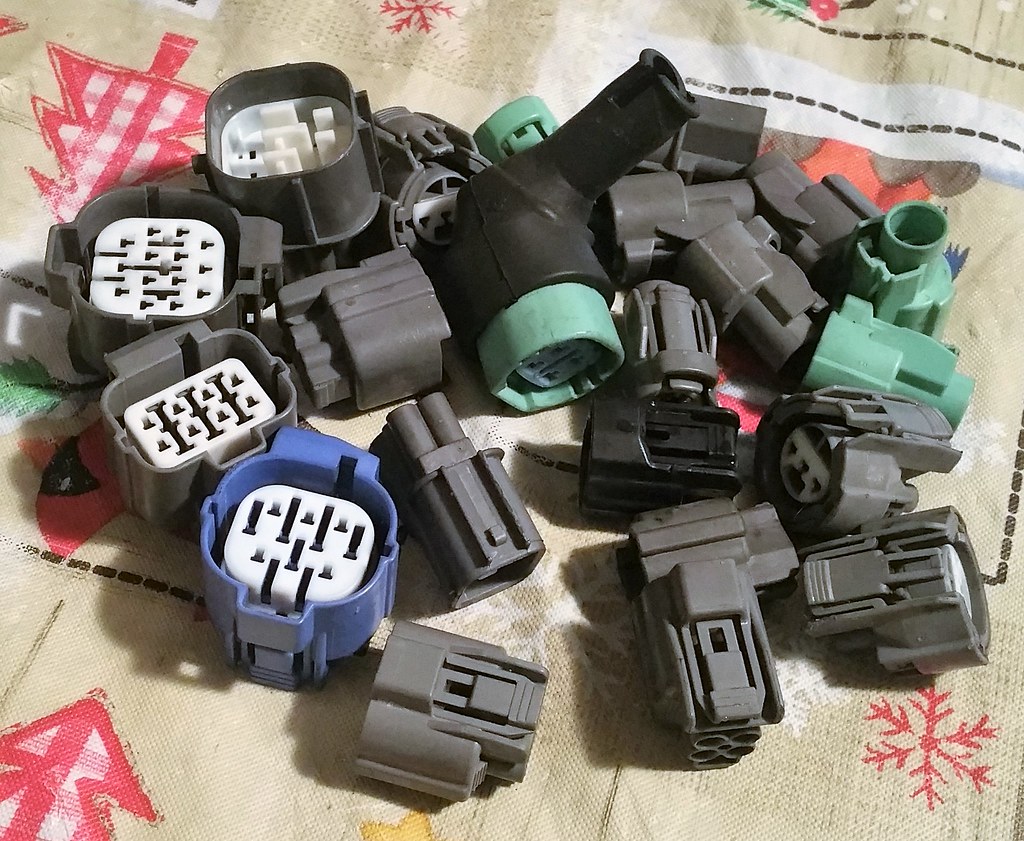
Went out and clipped some connectors, cleaned them up and depinned them. I have several extra as well, just in case. Time to order the pins and wire. 20171022_182950
All the depinned wires, It wasn't too bad. I'm going to have to order new fuel injector connectors. All of the ones I had were brittle and broke on me: 20171022_182524
Sadly the best tool I've found for depinning is a paper clip that is ground at a 45* angle creating a sharp wedge out of the end. It will depin every clip on the car.
I used a small flathead screwdriver for the de-pinning and a pick to remove the white "locks." Cleaning was definitely the longest part as you all know how dirty some of these connectors can get.
I had a few flat head screw drivers I tried, even some from a glasses kit. The paper clip just worked so much faster and on every connector. I got one screw driver to work on one clip but not the next. Was seriously frustrating.
I had a few flat head screw drivers I tried, even some from a glasses kit. The paper clip just worked so much faster and on every connector. I got one screw driver to work on one clip but not the next. Was seriously frustrating.
Yep. agreed. Some of the connectors i spent so much time on i ended up buying a spare one, cutting it in two just to figure out how the F i had to get the wire out properly without breaking it.


 20171022_182950
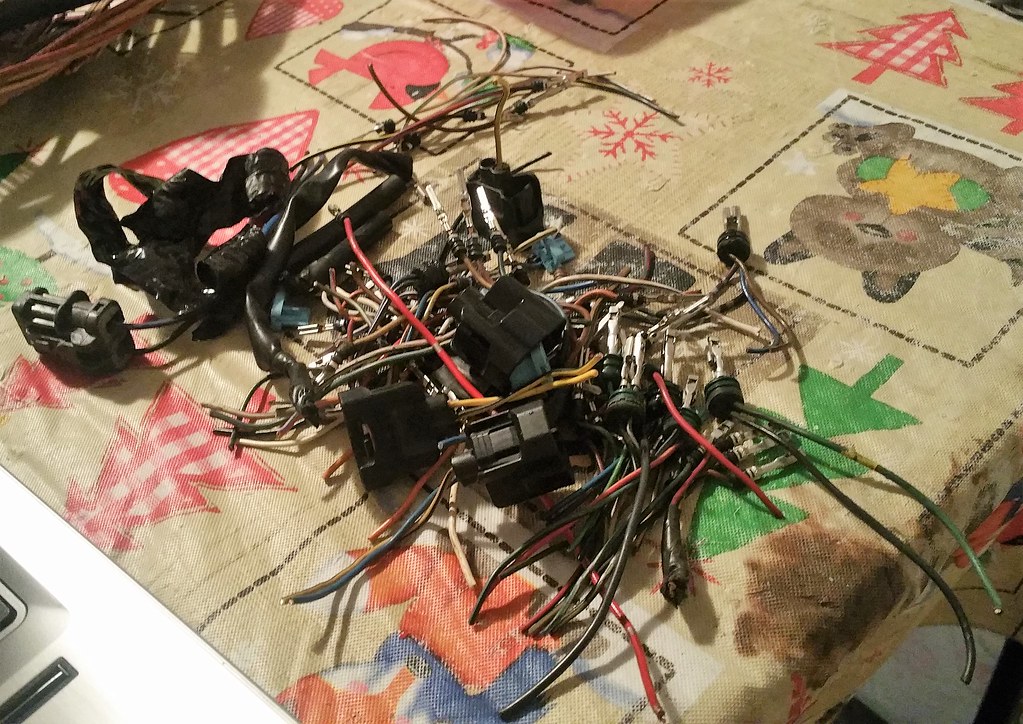 20171022_182524
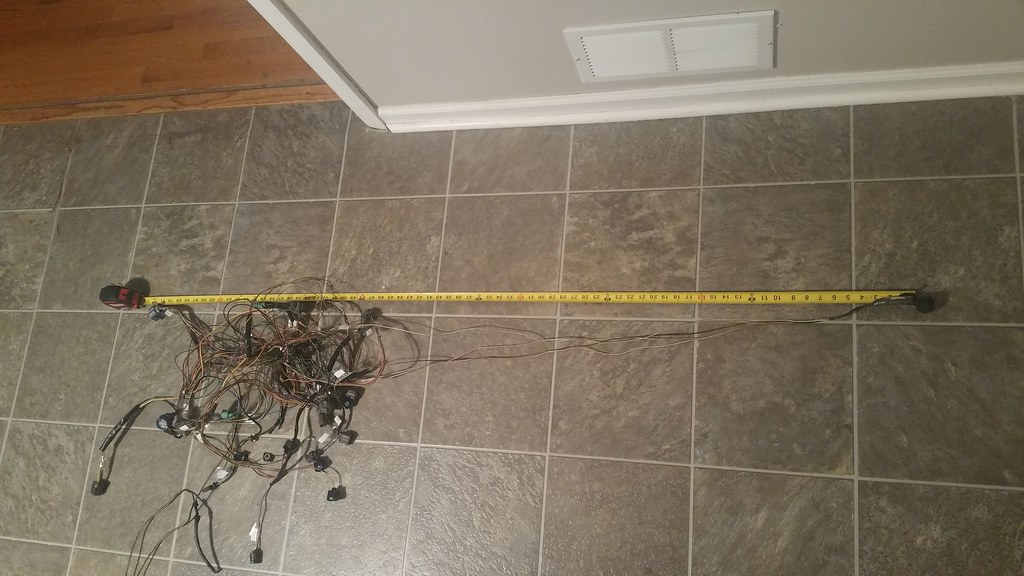 20171015_184430
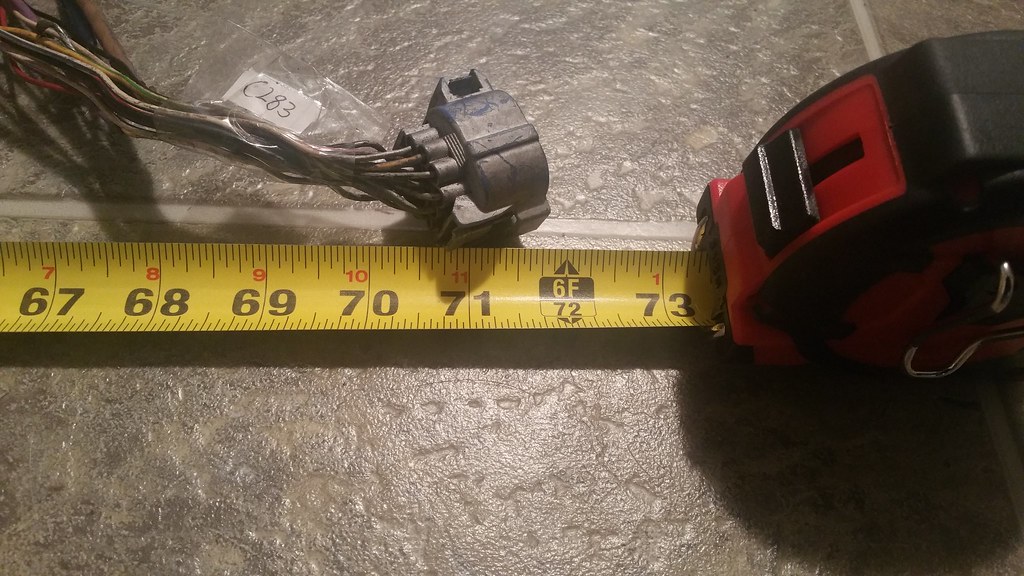 20171015_184441


Comment