
The Legend sedan lip fits the CB7 bumper with a one inch gap on either side. Since 1+1=2, I came up with this.
Tools:
10mm & 12mm sockets and ratchet
12mm wrench
Screwdriver
Drill
Heat gun(optional)
Hacksaw or other plastic cutting instrument
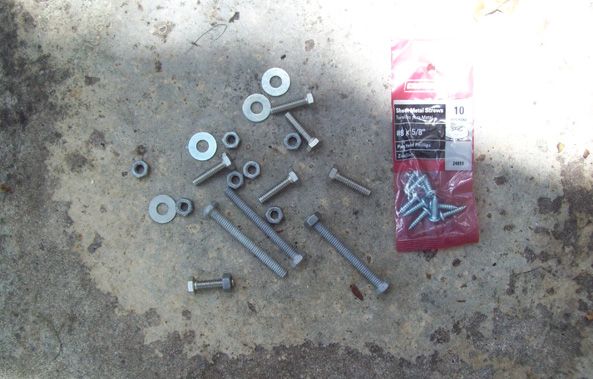
Materials:
Legend sedan lip
4 x 1.5inch hex bolts
6 X 1 inch hex bolts
1" plastic pipe
scissors and material of your choice
Locktite or other outdoor adhesive
Black spray paint (optional)
At least 1 square foot of flexible rubber or plastic
Method:
First, I set up my lip on a professional work bench

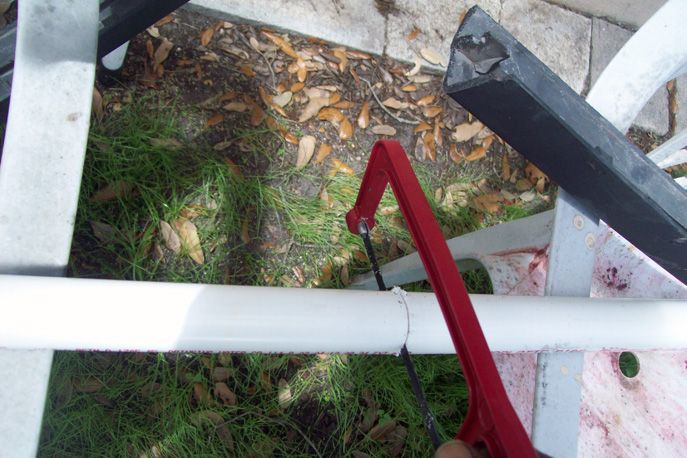
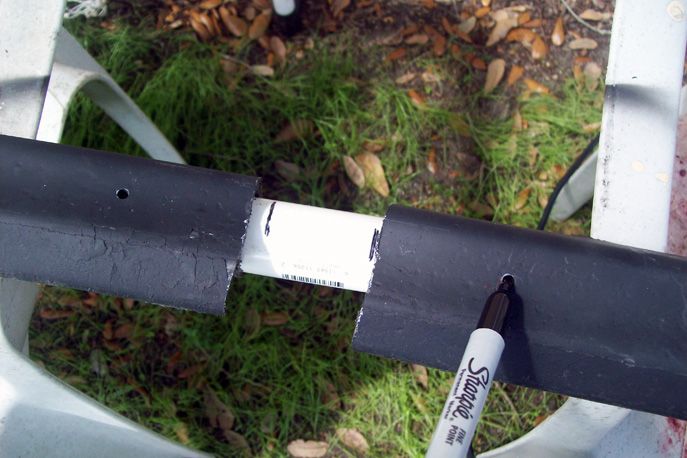
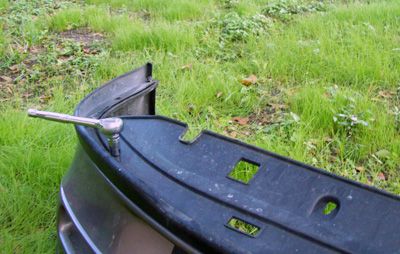
I then proceeded to cut the lip right down the middle (this maybe hard for those in an area where these are hard to find) I got mine for $12 and I'm ok with the stock lip, so I didn't mind.
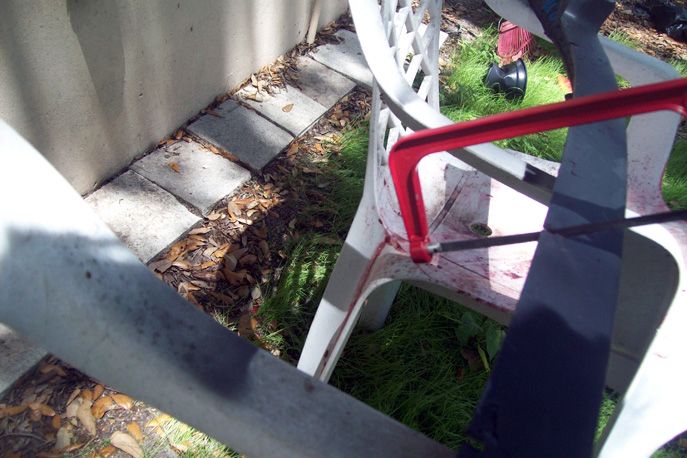
Cut it right down the middle of the clip, like so:
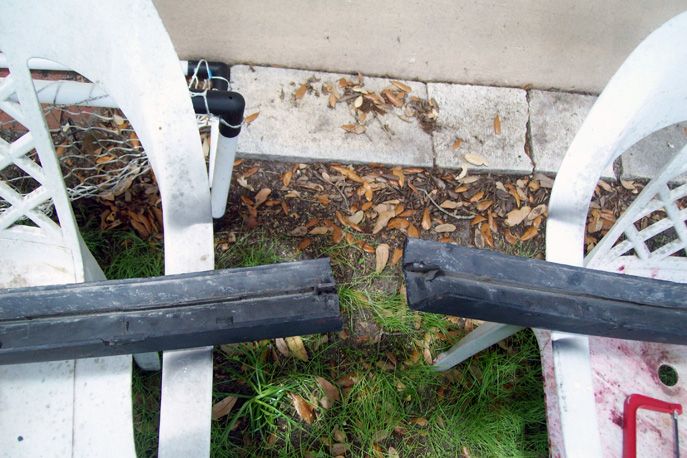
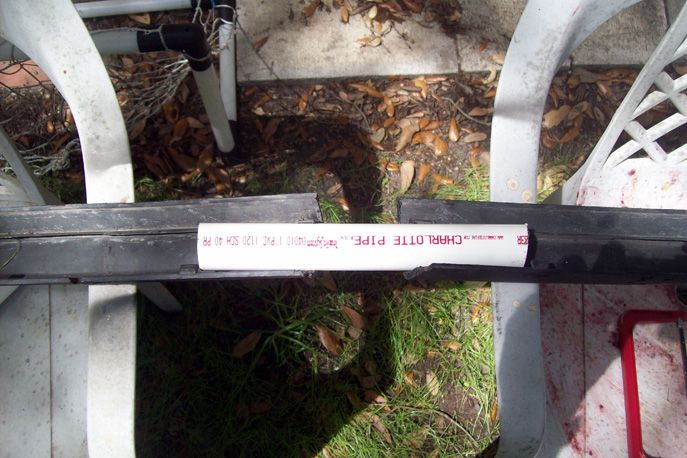
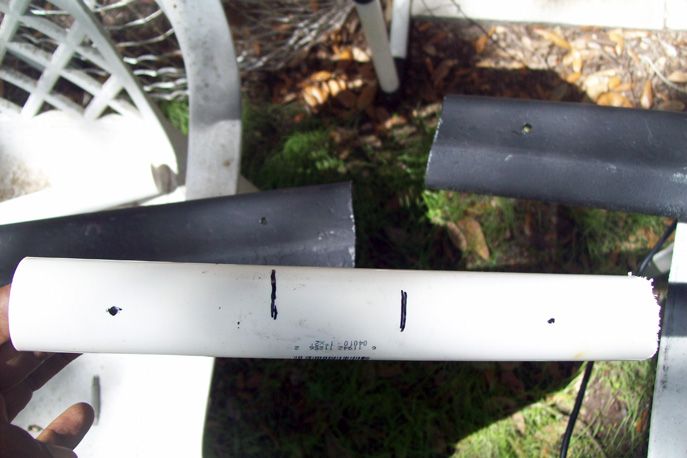
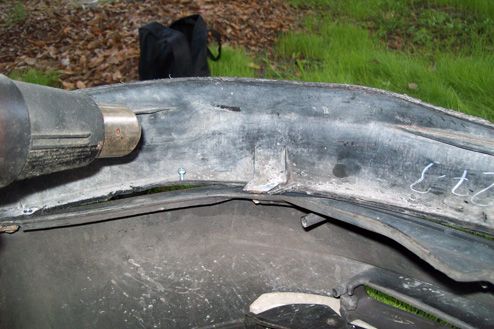
This one inch plastic pipe from Home Depot is a perfect fit
I then eyeballed a 10 to 12 inch of pipe and cut it
I put the pipe between the clip and the top of the lip to test it out(you can see where this is going)
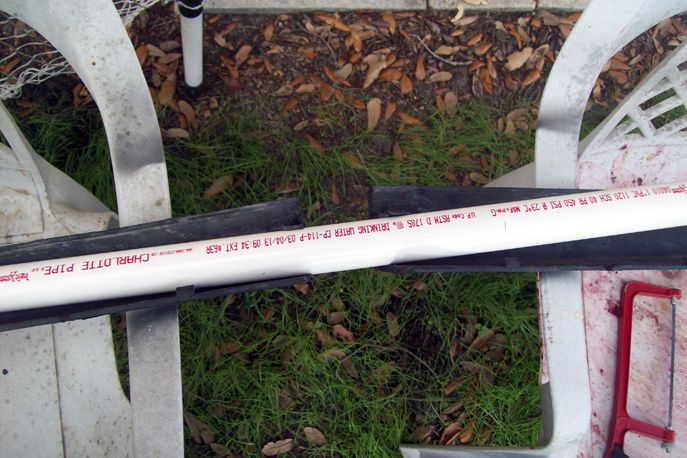
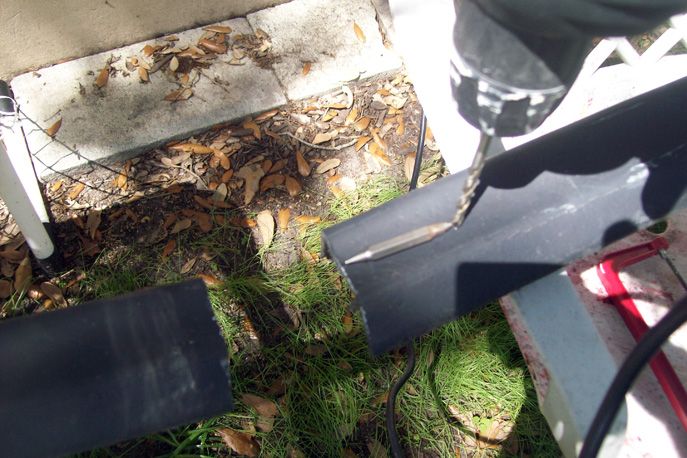
I used some thing to measure equal lengths from the cut and drilled 2 holes in the lip (you actually need 4, as you'll see later)
I measured off a two inch gap, and held it in place
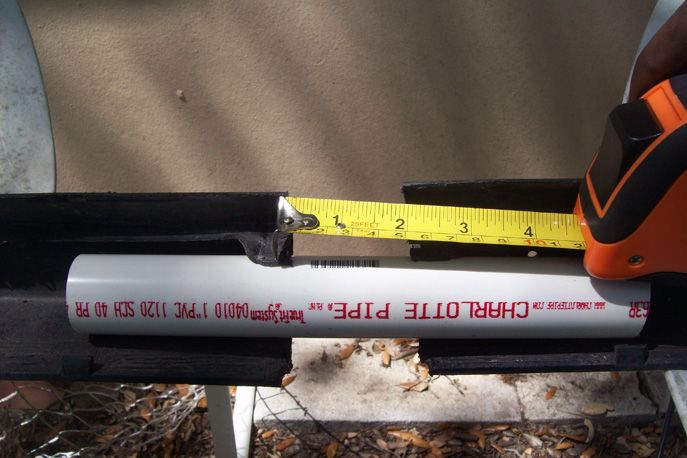
I then marked where the edges and holes lined up on the pipe. (4 holes would be better here)
Like so:
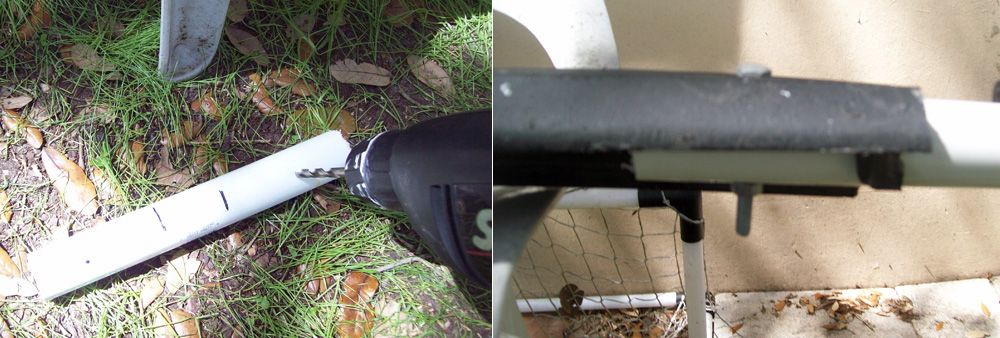
I then drilled holes in the pipe, and run my long bolts through the lip and pipe (These bolts are long so 1.5 inch bolts would do)
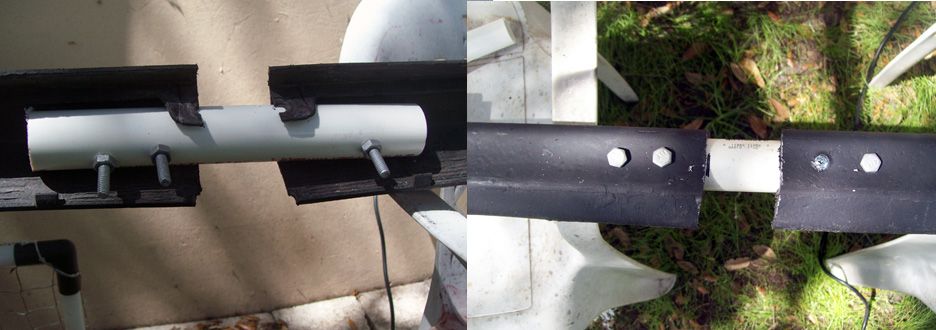
This is where i realized there was some play and I only had 3 long bolts so I used a screw on one side
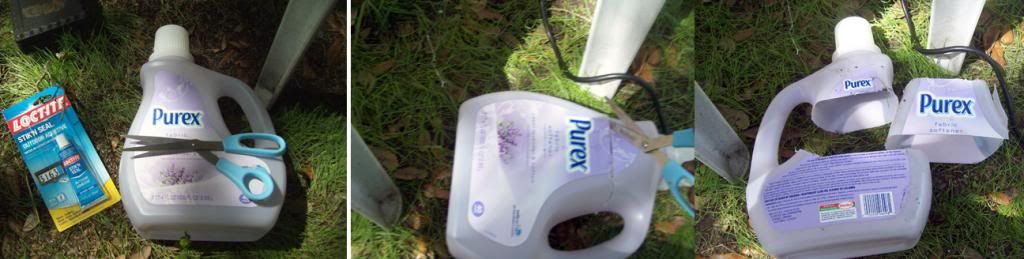
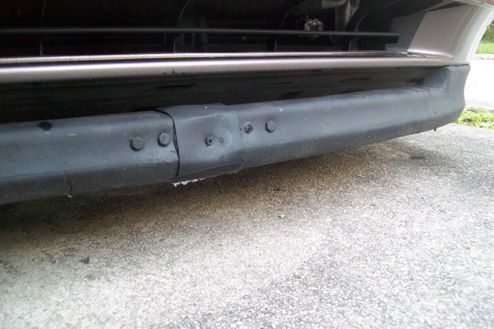
Again this is where your creativity comes in to cover the gap. I used a fabric softener bottle. I suggest a piece of black rubber with a little elasticity.
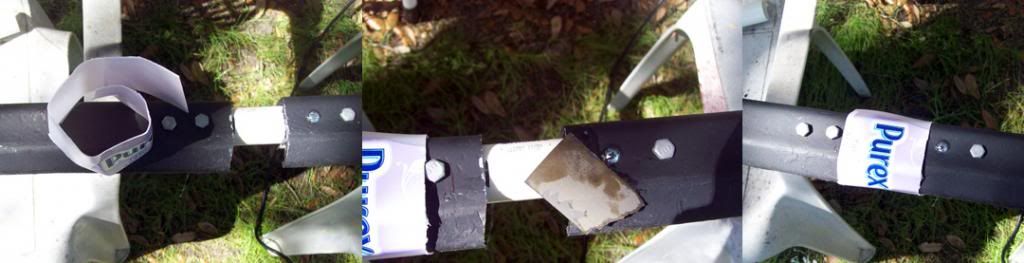
I pre-bent the plastic to the shape of the bumper, sanded the area to be glued, and attached it.(use a bigger piece of sand paper)
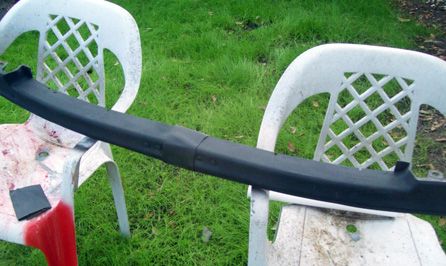
Because mine was in bad shape, I sanded the lip and painted everything flat black
I then removed the bumper (referring to this DIY)
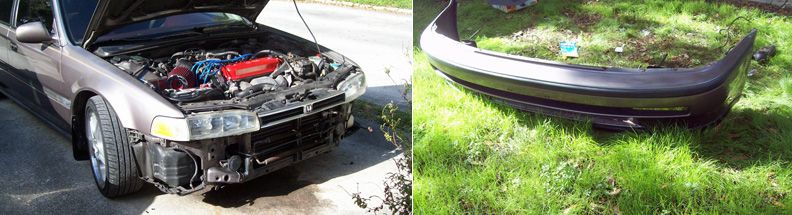
I removed the stock lip
and attached the new lip(referring to this DIY). I used a heat gun on the corners for a flush fit.
Then re-installed the bumper
Im sure other members have ways to make this 100 times better. For the middle piece I would suggest a black, sturdy rubber, because constant scraping will take the paint off, and you don't want your purex label showing Like I said, your creativity and neatness will determine the final look.
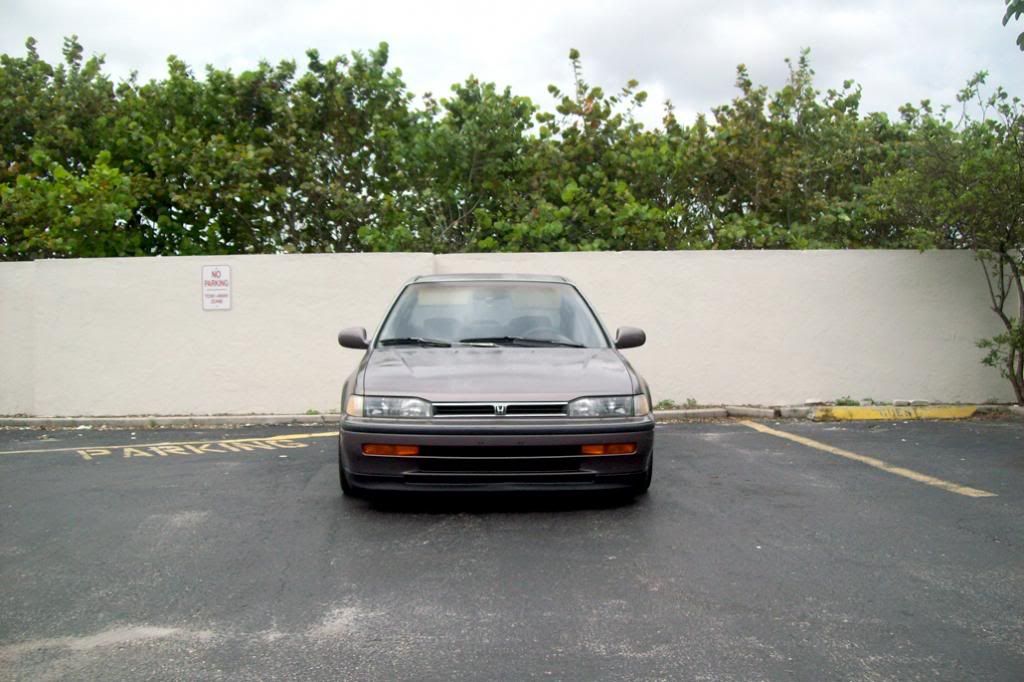
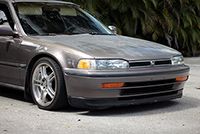
And the end result:
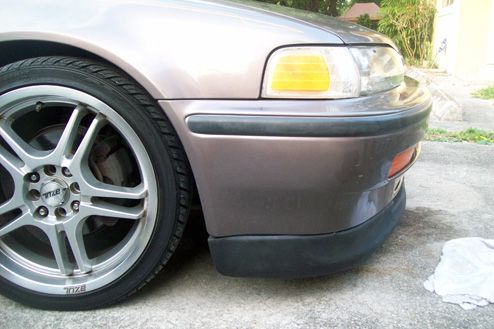
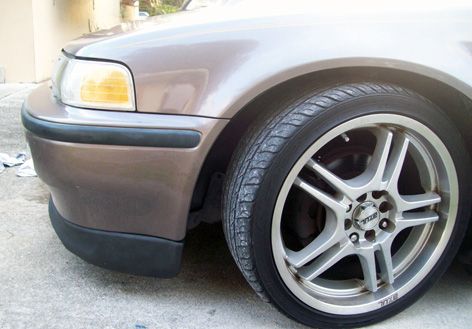
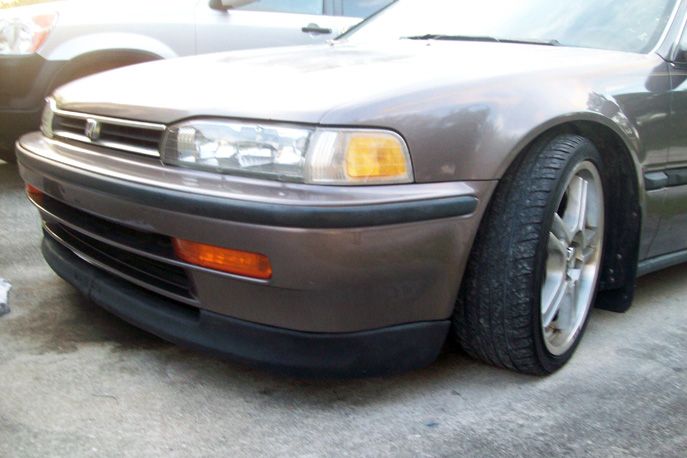
This is after 3 days of constant, somtimes severe scraping and dragging. Some paint came off, but its holding up very well.
I have some black vinyl, a piece of black rubber, black electrical tape, and black 'duck' tape from the dollar store, to make it more neat and even, but I'm rocking the frankenstein/prototype look for now. Ill edit with pics when I do that.
This is simply an idea/diy that can be improved upon by the more fabrication savy + plus its as easy as 1 2 3
Hopefully this helps those thinking of making their Legend sedan lip flush with the edges of the bumper
[EDIT] With rubber insert and gloss black

[EDIT] With bondo and flat black
Tools:
10mm & 12mm sockets and ratchet
12mm wrench
Screwdriver
Drill
Heat gun(optional)
Hacksaw or other plastic cutting instrument
Materials:
Legend sedan lip
4 x 1.5inch hex bolts
6 X 1 inch hex bolts
1" plastic pipe
scissors and material of your choice
Locktite or other outdoor adhesive
Black spray paint (optional)
At least 1 square foot of flexible rubber or plastic

Method:
First, I set up my lip on a professional work bench

I then proceeded to cut the lip right down the middle (this maybe hard for those in an area where these are hard to find) I got mine for $12 and I'm ok with the stock lip, so I didn't mind.

Cut it right down the middle of the clip, like so:

This one inch plastic pipe from Home Depot is a perfect fit

I then eyeballed a 10 to 12 inch of pipe and cut it

I put the pipe between the clip and the top of the lip to test it out(you can see where this is going)

I used some thing to measure equal lengths from the cut and drilled 2 holes in the lip (you actually need 4, as you'll see later)

I measured off a two inch gap, and held it in place

I then marked where the edges and holes lined up on the pipe. (4 holes would be better here)

Like so:

I then drilled holes in the pipe, and run my long bolts through the lip and pipe (These bolts are long so 1.5 inch bolts would do)

This is where i realized there was some play and I only had 3 long bolts so I used a screw on one side

Again this is where your creativity comes in to cover the gap. I used a fabric softener bottle. I suggest a piece of black rubber with a little elasticity.

I pre-bent the plastic to the shape of the bumper, sanded the area to be glued, and attached it.(use a bigger piece of sand paper)

Because mine was in bad shape, I sanded the lip and painted everything flat black

I then removed the bumper (referring to this DIY)

I removed the stock lip

and attached the new lip(referring to this DIY). I used a heat gun on the corners for a flush fit.

Then re-installed the bumper
Im sure other members have ways to make this 100 times better. For the middle piece I would suggest a black, sturdy rubber, because constant scraping will take the paint off, and you don't want your purex label showing
Like I said, your creativity and neatness will determine the final look.And the end result:


This is after 3 days of constant, somtimes severe scraping and dragging. Some paint came off, but its holding up very well.
I have some black vinyl, a piece of black rubber, black electrical tape, and black 'duck' tape from the dollar store, to make it more neat and even, but I'm rocking the frankenstein/prototype look for now. Ill edit with pics when I do that.
This is simply an idea/diy that can be improved upon by the more fabrication savy + plus its as easy as 1 2 3
Hopefully this helps those thinking of making their Legend sedan lip flush with the edges of the bumper
[EDIT] With rubber insert and gloss black

[EDIT] With bondo and flat black


Comment