

I figured since I did a DIY on the Headlights, I might as well do one on the corners as well. Here it is:
90-91 Accord USDM Black Housing Side Markers
Materials Needed:
Flat Black spray paint (High-temp, BBQ paint works best)
400-Grit Sand Paper
Silicone Sealant (Clear works fine)
Name Brand Masking Tape
Towel
Oven mitts
Optional: Yellow #9024 or Amber #9023 Krylon Stained Glass Paint
Tools Needed:
Phillips Screwdriver
Flat Head Screwdriver (Jewelers and normal size)
Clamps
Razor Blade, or Utility Knife, like an Exacto
Oven
1. Remove the side marker retaining screw. Pull out the marker towards the front of the car and unplug the bulb connectors. The corner is sometimes a little stubborn to get off. Just use a flat head to pry it out. Believe me it will come out.
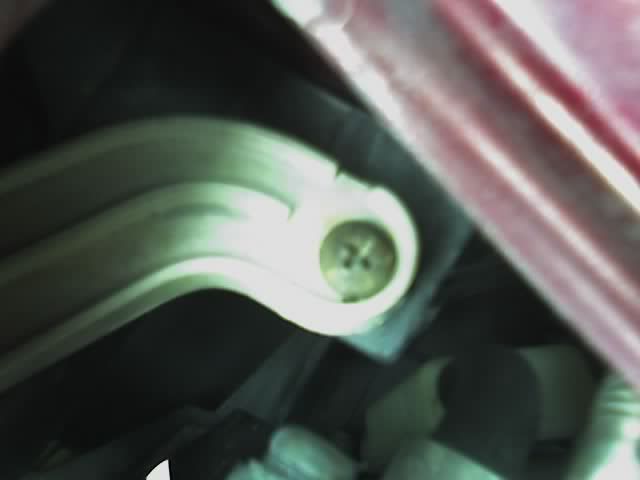
**Edit** It has two prongs in the back that go into the fender and a tab and a screw that goes into the headlight assembly. Try loosening the top bolts for the headlights and push them towards the fender, while pulling on the corner. Once its out you will see what I mean.
Rear prongs.

Front tab and screw.

2. Pre-heat the oven to 225 degrees F. Place one side marker in the oven for 5-8 minutes.DO NOT LEAVE IN THE OVEN ANY LONGER!!! They will melt. Some say heat doesn't work. I care to differ, as the corners and the bumper light housings are melted together, not glued, as most people think.
3. Remove from oven; use extreme caution as the surfaces are extremely hot. Use a jeweler’s screwdriver to pry open the housing. Once you get it started, use a normal size flat-head screwdriver to pry it open the rest of the way. Take your time as not to crack the outer lens. If needed, place the corner back in the oven to loosen the bond further.

4. The outer lens and the lens housing.

5. The lens housing has a transparent lens attached to it by one screw. Remove the screw and slide out the lens.

6. The three pieces of the corner lens.

7. Apply 5-6 coats of flat black paint to the lens housing. You may choose to sand the housing first, but it is not necessary.

8. You may also choose to paint the inner lens yellow or amber. You can find the paint at an arts and crafts store such as Hobby Lobby or Michael's. It’s called Stained Glass Sheer Color. I have only had luck finding the Amber at MisterArt.com. To apply, simply spray ONE coat. Do not apply too much, just thick enough to cover the lens on the under side.

9. Yellow inner lens and black housing. SWEET!!!

10. Apply clear silicon to the outer edge and either tape or clamp the two halves together. Allow ample time for the silicone to cure. I left mine over night.

11. The finished product.

12. On the car.

Bad Pic, but you get the idea. The same steps apply to aftermarket cornes too.
90-91 Accord USDM Black Housing Side Markers
Materials Needed:
Flat Black spray paint (High-temp, BBQ paint works best)
400-Grit Sand Paper
Silicone Sealant (Clear works fine)
Name Brand Masking Tape
Towel
Oven mitts
Optional: Yellow #9024 or Amber #9023 Krylon Stained Glass Paint
Tools Needed:
Phillips Screwdriver
Flat Head Screwdriver (Jewelers and normal size)
Clamps
Razor Blade, or Utility Knife, like an Exacto
Oven
1. Remove the side marker retaining screw. Pull out the marker towards the front of the car and unplug the bulb connectors. The corner is sometimes a little stubborn to get off. Just use a flat head to pry it out. Believe me it will come out.
**Edit** It has two prongs in the back that go into the fender and a tab and a screw that goes into the headlight assembly. Try loosening the top bolts for the headlights and push them towards the fender, while pulling on the corner. Once its out you will see what I mean.
Rear prongs.
Front tab and screw.
2. Pre-heat the oven to 225 degrees F. Place one side marker in the oven for 5-8 minutes.DO NOT LEAVE IN THE OVEN ANY LONGER!!! They will melt. Some say heat doesn't work. I care to differ, as the corners and the bumper light housings are melted together, not glued, as most people think.
3. Remove from oven; use extreme caution as the surfaces are extremely hot. Use a jeweler’s screwdriver to pry open the housing. Once you get it started, use a normal size flat-head screwdriver to pry it open the rest of the way. Take your time as not to crack the outer lens. If needed, place the corner back in the oven to loosen the bond further.
4. The outer lens and the lens housing.
5. The lens housing has a transparent lens attached to it by one screw. Remove the screw and slide out the lens.
6. The three pieces of the corner lens.
7. Apply 5-6 coats of flat black paint to the lens housing. You may choose to sand the housing first, but it is not necessary.
8. You may also choose to paint the inner lens yellow or amber. You can find the paint at an arts and crafts store such as Hobby Lobby or Michael's. It’s called Stained Glass Sheer Color. I have only had luck finding the Amber at MisterArt.com. To apply, simply spray ONE coat. Do not apply too much, just thick enough to cover the lens on the under side.
9. Yellow inner lens and black housing. SWEET!!!
10. Apply clear silicon to the outer edge and either tape or clamp the two halves together. Allow ample time for the silicone to cure. I left mine over night.
11. The finished product.
12. On the car.
Bad Pic, but you get the idea. The same steps apply to aftermarket cornes too.




Comment