
This DIY is for those of you who aren't happy with the Garage Door Trim Lip found here: http://www.cb7tuner.com/vbb/showthre...hlight=ext+lip
There's nothing wrong with that DIY Lip but if your like me and you have aftermarket sideskirts you need something bigger to match the sideskirts length and your broke and cant afford a real lip at the moment and need something bigger than Garage Trim then this is the solution and it can also be found at Home Depot or where i got mine is at Lowes.
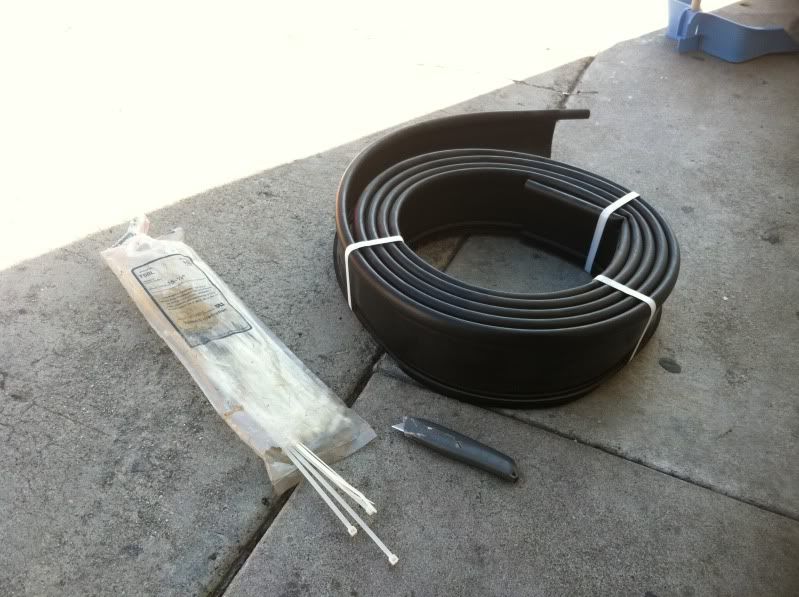
What i will be using for this lip is called Garden Edging and it can be found in the garden area by rolls. I bought a roll of 20 ft. for $10. Garden edge is a lot bigger and is actually stronger than the garage trim. Its not flimsy like the garage trim and its made of plastic like real lips and thats what i was looking for since i wanted something longer to match my sideskirts.
Tools needed:
Garden Edging - Can be found in the garden section
Stock Lip Hardware (Screws)
Razor Blade (New preferably to cut through the plastic easily)
Zip Ties (If you don't have stock hardware)
Blow Dryer (Optional- Helps bend the edging and make it more workable)
Step 1: Uninstall your front bumper and place it somewhere comfortable where you can work on the underside of it
Step 2: Remove your stock lip but keep your stock hardware (Screws) you will be using these for your new lip
Step 3: Measure your front bumper length where the lip will be and make sure to over measure so you have extra length on the new lip so you can give the ends some curves to match the bumper (will post pics of ends later)
Step 4: Measure the Garden Edge to the size in step 3 and cut that size or a little bit bigger just to be safe (I did lol)
lol)
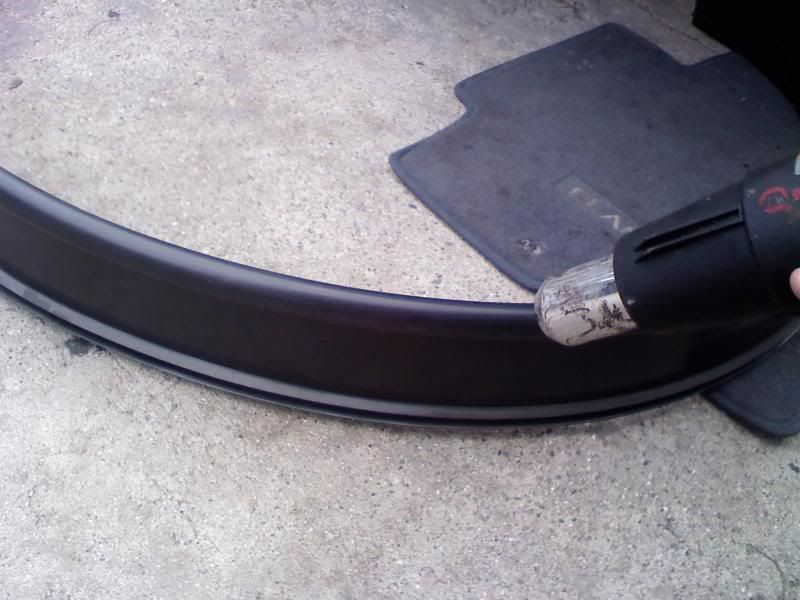
Step 5: Use the blow dryer and start making the lip straight because since its been rolled up in a roll for who knows how long, it will want to curl up on you. This step is optional but will help make it easier to work with.
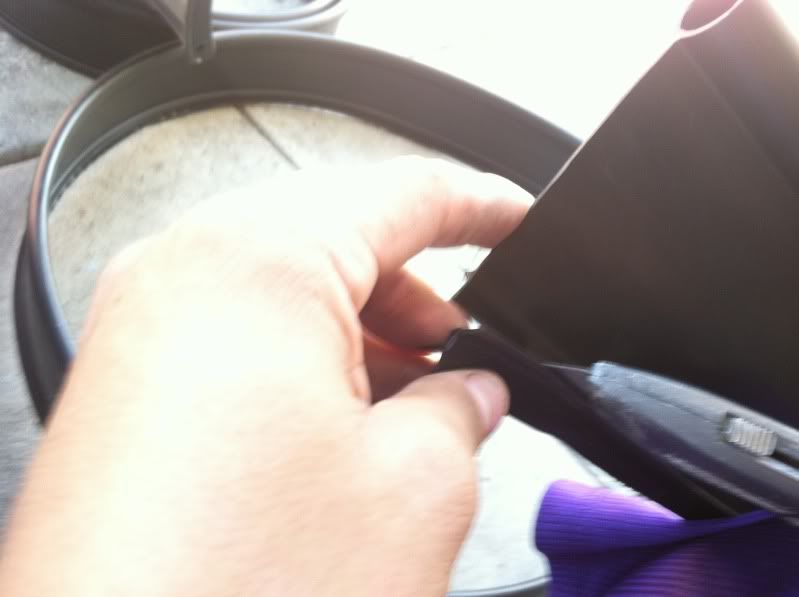
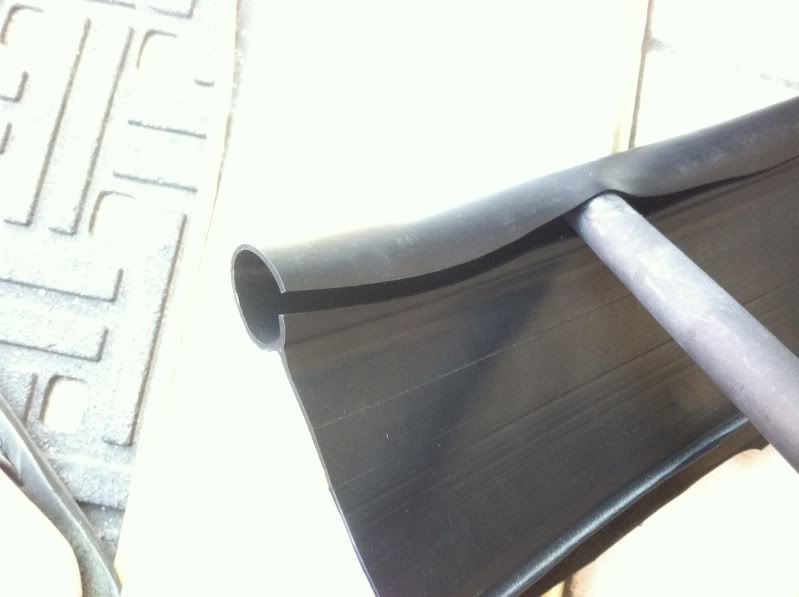
Step 6: Now that you have the edging to a close size and shape its time to cut the bottom portion off the lip to make it look flat. You can just put the razor blade where the two parts meet and follow that line to get a clean cut. Make sure to take your time on this step and have a new sharp razor so that its easier to cut because this cut will make the bottom of your lip and you want to make sure its straight because it will be visible. (See pic below)
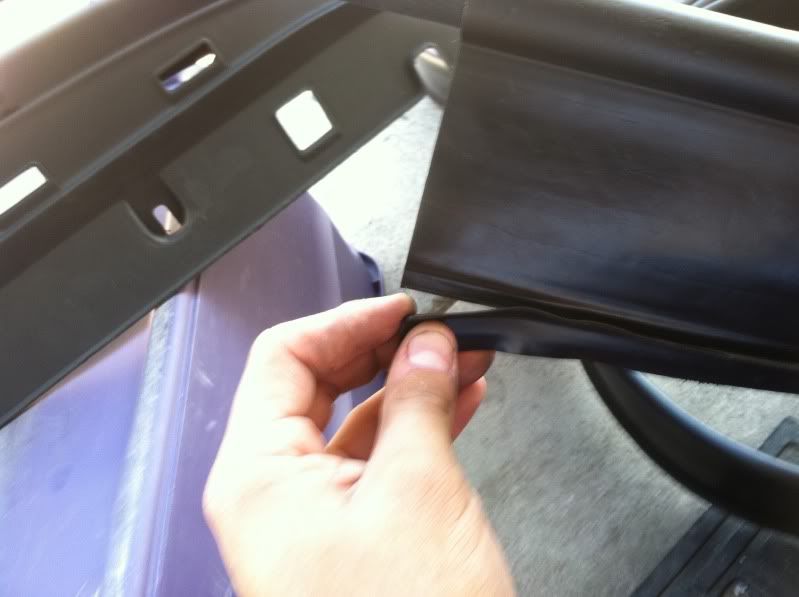
Step 6: Now you have to make the Edging mountable so turn to the back side of the edging and cut a line across the round part. You need to do this to make it mountable. See pics below so you know what i mean. Optional step: use the blow dryer to open the plastic up to make it easier to mount.
Step 7:Now work from the middle out. Start by setting the center of the lip on the center of the bumper and make sure to hold it how you want it to sit on the bumper (Flush), mark where the screw should go and make a hole. I used a screw gun to make the hole. Then install the screw to hold the lip. Now work from the middle out.
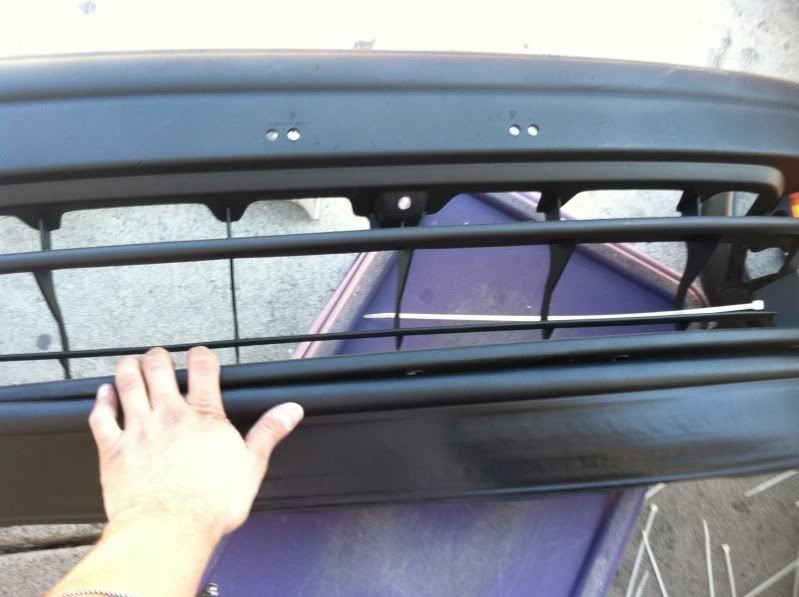
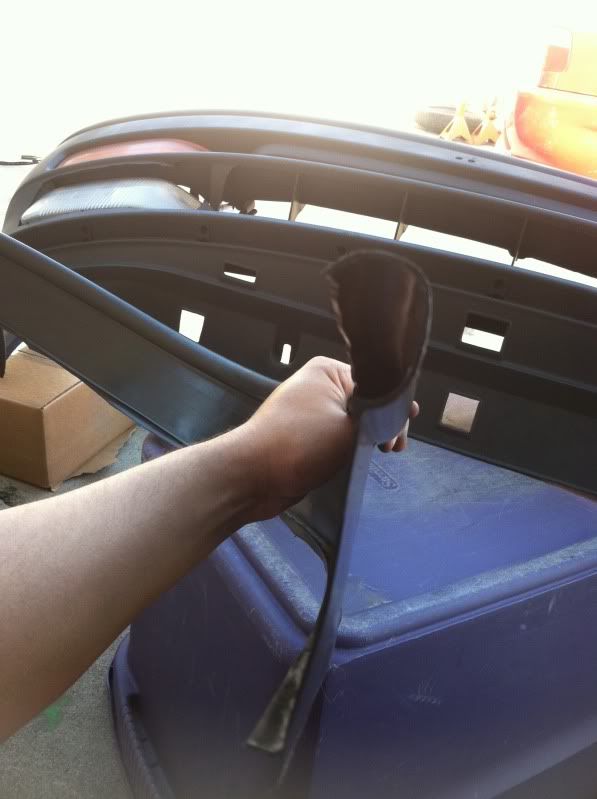
Step 8: Trim some of the back of the edging of so you can access the screw easier. see pic below
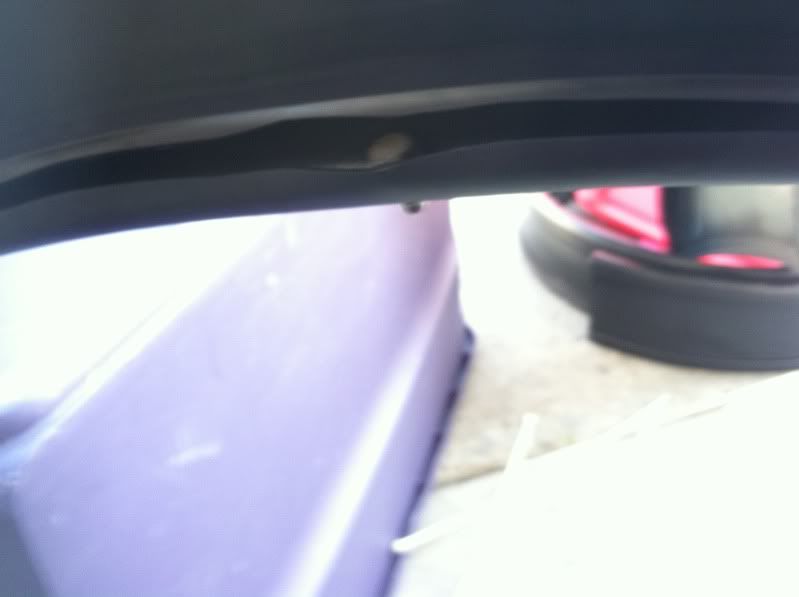
Step 9: Install all screws, I didnt have to use all of them, i did every other and the corners and the ends with zip ties because my bumper didnt come with a OEM lip or hardware, but i found some extra ones that i had. I gave my edge some curve to give it some style, see pic below, you can do a better job than me but this is a temporary lip for me because im waiting to get some money to buy an aftermarket lip and i was tired of seeing my CB without a lip, looks naked lol
Step 10: Optional step, use the blow dryer to give it shape where ever needed.
Step 11: Primer and paint what ever color you want. I didn't paint mine, but im sure it will look a lot better painted.
Enjoy your new plastic lip thats lower and stronger than the garage door trim!
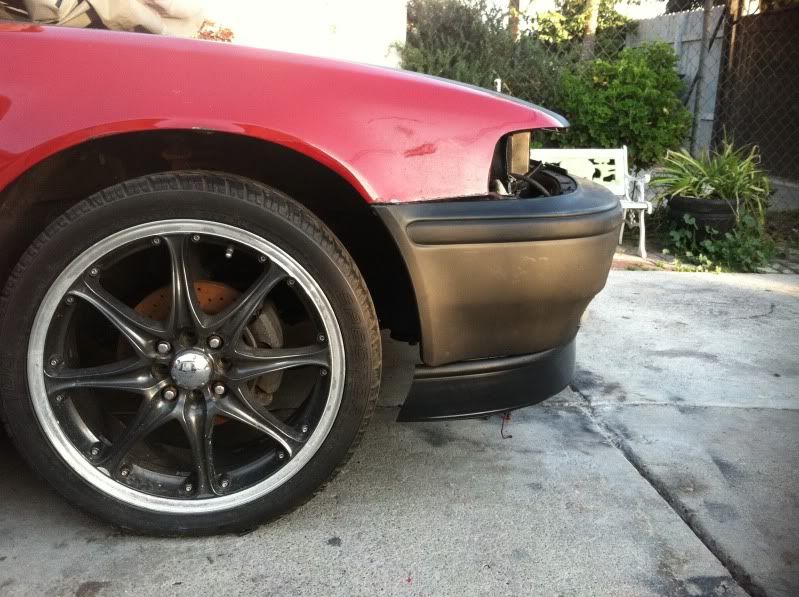
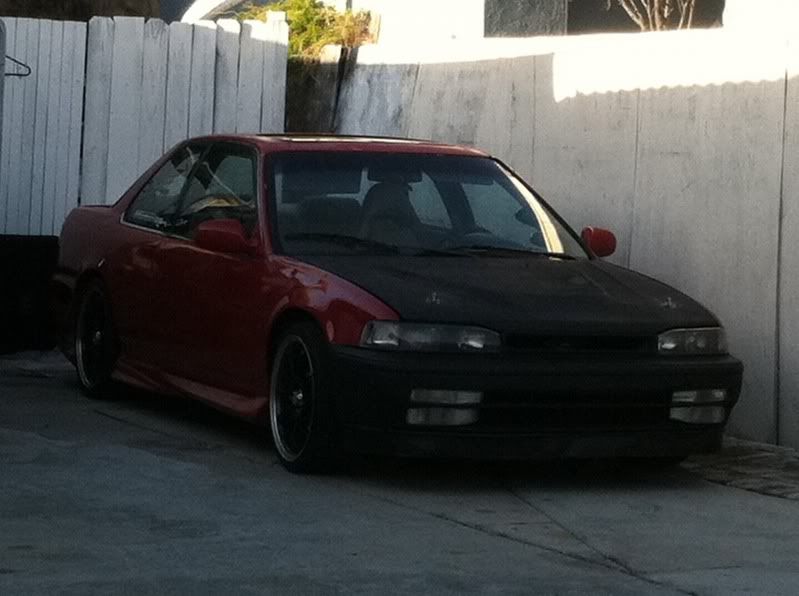
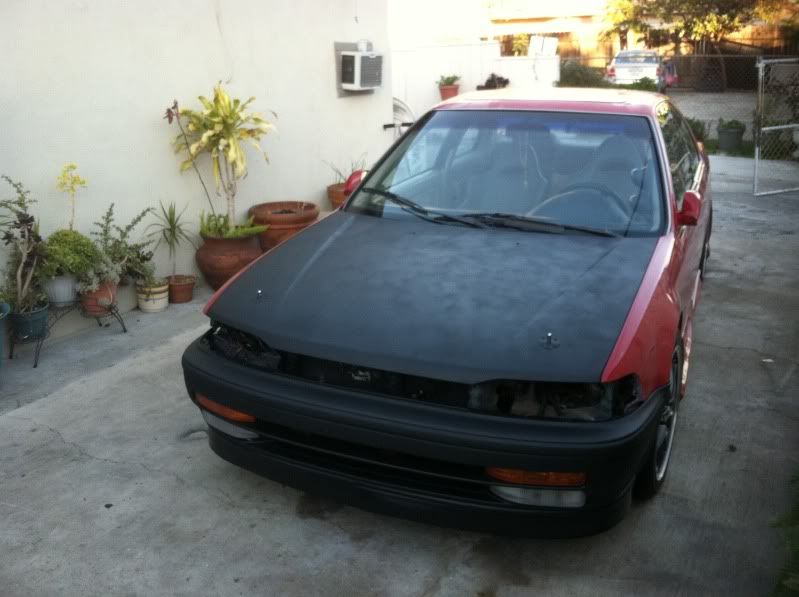
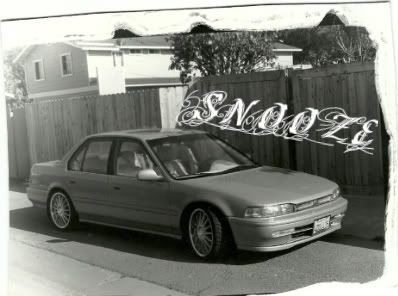
Thanks for looking! Here some pics of it on my ride, please note that the head of my engine is taken apart and its in the trunk so the front of my car is lifted more than it should be, lol another thing this lip is cool because if you dont want it so big, you can trim it down to what ever thickness you need or want. Ok thanks
vented Hood
There's nothing wrong with that DIY Lip but if your like me and you have aftermarket sideskirts you need something bigger to match the sideskirts length and your broke and cant afford a real lip at the moment and need something bigger than Garage Trim then this is the solution and it can also be found at Home Depot or where i got mine is at Lowes.
What i will be using for this lip is called Garden Edging and it can be found in the garden area by rolls. I bought a roll of 20 ft. for $10. Garden edge is a lot bigger and is actually stronger than the garage trim. Its not flimsy like the garage trim and its made of plastic like real lips and thats what i was looking for since i wanted something longer to match my sideskirts.
Tools needed:
Garden Edging - Can be found in the garden section
Stock Lip Hardware (Screws)
Razor Blade (New preferably to cut through the plastic easily)
Zip Ties (If you don't have stock hardware)
Blow Dryer (Optional- Helps bend the edging and make it more workable)
Step 1: Uninstall your front bumper and place it somewhere comfortable where you can work on the underside of it
Step 2: Remove your stock lip but keep your stock hardware (Screws) you will be using these for your new lip
Step 3: Measure your front bumper length where the lip will be and make sure to over measure so you have extra length on the new lip so you can give the ends some curves to match the bumper (will post pics of ends later)
Step 4: Measure the Garden Edge to the size in step 3 and cut that size or a little bit bigger just to be safe (I did
lol)Step 5: Use the blow dryer and start making the lip straight because since its been rolled up in a roll for who knows how long, it will want to curl up on you. This step is optional but will help make it easier to work with.
Step 6: Now that you have the edging to a close size and shape its time to cut the bottom portion off the lip to make it look flat. You can just put the razor blade where the two parts meet and follow that line to get a clean cut. Make sure to take your time on this step and have a new sharp razor so that its easier to cut because this cut will make the bottom of your lip and you want to make sure its straight because it will be visible. (See pic below)
Step 6: Now you have to make the Edging mountable so turn to the back side of the edging and cut a line across the round part. You need to do this to make it mountable. See pics below so you know what i mean. Optional step: use the blow dryer to open the plastic up to make it easier to mount.
Step 7:Now work from the middle out. Start by setting the center of the lip on the center of the bumper and make sure to hold it how you want it to sit on the bumper (Flush), mark where the screw should go and make a hole. I used a screw gun to make the hole. Then install the screw to hold the lip. Now work from the middle out.
Step 8: Trim some of the back of the edging of so you can access the screw easier. see pic below
Step 9: Install all screws, I didnt have to use all of them, i did every other and the corners and the ends with zip ties because my bumper didnt come with a OEM lip or hardware, but i found some extra ones that i had. I gave my edge some curve to give it some style, see pic below, you can do a better job than me but this is a temporary lip for me because im waiting to get some money to buy an aftermarket lip and i was tired of seeing my CB without a lip, looks naked lol
Step 10: Optional step, use the blow dryer to give it shape where ever needed.
Step 11: Primer and paint what ever color you want. I didn't paint mine, but im sure it will look a lot better painted.
Enjoy your new plastic lip thats lower and stronger than the garage door trim!
Thanks for looking! Here some pics of it on my ride, please note that the head of my engine is taken apart and its in the trunk so the front of my car is lifted more than it should be, lol another thing this lip is cool because if you dont want it so big, you can trim it down to what ever thickness you need or want. Ok thanks
vented Hood


Comment