
I did this on my first Accord aver 10 years ago and recently just dug up the pics so I figured I'd do a quick write-up on it. I apologize for the crappy pics, but they're good enough to give you the idea.
Parts Needed:
Bondo
Sandpaper of various grits (rough 80 grit up to super fine 1000 grit)
OEM interior power mirror covers
Tweeters
Glossy Black (or color of your choice) spray paint
Aluminum foil
Masking tape
Tools needed:
Drill and drill bit about 1/16" dia.
And some patience helps too
All steps listed should be done equally for both sides and it helps if you do both sides simultaneously as you go. This way they are both at the same steps and will be completed at the same time.
First start out by removing the black covers from the door. They just pop out but be careful when prying them away because the tab on the backside can break off if you use too much force. The top should come out first and then the bottom.
Now, use the drill and drill bit to make a small hole in the center of it for the speaker wire to run through. The hole should be only slightly larger than the diameter of the wire. Do not use to large of a drill bit.
Go ahead and use some sandpaper about 800-200 grit to "rough up" the whole front of the panel. It will look like crap now, but will help blend things together better later. Try to avoid deep gouges but make sure it is fairly rough.
Cover the complete grille of the tweeter with masking tape. Any area that you do not want to get covered with bondo/spray paint should be covered with masking tape.
Now grab the aluminum foil, the tweeter, and the masking tape. Tie a knot in the speaker wire about 2" away from where it connects to the tweeter. Run the speaker wire from the tweeter through the hole you drilled. This way if you tug on the speaker wire from the backside, it will not pull the speaker wires off of the tweeter. Any stress the wire sees will not "unplug" the tweeter and this is an important step since this mod is permanent!!! Use the aluminum foil to semi-shape how you want the speaker pod to look. Keep in mind there will be a layer of about 1/16"-1/8th" of bondo over top of it. You may use a little bit of masking tape to hold the foil in place, but it will usually keep its form pretty well. When making the shape, keep in mind how the panel fits in the car, and the angle you want the tweeters to be mounted. Now is the time to make any and all adjustments to the shape you want. Get it how you want before moving on.
Since you have the general shape and the tweeter masked off, It's time for the first coat of bondo. Put a light coat of bondo overtop of the foil and enough to belnd it into the panel and some over the sides of the tweeter, but NOT over the grille part of the tweeter.
Wait for it to dry and do some light sanding with some 80 or 100 or 120 grit to get the shape pretty much done. It does not have to look perfect but you want the general shape as you want it. It should look something like this:


Now, is where the patience comes in. You need to get it as smooth as possible and make sure there's no ruts or scratches visible. Gloss paint shows EVERY defect so it is in your best interest to get rid of ALL defects!
Sand, sand, and then sand some more. When you're done sanding, sand even more. If needed, add another coat of bondo and gues what....sand it down. As you're sanding, you need to work up on grit. Gradually work your way up to the ultra fine grit. You need to have all scratches completely removed before getting up to the ultra fine grit. The ultra fine grit is only used to smooth it out. It will not get rid of defects.
When you think you're done, it may help to spray a very light coat of paint on it and let it dry. Then go back with some fine sandpaper (about 400-600 grit) and lightly sand. The high areas will get down to bondo quickly while the ruts (low spots) will remiand black (or whatever color you sprayed it). This helps you to see any defects that you couldn't see before. Like this:


Guess what, sand, sand, and sand some more.
After you are absolutely sure it is free from all defects, it's time to paint it. Make sure you did not sand away the masking tape covering the speaker grille. If so, re-tape it so you don't paint the speaker.
Clean it up nicely from all dust, debris, dirt and so on.
Spray it with a light coat of paint. Let it dry
If it looks perfect, go ahead and spray it with another light coat. If there are any defects, you can use the fine or ultra fine grit to sand them out. but be careful and make sure it is completely dry before touch it or putting any sandpaper to it!
Add however many more coats you want until you're happy with the finish. 2 coats should be plenty though.
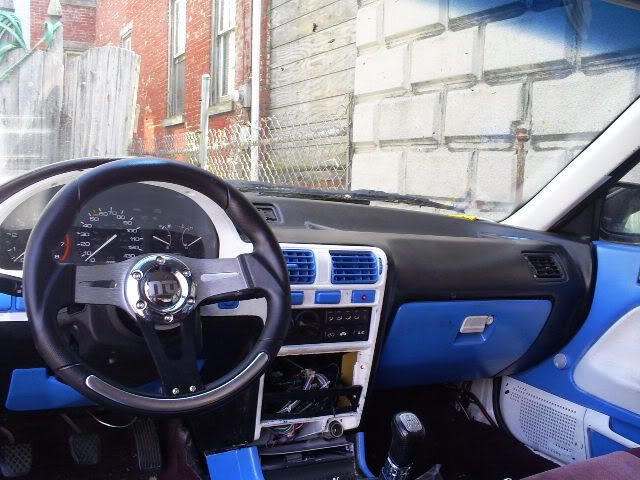
I don't have any "finished" pics, but this is the closest one I have. It shows how it should basically look "factory" by the time you're done. I wanted to do this to help with the killer stereo I had, but wanted to keep it OEM looking:

When you're done and it is completely dry, remove the masking tape from the grille and reinstall the pod.
To hook up the speaker wire, you may need to reomove the door panel which I will not be going into here but I'm sure the info is on this site if you look. Also, it is advised that you use the proper crossover or at the very least a capacitor to keep from blowing the tweeters. You just spent a lot of time making these nice pods and they are permanent so it would suck to blow the tweeters shortly after doing all of this.
Also, the tweeters I used were "one piece". They did not have a mount cradle but there are tweeters available that use a "two piece" design so you could do everything I mentioned above but leave the tweeter completely out until it comes time to install them in the car. If you can, use the "two piece" tweeters so you can replace them down the road easily if they should blow. Either way is fine. I had no issues with mine and if you do it right, you won't have any issues with yours either.
Good luck and I'll try to answer any questions if you have any, but it's pretty straightforward and mainly just takes time and patience.
Parts Needed:
Bondo
Sandpaper of various grits (rough 80 grit up to super fine 1000 grit)
OEM interior power mirror covers
Tweeters
Glossy Black (or color of your choice) spray paint
Aluminum foil
Masking tape
Tools needed:
Drill and drill bit about 1/16" dia.
And some patience helps too
All steps listed should be done equally for both sides and it helps if you do both sides simultaneously as you go. This way they are both at the same steps and will be completed at the same time.
First start out by removing the black covers from the door. They just pop out but be careful when prying them away because the tab on the backside can break off if you use too much force. The top should come out first and then the bottom.
Now, use the drill and drill bit to make a small hole in the center of it for the speaker wire to run through. The hole should be only slightly larger than the diameter of the wire. Do not use to large of a drill bit.
Go ahead and use some sandpaper about 800-200 grit to "rough up" the whole front of the panel. It will look like crap now, but will help blend things together better later. Try to avoid deep gouges but make sure it is fairly rough.
Cover the complete grille of the tweeter with masking tape. Any area that you do not want to get covered with bondo/spray paint should be covered with masking tape.
Now grab the aluminum foil, the tweeter, and the masking tape. Tie a knot in the speaker wire about 2" away from where it connects to the tweeter. Run the speaker wire from the tweeter through the hole you drilled. This way if you tug on the speaker wire from the backside, it will not pull the speaker wires off of the tweeter. Any stress the wire sees will not "unplug" the tweeter and this is an important step since this mod is permanent!!! Use the aluminum foil to semi-shape how you want the speaker pod to look. Keep in mind there will be a layer of about 1/16"-1/8th" of bondo over top of it. You may use a little bit of masking tape to hold the foil in place, but it will usually keep its form pretty well. When making the shape, keep in mind how the panel fits in the car, and the angle you want the tweeters to be mounted. Now is the time to make any and all adjustments to the shape you want. Get it how you want before moving on.
Since you have the general shape and the tweeter masked off, It's time for the first coat of bondo. Put a light coat of bondo overtop of the foil and enough to belnd it into the panel and some over the sides of the tweeter, but NOT over the grille part of the tweeter.
Wait for it to dry and do some light sanding with some 80 or 100 or 120 grit to get the shape pretty much done. It does not have to look perfect but you want the general shape as you want it. It should look something like this:
Now, is where the patience comes in. You need to get it as smooth as possible and make sure there's no ruts or scratches visible. Gloss paint shows EVERY defect so it is in your best interest to get rid of ALL defects!
Sand, sand, and then sand some more. When you're done sanding, sand even more. If needed, add another coat of bondo and gues what....sand it down. As you're sanding, you need to work up on grit. Gradually work your way up to the ultra fine grit. You need to have all scratches completely removed before getting up to the ultra fine grit. The ultra fine grit is only used to smooth it out. It will not get rid of defects.
When you think you're done, it may help to spray a very light coat of paint on it and let it dry. Then go back with some fine sandpaper (about 400-600 grit) and lightly sand. The high areas will get down to bondo quickly while the ruts (low spots) will remiand black (or whatever color you sprayed it). This helps you to see any defects that you couldn't see before. Like this:
Guess what, sand, sand, and sand some more.
After you are absolutely sure it is free from all defects, it's time to paint it. Make sure you did not sand away the masking tape covering the speaker grille. If so, re-tape it so you don't paint the speaker.
Clean it up nicely from all dust, debris, dirt and so on.
Spray it with a light coat of paint. Let it dry
If it looks perfect, go ahead and spray it with another light coat. If there are any defects, you can use the fine or ultra fine grit to sand them out. but be careful and make sure it is completely dry before touch it or putting any sandpaper to it!
Add however many more coats you want until you're happy with the finish. 2 coats should be plenty though.
I don't have any "finished" pics, but this is the closest one I have. It shows how it should basically look "factory" by the time you're done. I wanted to do this to help with the killer stereo I had, but wanted to keep it OEM looking:
When you're done and it is completely dry, remove the masking tape from the grille and reinstall the pod.
To hook up the speaker wire, you may need to reomove the door panel which I will not be going into here but I'm sure the info is on this site if you look. Also, it is advised that you use the proper crossover or at the very least a capacitor to keep from blowing the tweeters. You just spent a lot of time making these nice pods and they are permanent so it would suck to blow the tweeters shortly after doing all of this.
Also, the tweeters I used were "one piece". They did not have a mount cradle but there are tweeters available that use a "two piece" design so you could do everything I mentioned above but leave the tweeter completely out until it comes time to install them in the car. If you can, use the "two piece" tweeters so you can replace them down the road easily if they should blow. Either way is fine. I had no issues with mine and if you do it right, you won't have any issues with yours either.
Good luck and I'll try to answer any questions if you have any, but it's pretty straightforward and mainly just takes time and patience.


 **Don't b scared be prepared for the worst**


Comment