
Since alot of members are asking whats involved in wire tucks and it soes seem like everyone wants to tuck their CB's and there is no guide on what to do. It's quite simple yet time consuming and there are different methods as to how to do it. Here is my method (note that to do not have A/C or PS) and I have 90 cb no ABS
THERE ARE 3 TYPES OF TUCKS
1.BASIC
2MILD
3.EXTREME
I went basic/mild tuck route, enjoy
I'AM NOT RESPONSIBLE IF YOU MESS YOU WIRING UP
USE RUBBER GROMETS IF GOING THROUGH UNGUARDED HOLES THIS IS A WAY YOU DON'T GET SHORTS
Stuff needed
Split loom
Push mount tab zipties
scissors
electrical tape
Hobby knife
10mm socket
12mm socket
19mm socket
Ratchet wrench.
I don't have pics of the begining steps.
I started on the driver side
1. Remove the clips from the chasis that holds the wire harness.
2. Cut the tape or twist the loom by hand first for easier cutting (prevents cutting to deep in the loom nicking wires)
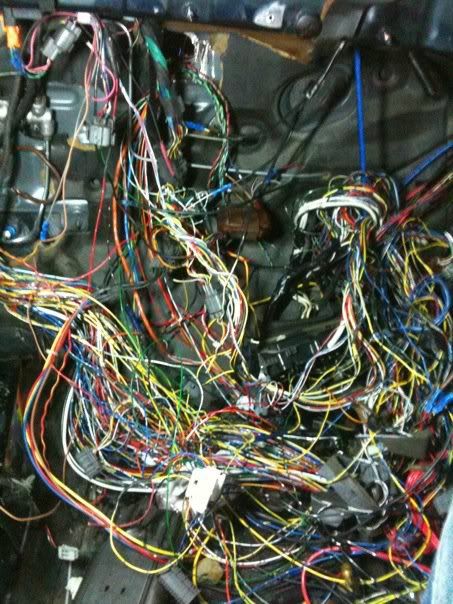
3. Now that you have wires out of the loom start organizing them. (not the best pic but you have an idea)

4. remove the fenders
5.Now that you organized your wires, remove the cowl unplug and remove the wind sheild wiper motor 2 10mm bolts for the wiper motor, to remove the cowl you'll need to remove the wiper arms 2 19mm bolts.
This how I tucked my wires for the driverside, I cut the rubber gromet wide enough to fit all the wires through

Then I pushed them through the water drainage hole( don't mind the hole above my mess up lol)


If you choose to keep AC and other stuff all wires and plugs will be routed the same way
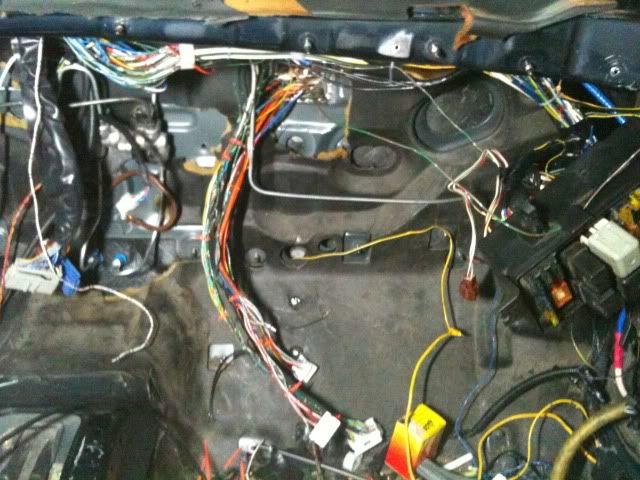
When done the driver side should look like this.

Placement of the resistor box varies on you
1.Shock tower in it's original location
2.Behind the shock tower
3.behind or under the intake manifold
4.inside the cabin
Passenger Side
The first 3 steps are repeated.
This is how I routed my passenger side wires.
Remove the fuse box it should look like this when done

6.Remove the glove box to get access of the AC condensor and blower motor. Remove the 6 10mm bolts that hold them in place.
7.With the fuse box removed and AC condensor and blower motor,pull the passenger harness and fuse box harness through the fire wall.
Once you have the light harness in the cabin put the fuse box wires back in the bay ( it made taping and looming easier for me)

I chose this gromet to route the wires through. Cut it wider so ypu can fit the wires through. push the plugs through and gently tug the wires through.
(should look like this )

Then loom and tape and done

Fog harness also added. Widen gromet hole

Fog harness does not need to be cut or extended
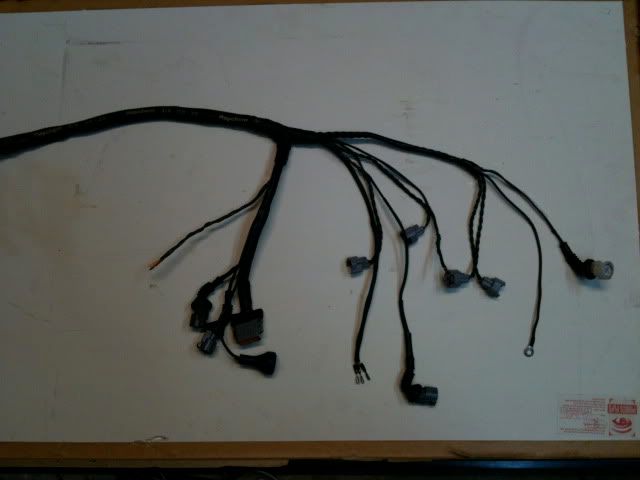
This tuck is basic,the fuse box is is still in the bay. The Engine harness is still mounted on the shock towers just hidden better.
The only part of the harness that needs to be extended is the hi beam harness. extend them about 8in.
To hide the light harness you can choose one of 2 ways. 1. through the hole near the light under the fender or 2. under the headlights.
The hole near the headlights


Under the headlights (not a good pic)

If you have jdm headlights then get a conervsion harness or have one made. Hi beams have to be extended as well on the conversion harness.
Password jdm light conversion harness

When I start my engine harness tuck a DIY will be made
ANY ?'s just ask on the diy I will respond. I'm going more mild and extreme and will add on.
LMK What you guys think
__________________________________________________ ______________________
[B][JUNCTION BOX DELETION/B]
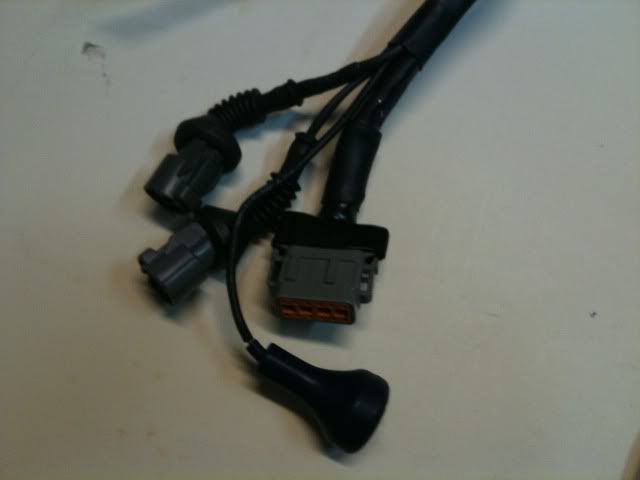
For those that don't know what a juction box is here is a pic
Reason for this deletion of junction box is that the box couldn't be mounted properly
In my case how I'm tucking I needed to cut them. It's absolutely fine to cut, the junction boxes are just grounds.
Stuff needed
WIRE CUTTERS
BRASS CONNECTORS
SHRINK WRAP
DRILL
1/4 DRILL BIT
2 Self tapping screws
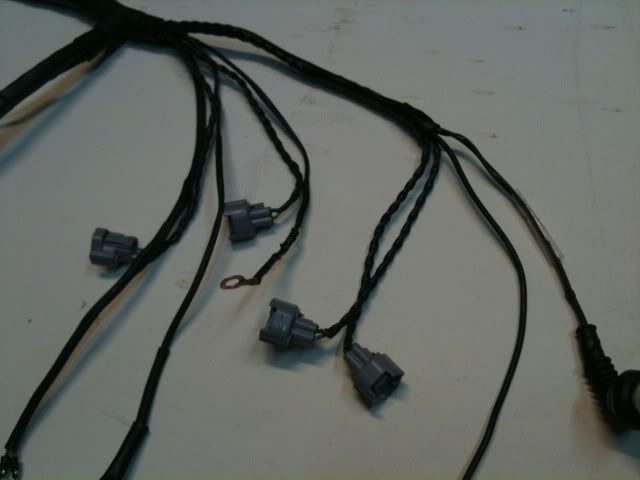
So now that you have your junction boxes cut, strip each wire with wire stripper's. Then twist all the ground wires together.
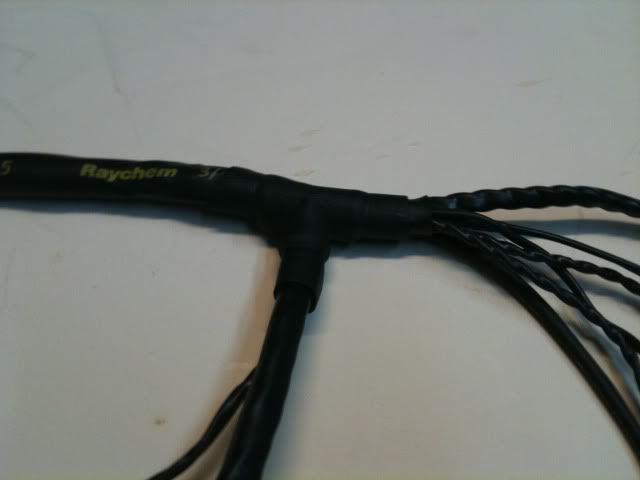
Now get your brass connector

I chose this style connector
Clamp the connector on on the exposed ground wires

make sure the connector is on tight and shrink wrap
You can choose where you want mount the your new ground. Drill and secure.
If you choose to delete this make sure yotr wires are organized first.
After you finish. test your lights and make sure thet work

__________________________________________________ _________________________________
Routing VSS,CC,AND ENGINE HARNESS
For those that are going a more extreme tuck. Here is what I did, I took all of the wires/plugs and routed them through the fire wall on the driver side.

No grab the CC etc. them up and Ziptie them and find a place under the dash to hide them

I will have a pic soon of where I hid them
__________________________________________________ ________
Depining a engine harness and looming
Tools needed
1. a mini screw driver set
2.plug harness bible
3.expandable wire loom
4. heat shrink tubing
Make a harness plug bible if you have bad memory. there are alot of wires to keep track of

To get started you need to pop the white plastic cap out of the plug


Then you need to push the the pin up and pull


THERE ARE 3 TYPES OF TUCKS
1.BASIC
2MILD
3.EXTREME
I went basic/mild tuck route, enjoy
I'AM NOT RESPONSIBLE IF YOU MESS YOU WIRING UP
USE RUBBER GROMETS IF GOING THROUGH UNGUARDED HOLES THIS IS A WAY YOU DON'T GET SHORTS
Stuff needed
Split loom
Push mount tab zipties
scissors
electrical tape
Hobby knife
10mm socket
12mm socket
19mm socket
Ratchet wrench.
I don't have pics of the begining steps.
I started on the driver side
1. Remove the clips from the chasis that holds the wire harness.
2. Cut the tape or twist the loom by hand first for easier cutting (prevents cutting to deep in the loom nicking wires)
3. Now that you have wires out of the loom start organizing them. (not the best pic but you have an idea)
4. remove the fenders
5.Now that you organized your wires, remove the cowl unplug and remove the wind sheild wiper motor 2 10mm bolts for the wiper motor, to remove the cowl you'll need to remove the wiper arms 2 19mm bolts.
This how I tucked my wires for the driverside, I cut the rubber gromet wide enough to fit all the wires through
Then I pushed them through the water drainage hole( don't mind the hole above my mess up lol)
If you choose to keep AC and other stuff all wires and plugs will be routed the same way
When done the driver side should look like this.
Placement of the resistor box varies on you
1.Shock tower in it's original location
2.Behind the shock tower
3.behind or under the intake manifold
4.inside the cabin
Passenger Side
The first 3 steps are repeated.
This is how I routed my passenger side wires.
Remove the fuse box it should look like this when done
6.Remove the glove box to get access of the AC condensor and blower motor. Remove the 6 10mm bolts that hold them in place.
7.With the fuse box removed and AC condensor and blower motor,pull the passenger harness and fuse box harness through the fire wall.
Once you have the light harness in the cabin put the fuse box wires back in the bay ( it made taping and looming easier for me)
I chose this gromet to route the wires through. Cut it wider so ypu can fit the wires through. push the plugs through and gently tug the wires through.
(should look like this )
Then loom and tape and done
Fog harness also added. Widen gromet hole
Fog harness does not need to be cut or extended
This tuck is basic,the fuse box is is still in the bay. The Engine harness is still mounted on the shock towers just hidden better.
The only part of the harness that needs to be extended is the hi beam harness. extend them about 8in.
To hide the light harness you can choose one of 2 ways. 1. through the hole near the light under the fender or 2. under the headlights.
The hole near the headlights
Under the headlights (not a good pic)
If you have jdm headlights then get a conervsion harness or have one made. Hi beams have to be extended as well on the conversion harness.
Password jdm light conversion harness
When I start my engine harness tuck a DIY will be made
ANY ?'s just ask on the diy I will respond. I'm going more mild and extreme and will add on.
LMK What you guys think
__________________________________________________ ______________________
[B][JUNCTION BOX DELETION/B]
For those that don't know what a juction box is here is a pic
Reason for this deletion of junction box is that the box couldn't be mounted properly
In my case how I'm tucking I needed to cut them. It's absolutely fine to cut, the junction boxes are just grounds.
Stuff needed
WIRE CUTTERS
BRASS CONNECTORS
SHRINK WRAP
DRILL
1/4 DRILL BIT
2 Self tapping screws
So now that you have your junction boxes cut, strip each wire with wire stripper's. Then twist all the ground wires together.
Now get your brass connector
I chose this style connector
Clamp the connector on on the exposed ground wires
make sure the connector is on tight and shrink wrap
You can choose where you want mount the your new ground. Drill and secure.
If you choose to delete this make sure yotr wires are organized first.
After you finish. test your lights and make sure thet work
__________________________________________________ _________________________________
Routing VSS,CC,AND ENGINE HARNESS
For those that are going a more extreme tuck. Here is what I did, I took all of the wires/plugs and routed them through the fire wall on the driver side.
No grab the CC etc. them up and Ziptie them and find a place under the dash to hide them
I will have a pic soon of where I hid them
__________________________________________________ ________
Depining a engine harness and looming
Tools needed
1. a mini screw driver set
2.plug harness bible
3.expandable wire loom
4. heat shrink tubing
Make a harness plug bible if you have bad memory. there are alot of wires to keep track of
To get started you need to pop the white plastic cap out of the plug
Then you need to push the the pin up and pull


Comment