
I love the work you're doing! You're going way more in depth than a lot of other folks. Do you have any autocross or track days planned for it?
-
-
Thanks Mike! I had plans to join some of my friends for some small events during summer and fall but I have a few minor leaks I need to address before I can commit to anything. As of late I know my rear main has a minor leak. It's obvious down under the engine and there's occasional slip when engaging the clutch.
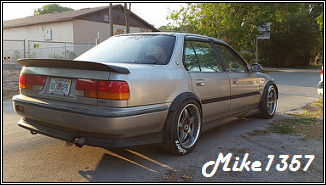
I've seen some cars with minor leaks pass tech inspection (usually the owner cleans up the evidence of it), but I don't want to be that guy dripping oil on a course, endangering myself and other drivers, you know?1993 Accord DX | Rosewood Brown Metallic

Comment
-
July 25, 2017 - CD5 Side Skirts
Decided to take the plunge on some added aesthetics with CD5 side skirts and front mud flaps.
Started by gutting the body mounts and trimming off the lower mounting tab of the CD5 skirt

Drew a cut line 1" from the first angle of the CD5 skirt to allow it to sit closer to the body

This is all that remains of the original CB7 skirt. I only wanted the mounts because the body of the skirt doesn't allow the CD5 one to flush up to where I want it

Some careful measurements and then 3M outdoor double sided tape to attach the CB7 mounts to the CD5 skirt

Clipped up and ready to install

They snapped into place, just like the original ones did. I finished them off up front with the CD5 mud flaps

The only place the skirt is attached is on the top of the old CB7 skirt with the double sided tape. The eleven clips hold it firmly enough that I felt it didn't need any further reinforcement. I drilled two new holes in the CD5 mud flap to mate it with the mounts on the fender and everything screwed together nice and clean.
The center of the skirt does rub on the rear doors at their hinge, but it's very slight so I'm not worried about digging into the plastic.
With the front mud flap being so small, I opted to remove the rears since they didn't match up any more.1993 Accord DX | Rosewood Brown Metallic
Comment
-
Excellent work, as is usual!! I tried this once, but reverted soon after not sure why.
Comment
-
I noticed you're running 225s do you have issues with them rubbing up front and in the rear also? I ask because right now I'm running a set of Avid1 wheels with a 25 offset and a set of 205/55/16s pokes out just a bit but eventually I'd like the next set of wheels to be flush.
Good work as always Anthony.
Henry R
Koni/Neuspeed
1992 Accord LX R.I.P
1993 Accord EX OG since 'o3
Legend FSM

'You see we human beings are not born with prejudices, always they are made for us,
made by someone who wants something' -1943 US War Department videoComment
-
Thanks guys!
Henry, I only rub in front under certain circumstances, like coming up a steep driveway at an angle, which forces the front-most wheel up furthest while it's turned. Under normal driving, it's all free and clear. My front fenders are completely stock with the plastic fender liners still in tact. In the rear, the fenders have been trimmed so there is no more lip at all. Additionally, my camber settings aid in preventing interference. The rear is always the more difficult end with our cars as the fender does not have as much "flare" as the front.
Adjustable camber and fender rolling/trimming are pretty much the answers to all clearance issues when it comes to flush fitment.1993 Accord DX | Rosewood Brown Metallic
Comment
-
-
Thanks Cyborg! I thought it was going to be much simpler going into it based on how I'd seen others do it. However, mocking up the CD5 side skirt over the CB7 one or directly on the car was not very promising. Trimming down the top of the CD5 skirt was the only way to get the result I desired. That lead to having to trim away all but that inch strip of the CB7 skirt. They say "measure twice, cut once" but I probably measured a dozen times before cutting a single thing.
Interesting to note that the measurement at the 6th clip from the front was 1-1/4" from the mounting point to the door edge while it was only 1" at the first and last clips. There's a very subtle concave in the chassis. Lining up that mounting bracket strip of the CB7 side skirt along the plank lines of the simulated wood floor showed the mounts are not in a straight line either.1993 Accord DX | Rosewood Brown Metallic
Comment
-
Wow this is great im inspired
Comment
-
This is seriously some impressive work you're doing. Keep it up!Comment
-
car is looking mean!
1992 Honda Accord EX My Ride Thread H23A BLUE TOP CompleteComment
-
Thank you for the kind words! I'm glad I could pay forward the inspiration that others have brought me!Originally posted by jdmstylz24 View Post
I shall! Thank you!Originally posted by Chrisnick View Post
I think it's the black bumpers and wheels. I've been hearing that a lot lately!Originally posted by Alex13mod View Post
Some of you who I've kept up with through PM's know I've been out of commission since September due to a neck injury (C5-C6 spinal disc herniation). Times were tough, but with proper care and regular therapy I'm on the mend and finally feeling normal again.
The CB7 is still running strong and doing well. My suspension and PS delete made it a challenge to drive in that condition, so I kept it to a minimum.
During this recovery time my itch to tinker has focused away from the car and into my watch collection. I've been rebuilding and modifying Seikos and a couple of Casios (mad JDM yo!). Here's what I've got in front of me now:
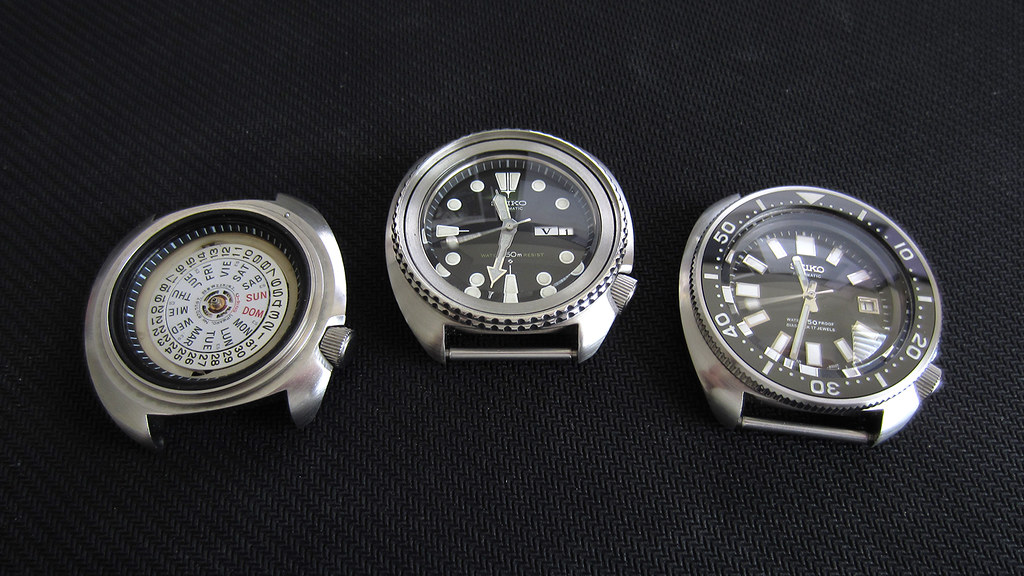
For anyone interested, these are my Seiko 6309 "turtle" divers, left to right showing the progress of the builds.
- Left is a 6309-7040 from 1984. It's waiting for the dial, hands, crystal, bezel and insert.
- Middle is a 6309-7049 (US market version) from 1980. This one is an awesome specimen in fantastic condition. Everything about it is original except for the addition of a domed Hardlex Type 3 crystal designed for the earlier Seiko 6105 diver. I'm just waiting on an OEM spec bezel insert.
- Right is a 6309-7040 from 1980. I just finished this one up. It has an aftermarket dial and hand set intended for the 1965 Seiko 6217 (Seiko's first professional diver). I like the contrast of rectangular hour markers to the roundness of everything else around it. It sports a sapphire crystal modeled after the 6105 Type 2 Hardlex, a coin edge bezel and ceramic insert with lume filled indicies.
Off topic, I know, but this is what's been keeping my occupied while I "take it easy" on my mission to 100%. I'd rather share this with you guys than on a watch forum anyway.
Anyone into watches, here's some others I've completed: www.anthonypalileo.com/watches1993 Accord DX | Rosewood Brown Metallic
Comment
-
P.S. I'm really glad to see all of the other member ride threads continuing to evolve! I want to post on each and every one right now, but there are so many with so many new posts that I'll have to update myself on the builds one at a time!1993 Accord DX | Rosewood Brown Metallic
Comment
-
Apalileo, glad to see that your back and the Accord is well. I was just thinking about what had happened to you a week or so back. Glad to hear that your able to take it easy and get fully recovered. Those are some very nice watches indeed. Not that I really know anything about watches.Comment
-
I always enjoy checking in on this build. Excellent modifications executed with top notch work.
Any shots of the output?Originally posted by apalileo View Post

Form.Follows.FunctionComment

Comment