Announcement

Collapse
No announcement yet.

Water Drainage from Cowl Area to Behind Left Front Fender (Photos?)

Collapse
X
 
  • Filter
  • Time
  • Show
Clear All
new posts

    Water Drainage from Cowl Area to Behind Left Front Fender (Photos?)

    This thread is an offshoot of "Rescuing Ruby"; I am still having water leakage problems into the driver footwell even with a new windshield that should have cured my A pillar leak. The title should get a more specific response.

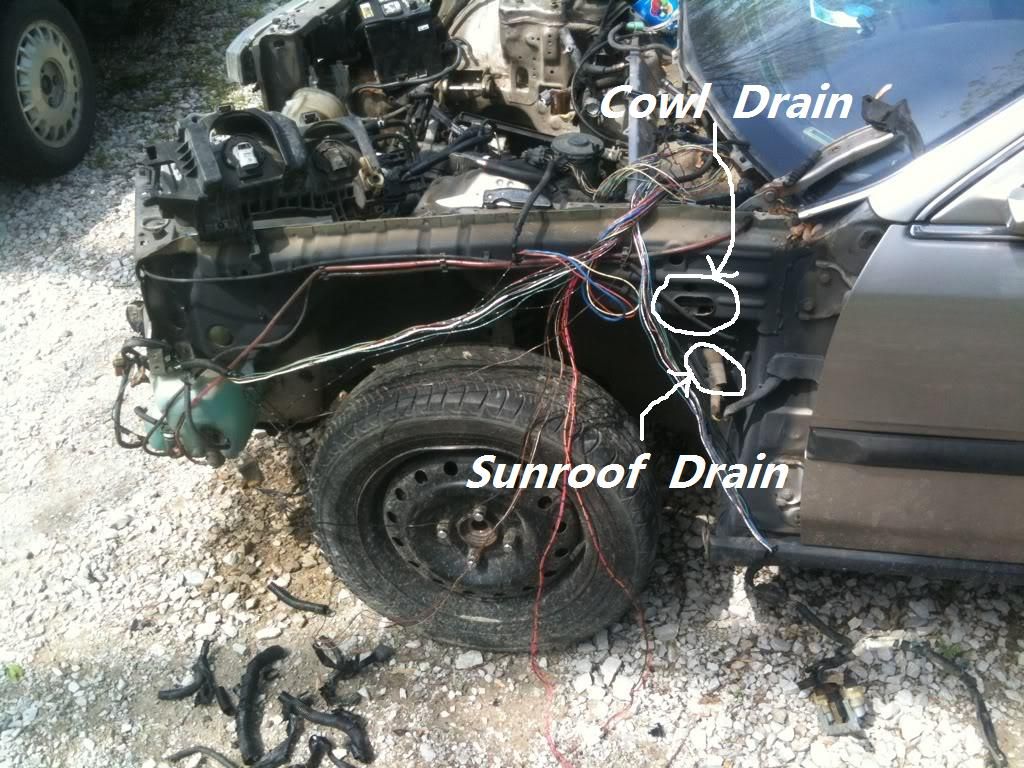
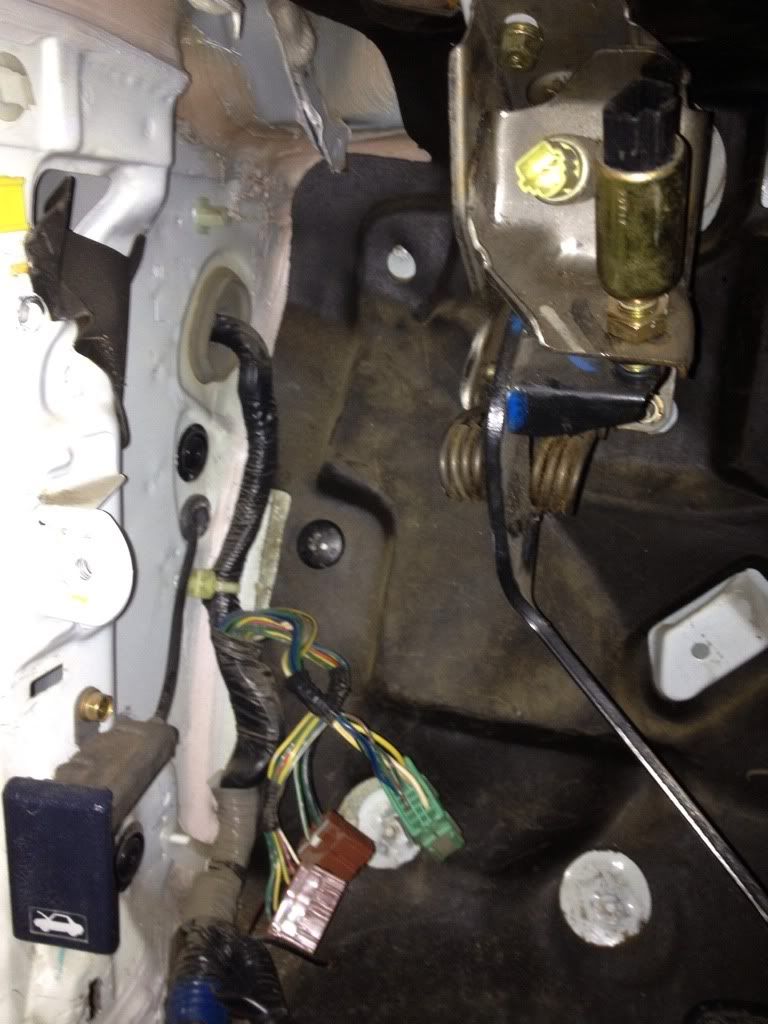
    Does anyone have the left front fender off their car that can take a few pictures of where the water drains from under the cowl to behind the front bumper? Even with the liner partially removed, it is tough to see the drain opening from inside the fender. I don't remember it well enough from when I had it off. I don't want to take my freshly painted fender off (they painted the lip of the fender and bolt heads in the engine compartment) unless I have to. I'm trying to track down all the places water can come from and challenges seams, plugs, grommets, etc. around the driver footwell. Nothing obvious under the cowl with the wiper motor removed. I'll being doing some water pour experiments tonight after taking two days with a hair dryer to dry the carpet and firewall padding. I may go to the JY tomorrow just to get some photos (never know what I might find!).
    Last edited by Fleetw00d; 02-02-2013, 02:18 PM.
    90 LX 4dr 5 spd 396,014 (sold 1/1/2022) - MRT: http://www.cb7tuner.com/vbb/showthread.php?t=201450
    08 Element LX FWD AT 229,000 - MRT: fleetw00d : 2008 Honda Element LX - CB7Tuner Forums

    #2
    Here you go. This when I was did a wire tuck on my wagon. I hope it helps.

    Comment


      #3
      Thanks. What I really need is a close up through the oval hole. From what I recall, the cowl drain actually dumps some inside of that opening and I'm not sure anymore where it goes.

      10:15 pm: Door wire harness grommet looks good. Just poured water in the cowl area and over the A pillar. Most of it doesn't drain through the oval slot, but a hole further forward and an opening a few inches to the rear of the oval (where the piece with the oval hole meets the door jamb. Only poured about a quart, making a mess on the garage floor. Nothing inside so far!?!?

      02/02/2013:
      Snowed some here today, so I didn't head to the JY. I was able to track the leak some. If I pour water along the left edge of the windshield so that all the water goes down toward the engine compartment (without cowl panel on), I get a small trickle coming from above/behind the upper left (when looking at it) mounting boss for the inside fuse box. It looks like there is an opening into the pillar behind the fuse box. Not sure I can get the fuse box out easily. Grommet where door wires go through body appears to be in good shape. I put a small rubber gasket under the left windshield trim screw (water drains over/around it); that doesn't seem to have helped.

      Another request: any one with their interior or parts car stripped that can shoot some photos where the fuse box mounts (with the fuse box out)?

      9:55 PM EST:
      Tried further restricting the flow to only allow it to go into the cowl drain, not to the left and down the pillar (where hinges and door electrical harness are). Still get water inside. Pulled the fuse box away from the mounting surface; water is still trickling in from just above the upper left mount. I'm tempted to beg/borrow/buy a cordless sawzall and cut one open at the JY to see how it is put together. It may be a balmy 30F here tomorrow.

      2/3/2013:
      almostJDM gratiously supplied several pictures, the one below shows the triangular opening (upper left corner) with black fabric(?) partially covering it where the trickle comes in. Tried to find a small camera this morning that I can get in there and look around.


      02/04/2013:
      More water tests. I can pour as much as I want into the drain trough; it drains out through the fender opening - no water inside. Same for pouring along the side of the hood hinge (not letting it go aft from there). No obvious holes, cracks, etc. right at base/corner of the windshield.

      02/05/2013:
      Based on study of photos and sheet metal piece configuration pictures, the leak had to be coming from the seam of several pieces right at the base/left corner of the windshield just behind the hood hinge. As I said above, no obvious holes or cracks. This area was sandblasted before windshield installation and treated/primed, but is below the extent of adhesive used for the windshield. Based on this assessment, I applied some auto body panel adhesive as a sealer over the area last night. I poured about a quart of water over the area this morning (that would have resulted in a leak earlier), nothing inside. I'll try a larger amount when I get home this evening, then put it back together if successful.


      Midnight:
      Success (I think)! Did another water test, still dry inside. Put it all back together. Next rain will be the real test.

      04/19/2013:
      Has been dry ever since.
      Last edited by Fleetw00d; 04-19-2013, 04:40 PM.
      90 LX 4dr 5 spd 396,014 (sold 1/1/2022) - MRT: http://www.cb7tuner.com/vbb/showthread.php?t=201450
      08 Element LX FWD AT 229,000 - MRT: fleetw00d : 2008 Honda Element LX - CB7Tuner Forums

      Comment

      Working...
      X