
Originally posted by FatManChunk
View Post
-
No Doubt, yeah i see what your saying... Don't Solenoid's work like that too (locked until powered)?
-
Some. Not all are created equal. They really isnt a way to tell without actually getting your hands on a set unfortunately. I would see if the seller knew the answer to this question generally youre safe and they are NOT a "locked" style.Originally posted by Co0chysCB7 View PostComment
-
Looking at the picture, it's hard for me to visualize. Could you take an explosive view of the actuator so I'll see how to mount it? Is there a DIY in the that section?
Thanks.Comment
-
In this case, you would use it to pull right?Originally posted by Co0chysCB7 View Post
Also I was thinking of wiring to the alarm, would I need a relay for that? If yes, how is it connected using the relay?
Thanks.Comment
-
Sorry dude i havent been checking this stuff,.. It is just wired to the alarm and I did use a relay.
So if you look at the relay there is a number beside each terminal post.
Terminal #85 - to fused 12v power source
Terminal #86 - to alarm (trunk release output)
Terminal #87 - to trunk release solenoid
Terminal #30 - to chassis ground
Terminal #87a - to chassis ground (or just jump wire to Terminal #30)
Whichever fused 12v power source you use for the relay you can also use for the trunk release solenoid just so its easier and less wires.
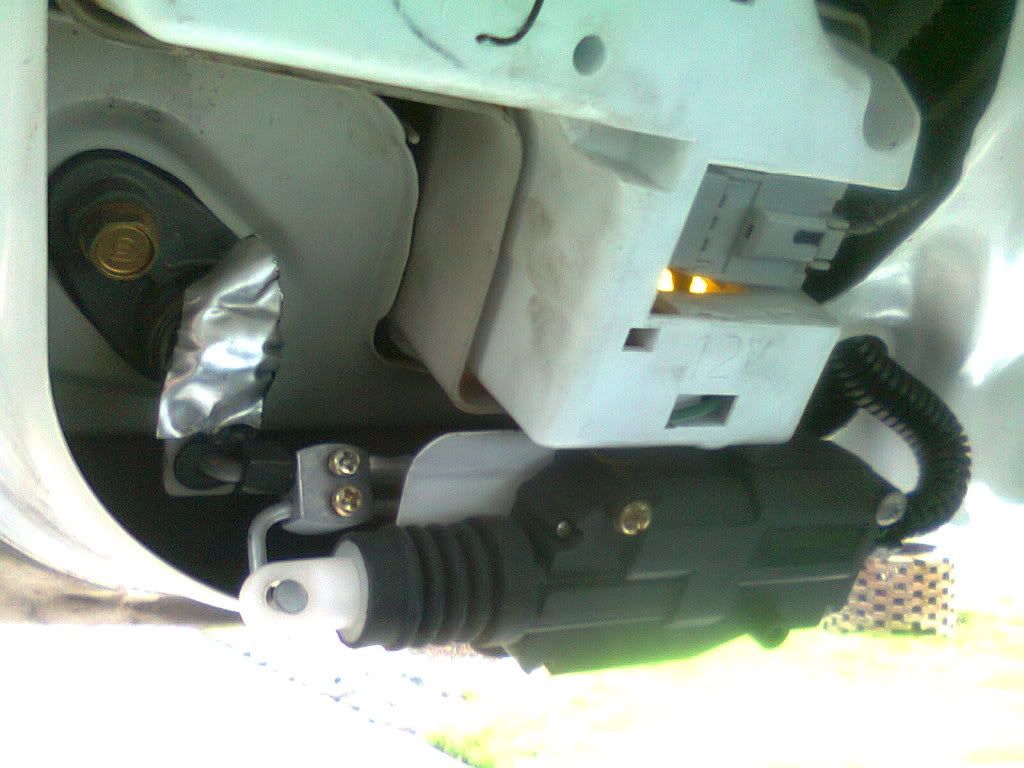
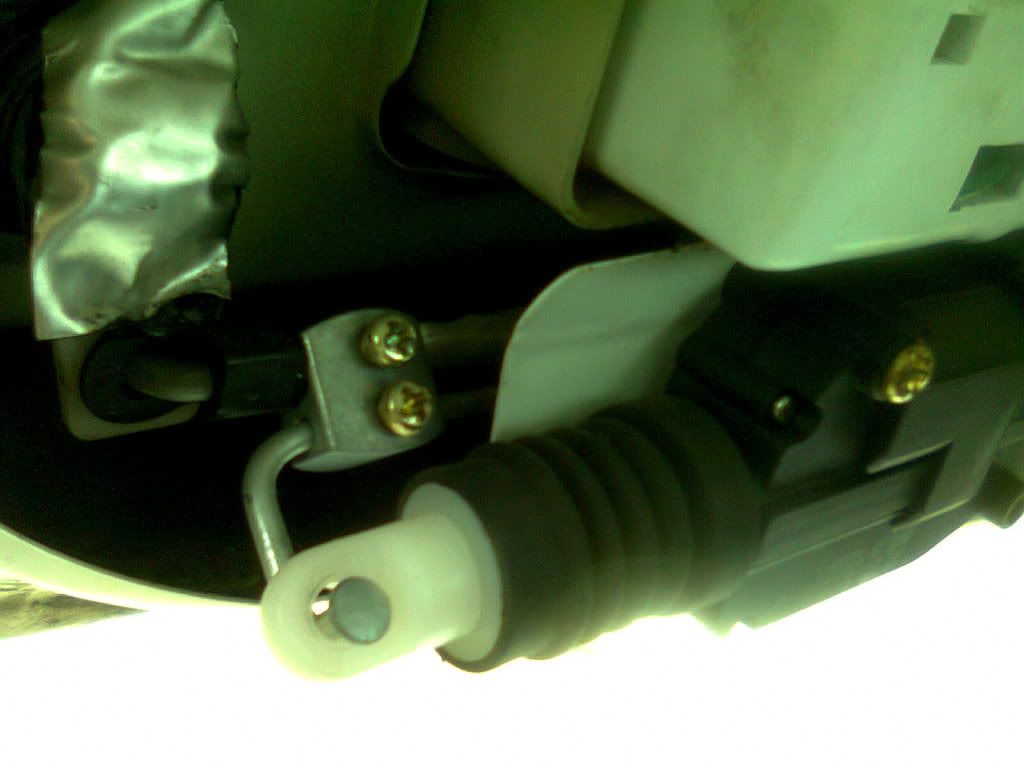
Ill have to take a couple pictures tomorrow, so do you need to see more of the trunk lid to justify exactly where it is mounted?!...Comment
-
From your picture, it seems like you used an actuator, but you said in this post solenoid. I bought an actuator kit, should I buy the solenoid kit now?Originally posted by Co0chysCB7 View Post
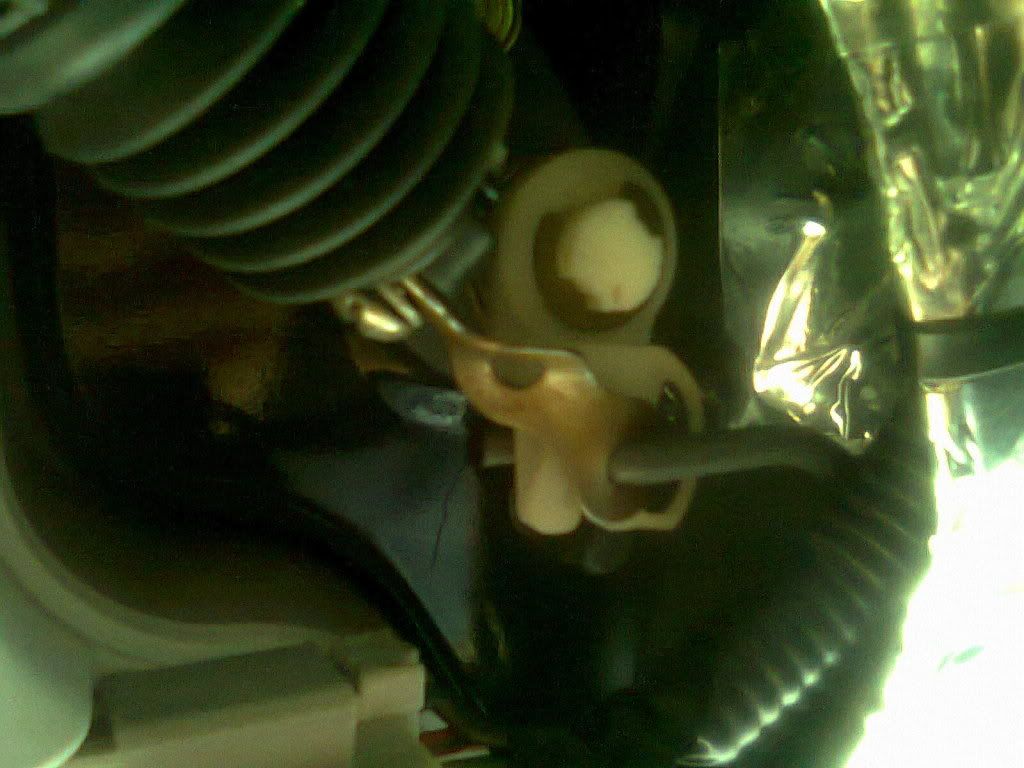
When you mount it, do you mount it so the actuator pulls or push the trunk release rod to open? It looks like in your pictures that the actuator is extended all the way to pull on the rod to pop the trunk.
Thanks.Comment
-
Yes Actuator, sorry for the mix up! in my pictures it shows both push/pull. For my CB7 its a pulling motion, if your trunk is the same style you might want to try to find one like i used in the picture below (middle). Worked Perfect!
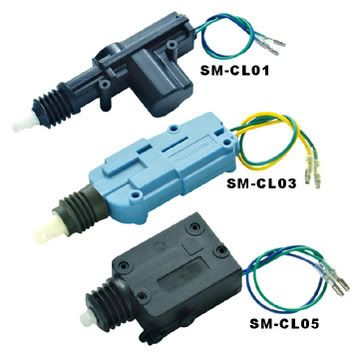
DanCans is a pushing motion and its the same as top actuatorLast edited by Co0chysCB7; 06-16-2012, 02:52 AM.Comment
-
While this will work, 30 and 87a have continuity whe the relay is off so wiring 87a to ground or 30 is pointless. It wastes time, connectors, and wire.Originally posted by Co0chysCB7 View Post
Also switching ground instead of 12v is less than ideal. First it is alway safer to have things work with 12v. It is much harder to accidently activate something by 12v as opposed to ground.
Second, it easier, faster and cheaper to run 1 12v switched wire and ground the actuator instead running 2 wires.Manual Belt Conversion-Variable Intermittent Wipers-Steering Volume Controls-Rear Defroster Antenna-JDM Climate Control-MDX Steering Wheel-Lighted Mirror Switch-CL Trunk Solenoid-CL Homelink-Shaved Hood Squirters-Foglight Wiring Diagram-Door Panel Removal-Puddle Lights-Ambient Lighting-Door Speaker Install-Window Seal and Regulator Cleaning-Prelude Cluster-Mirror Tweeter Pods-Illuminated Window Switch -More Coming SoonComment
-
Okay then, sorry there Lucifer1 i was just telling him how i did it and read it from my Code Alarm Manual,...Originally posted by lucifer1 View PostComment
-
No need to be sorry, I didn't mean it as attack against you.Manual Belt Conversion-Variable Intermittent Wipers-Steering Volume Controls-Rear Defroster Antenna-JDM Climate Control-MDX Steering Wheel-Lighted Mirror Switch-CL Trunk Solenoid-CL Homelink-Shaved Hood Squirters-Foglight Wiring Diagram-Door Panel Removal-Puddle Lights-Ambient Lighting-Door Speaker Install-Window Seal and Regulator Cleaning-Prelude Cluster-Mirror Tweeter Pods-Illuminated Window Switch -More Coming SoonComment
-
So, a noob question. How do you know what the actuator does in terms of push, pull, or both? Is a style designated to the function, or are most of them two way actuators?Comment
-
I'm sure you have it done already but if not,... yes most work both ways, you just simply switch +/- wires on Actuator. you can check and mark wires before install if you have a small 9v battery to power the actuator, that's what I did.Comment
-
Originally posted by Co0chysCB7 View Post
So which side of the trunk are these pictures on? Are they on the driver's side or passenger's side? My entire trunk lid is dynamat so I want to peel the correct side off to do this.
Thanks.Comment
-
Here's my actuator installed. I got the relay and every thing else ready. I'll do that tomorrow. The black stuffs on the trunk is from the Dynamat peel back. Where is the best place for me to tap the constant 12V for the relay? Other than the antenna? I tried testing from the lights plugs and nothing constant 12V I could find.
Thanks.


Hey DanCan,
It looks like your actuator push the OEM rod to pop the trunk? Your actuator looks just like mine. There's a green and blue wire. I think if you ground the green and put 12V to blue, the actuator pulls right?
Thanks.

Comment
-
hey that looks close to what i got. my friend took a T tap and wired it to the constant to the antenna and put a relay in there next to the trunk bars and its wired that way i dont remember where the ground comes from the hardest part was wireing it to a swich and my alarm LOL
Missing MyOriginally posted by evil_demon_01
White -91 LX Sedan - leather converted
Mulberry 91 EX Sedan
The project 92Comment
Comment