
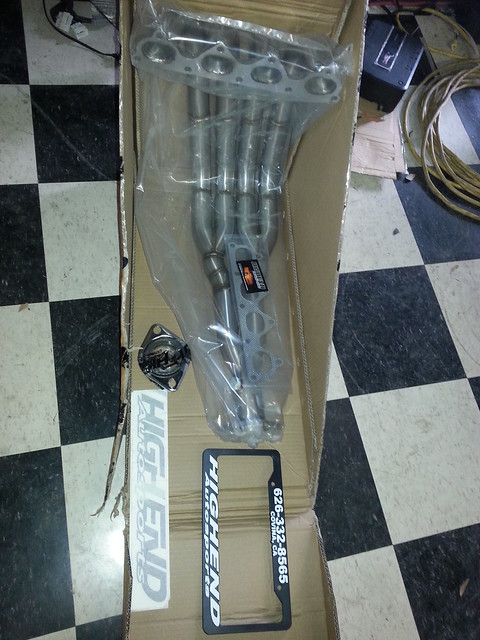
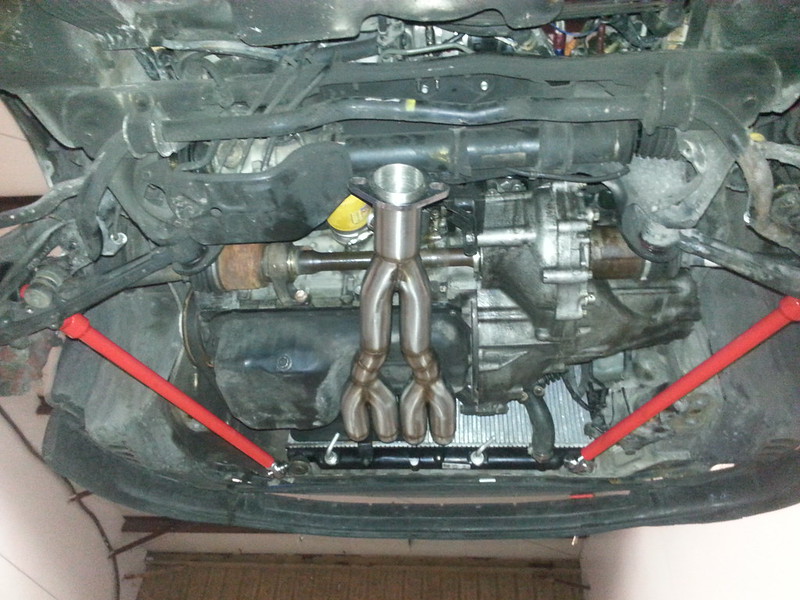
Among the various long tube headers available for the H22, the High End header is a fantastic bang-for-the-buck option with prices just under $400 including shipping. The one piece design pretty much insures that leaking gaskets or slip joints (and their annoying springs) won't be an issue. Included with the header are a head/header gasket, spring bolt flange and gasket as well as a license plate frame and large sticker. No bolts were included for the flange so I had to pick up some spring bolts as well as a spare O2 sensor bung (I'll get to that later). The tig welds looked very nice and definitely better than the welds on some other parts I've purchased. At each weld joint the piping jumps up in size for a smooth transition from the exhaust ports to the 2.5" collector with equally smooth piping bends. Great first impression of the part.
Before I move on to the installation, I will say that I have a traction bar so I cannot comment on the clearances between this header and the stock subframe. You will not be able to maintain the stock front motor mount or the brace that connects the front and rear subframes.
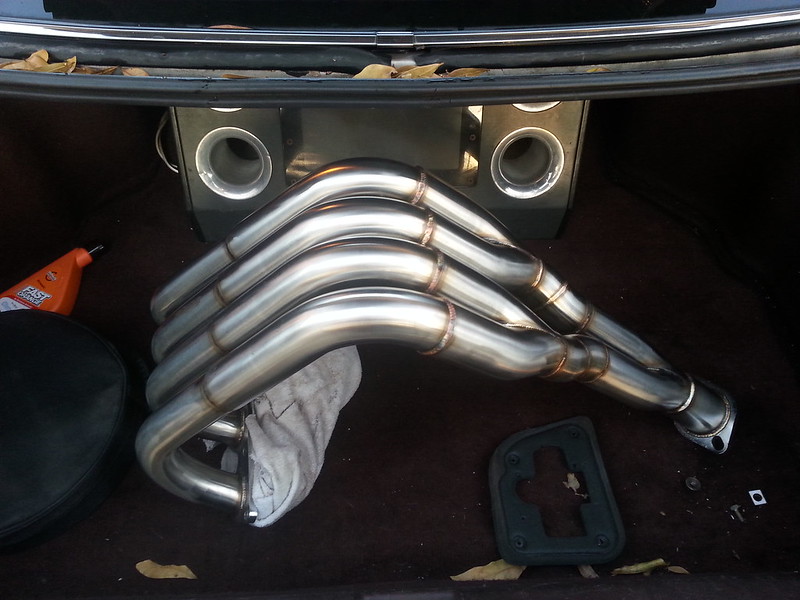
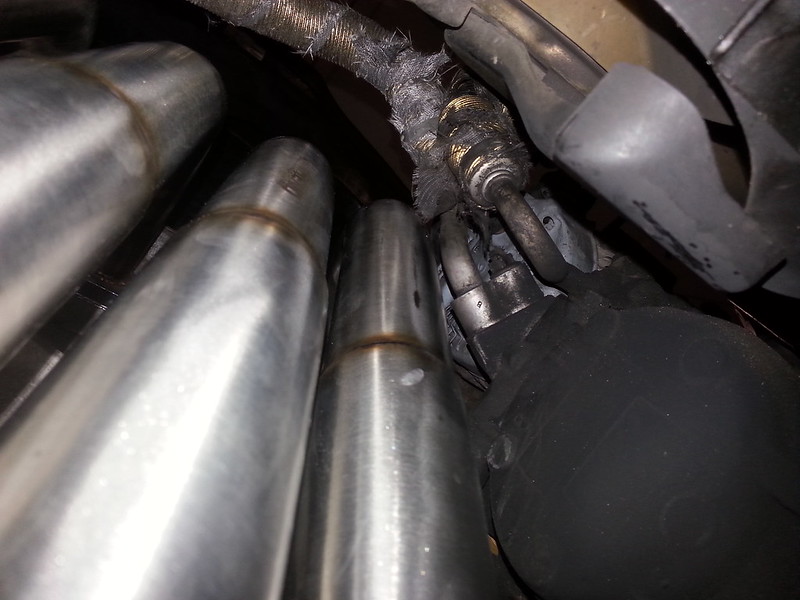
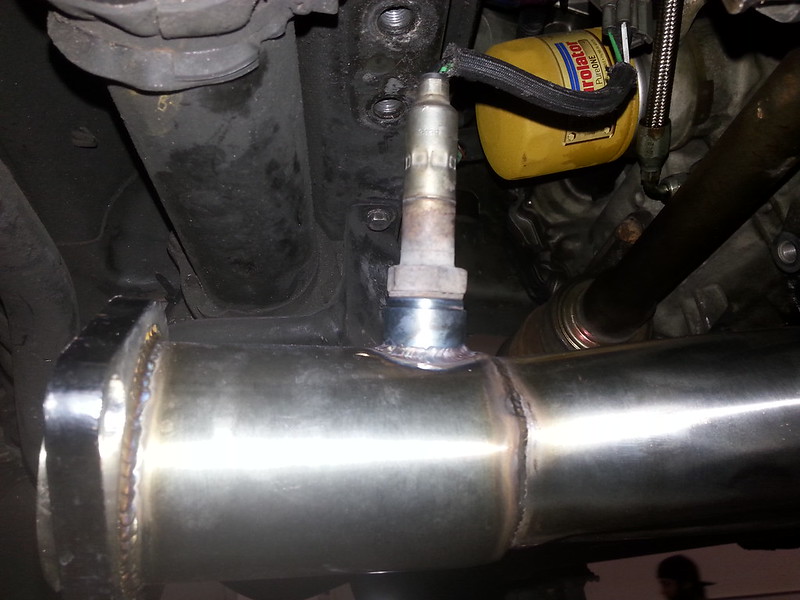
Now for the installation. It was necessary for me to remove my passenger side cooling fan (stock radiator and fan) as well as the clutch slave cylinder to have enough room to slide the header into place. The leftmost runner does come close to the A/C line, but clearances are comparable to that of a Megan Racing header. The flange I was sent wasn't a good match to the flange that was on the header and I ended up having to oval out the holes to get it to bolt on properly. The O2 bung on the header will not allow for clearance between the sensor and the power steering rack. Due to this, I had a new bung welded in place where space wasn't an issue. I had an adapter pipe made to have everything still be a bolt in affair with the rest of my current exhaust.
Note: During installation, don't touch the header with your bare hands if you can help it. If it is unavoidable, thoroughly clean the header before first start up. Any residues will show on the header after its first few heat cycles.
One thing about this part that is really attractive that I didn't fully notice until after install is how close it sits to the oil pan. Ground clearance and denting will likely never be an issue with this header. It also appears that there is just barely enough room for an aftermarket/custom torque mount.
After everything was buttoned up it was test drive time. The car revs a decent bit smoother when compared to a traditional style header and feels less restrained. I could definitely feel more mid range torque even without a tune. The car also took on a different sound under load that I quite like. As long as you keep the header clean, it will turn some nice colors after the first few heat cycles, though the brand label doesn't fare as well.
Before I move on to the installation, I will say that I have a traction bar so I cannot comment on the clearances between this header and the stock subframe. You will not be able to maintain the stock front motor mount or the brace that connects the front and rear subframes.
Now for the installation. It was necessary for me to remove my passenger side cooling fan (stock radiator and fan) as well as the clutch slave cylinder to have enough room to slide the header into place. The leftmost runner does come close to the A/C line, but clearances are comparable to that of a Megan Racing header. The flange I was sent wasn't a good match to the flange that was on the header and I ended up having to oval out the holes to get it to bolt on properly. The O2 bung on the header will not allow for clearance between the sensor and the power steering rack. Due to this, I had a new bung welded in place where space wasn't an issue. I had an adapter pipe made to have everything still be a bolt in affair with the rest of my current exhaust.
Note: During installation, don't touch the header with your bare hands if you can help it. If it is unavoidable, thoroughly clean the header before first start up. Any residues will show on the header after its first few heat cycles.
One thing about this part that is really attractive that I didn't fully notice until after install is how close it sits to the oil pan. Ground clearance and denting will likely never be an issue with this header. It also appears that there is just barely enough room for an aftermarket/custom torque mount.
After everything was buttoned up it was test drive time. The car revs a decent bit smoother when compared to a traditional style header and feels less restrained. I could definitely feel more mid range torque even without a tune. The car also took on a different sound under load that I quite like. As long as you keep the header clean, it will turn some nice colors after the first few heat cycles, though the brand label doesn't fare as well.


Comment