
My attempt to make a swap thread. Please forgive me, there are limited pics as my wife took the camera to go on vaca with. There might be a few Key pics missing.
My reason for swapping the motor is actually because I spun a bearing on the F22B on cylinder #2, either due to a misshift or low oil. I tried to do a quick fix and replace all the rod bearings and smooth out the journal with emery. It ran smooth for 2 hours only until I hear that loose bearing noise again. Instead Of taking out the crank and dealing with so much disassembly, I went to pick up another F22B DOHC. The Engine Depot were all out but they had an H22 for a price my 2 friends wouldnt let me pass up so I checked and test compression, oil, etc and it was all good. So I ended up with the H22, dont get me wrong I always wanted one.
The F22B DOHC before we took it out.

As you can see or maybe not so well, the wiring harness is not in the best of shape. Shredded peices of loom and tape, soldering and crimping all haunt this engine bay even though it may be hard to see. This time around its going to be cleaned up. Luckily one of my swap homies does wirning for a living so instead of buying a new wire harness which is what I planned, he planned on cleaning the old one up.
The F22B on its way out with everything disconnected.

Remember to take off any accessories that might be in the way, In my case, we took off the Crank pully and took out the radiator instead of the accessories and it came out just fine.
The next step was to swap my tranny from the F22B over to the H22A. While its out of the car, might as well clean it.


Looks clean but its still a peice of shit.
Heres a pic of the head internals, not the cleanest I've seen, the owner probably skipped a few oil changes. I'm just gonna do 2 rapid oil changes ina a 2 week period and use Royal Purple, see what the hype is about.

The old head was so much cleaner

The next step was to swap the Automatic tensioner out for a Manual one. I used two vice grips to lock both cams to the belt on each side, then proceeded to take the tensioner parts out. You can use the following from your F22B or F22A.
A. Both the timing and balancer belt tensioner.
B. The through bolt that the tensioner assembly slides on.
C. The tensioner springs.
D. Spring perch for timing belt tensioner.
You need to order from HONDA the 1mm washer that spaces the tensioner assemly bolt from the block. You need to order the bolt on piece that the tesnioner arm is bolted to to set the final tension. You need to order the 10mm dowel pin the the right side of tensioner slides onto in order to set a correct and flush tension.
If you dont want to strip your old parts just order the entire conversion kit.
Everything is not converted and in place except for the bolt on piece for the left side tensioner arm to bolt to for final tesnion.

I had to also swap Top plenum and Throttle body. Not only was the Map and TPS sensor broken on the throttle body, but both inlets on the TB and plenum were at least 1mm to 2mm smaller than what came on my F22B. I had come to the conclusion that this must be one step on how they reduce power for the automatic setups. They were both stamped with a P13 with letter following and those letters were different on the two. One said HF1 and one didnt. Heres some pic of the differences.


Here is the F22B TB on the H22A plenum. You can see the ring inside which means its significantly smaller.

Now all the wirning is done and the harness looks like a brand new H22 harness. New tape, soldering and heat shrink done. The motor came without a V-tec pressure sensor. Luckily my boy had an extra one laying around, otherwise we would have to have the V-tec pressure wire cross paths with the solenoid wire. The motor was a 97 so I dont know if that had something to do with there being no sensor present.
Its time to put the motor back in and the harness is plugged to the sensors on the engine. Installing we kept the crank pulley off the get good clearance.
The F22A or F22B pulley muct be used or you will have clearance issues from hell. You can either use your old power steering pump by shaving down the back of the power steering bracket and bolting it on, or you can reweld your power steering line for the h22a fitting which is what I opted for.
The V-tec and Knock sensor wires are now routed in to the cab to go to the ecu plugs. The knock sensor can be skipped if you have an ecu to not ask for one.
I also had to buy a new speed sensor because my old one took a shit. Remember, no VSS, no V-tec.
Luckily a downpipe for the H22a was thrown in with the deal but unluckily it wasnt a direct fit. What we had to do was drill or cut holes or more space toward the center of the pipe. The Accord Catalytic and the H22a downpipe was the same shape, only the H22a was bigger, the goal was to get the holes closer toward the middle so that the CAT bolts can slide in, and they did.
Mounting up the engine was simple with minor manipulation. I used the H22A power steering belt and an H23 alternator belt. The only difference was the h22 accessory units have 6 grooves and the f22b/h23/f22a ahve 5. It worked for me regardless, the belts are tight and they dont wander or walk off track.
Now its ready to fire up and it fired up strong right after it for a little gas going to the motor. Very strong motor, the compression number were a little above 260 or 270 when I picked it up.
The H23/F22B spark plug wires cannot be used, they are too short, I was pissed because they were NGK. When i say too short I ment the length fro top the valve cover to the actual spark plug.
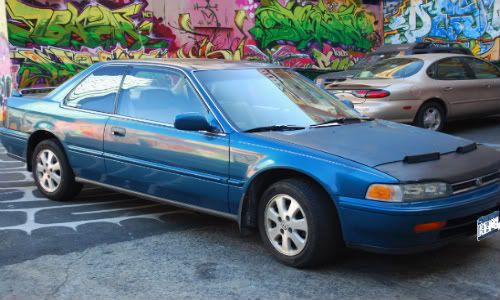
Heres how it came out after it was cranked for the first time.


Runs perfectly. The difference I feel at High RPM with this motor is like night and day from the F22B.
If anyone one wants some work done and likes the work we did, in NYC, Tri-state maybe, just let me know and we'll make something happen.
My reason for swapping the motor is actually because I spun a bearing on the F22B on cylinder #2, either due to a misshift or low oil. I tried to do a quick fix and replace all the rod bearings and smooth out the journal with emery. It ran smooth for 2 hours only until I hear that loose bearing noise again. Instead Of taking out the crank and dealing with so much disassembly, I went to pick up another F22B DOHC. The Engine Depot were all out but they had an H22 for a price my 2 friends wouldnt let me pass up so I checked and test compression, oil, etc and it was all good. So I ended up with the H22, dont get me wrong I always wanted one.
The F22B DOHC before we took it out.
As you can see or maybe not so well, the wiring harness is not in the best of shape. Shredded peices of loom and tape, soldering and crimping all haunt this engine bay even though it may be hard to see. This time around its going to be cleaned up. Luckily one of my swap homies does wirning for a living so instead of buying a new wire harness which is what I planned, he planned on cleaning the old one up.
The F22B on its way out with everything disconnected.
Remember to take off any accessories that might be in the way, In my case, we took off the Crank pully and took out the radiator instead of the accessories and it came out just fine.
The next step was to swap my tranny from the F22B over to the H22A. While its out of the car, might as well clean it.
Looks clean but its still a peice of shit.
Heres a pic of the head internals, not the cleanest I've seen, the owner probably skipped a few oil changes. I'm just gonna do 2 rapid oil changes ina a 2 week period and use Royal Purple, see what the hype is about.
The old head was so much cleaner
The next step was to swap the Automatic tensioner out for a Manual one. I used two vice grips to lock both cams to the belt on each side, then proceeded to take the tensioner parts out. You can use the following from your F22B or F22A.
A. Both the timing and balancer belt tensioner.
B. The through bolt that the tensioner assembly slides on.
C. The tensioner springs.
D. Spring perch for timing belt tensioner.
You need to order from HONDA the 1mm washer that spaces the tensioner assemly bolt from the block. You need to order the bolt on piece that the tesnioner arm is bolted to to set the final tension. You need to order the 10mm dowel pin the the right side of tensioner slides onto in order to set a correct and flush tension.
If you dont want to strip your old parts just order the entire conversion kit.
Everything is not converted and in place except for the bolt on piece for the left side tensioner arm to bolt to for final tesnion.
I had to also swap Top plenum and Throttle body. Not only was the Map and TPS sensor broken on the throttle body, but both inlets on the TB and plenum were at least 1mm to 2mm smaller than what came on my F22B. I had come to the conclusion that this must be one step on how they reduce power for the automatic setups. They were both stamped with a P13 with letter following and those letters were different on the two. One said HF1 and one didnt. Heres some pic of the differences.
Here is the F22B TB on the H22A plenum. You can see the ring inside which means its significantly smaller.
Now all the wirning is done and the harness looks like a brand new H22 harness. New tape, soldering and heat shrink done. The motor came without a V-tec pressure sensor. Luckily my boy had an extra one laying around, otherwise we would have to have the V-tec pressure wire cross paths with the solenoid wire. The motor was a 97 so I dont know if that had something to do with there being no sensor present.
Its time to put the motor back in and the harness is plugged to the sensors on the engine. Installing we kept the crank pulley off the get good clearance.
The F22A or F22B pulley muct be used or you will have clearance issues from hell. You can either use your old power steering pump by shaving down the back of the power steering bracket and bolting it on, or you can reweld your power steering line for the h22a fitting which is what I opted for.
The V-tec and Knock sensor wires are now routed in to the cab to go to the ecu plugs. The knock sensor can be skipped if you have an ecu to not ask for one.
I also had to buy a new speed sensor because my old one took a shit. Remember, no VSS, no V-tec.
Luckily a downpipe for the H22a was thrown in with the deal but unluckily it wasnt a direct fit. What we had to do was drill or cut holes or more space toward the center of the pipe. The Accord Catalytic and the H22a downpipe was the same shape, only the H22a was bigger, the goal was to get the holes closer toward the middle so that the CAT bolts can slide in, and they did.
Mounting up the engine was simple with minor manipulation. I used the H22A power steering belt and an H23 alternator belt. The only difference was the h22 accessory units have 6 grooves and the f22b/h23/f22a ahve 5. It worked for me regardless, the belts are tight and they dont wander or walk off track.
Now its ready to fire up and it fired up strong right after it for a little gas going to the motor. Very strong motor, the compression number were a little above 260 or 270 when I picked it up.
The H23/F22B spark plug wires cannot be used, they are too short, I was pissed because they were NGK. When i say too short I ment the length fro top the valve cover to the actual spark plug.
Heres how it came out after it was cranked for the first time.
Runs perfectly. The difference I feel at High RPM with this motor is like night and day from the F22B.
If anyone one wants some work done and likes the work we did, in NYC, Tri-state maybe, just let me know and we'll make something happen.


Comment