
Ok I rebuilt my clutch slave cylinder this morning. You may ask...but a new one is like $20...why rebuilt? Simple...this rebuild is about as easy as replacing your brake pads...if not easier.
And while a new slave costs $20, this kit cost like $10
Here's how it goes.
Tool list:
10mm flare nut wrench
OR 10mm open end wrench
12mm deep socket
ratchet
10mm shallow socket
8mm open end wrench
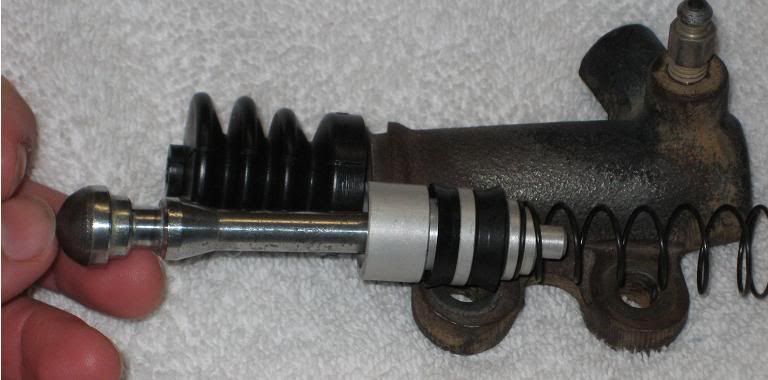
rebuild kit...see pic
2-3 bit honing tool (brake cylinder hone)
(11/16" - 2 1/2" [17.4mm - 63.5mm] )
{I haven't measured the inner diameter but this one worked perfectly}
air gun with rubber tip
long bar
vacula (to pull brake fluid out of line thus flushing lines)
SOS pad (or equivalent)
gasoline
new or used toothbrush (depends on your budget)
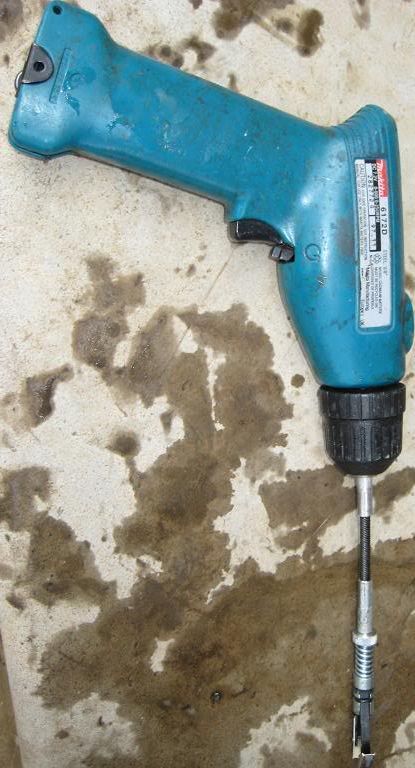
power drill/screwdriver (LOW setting is a must)
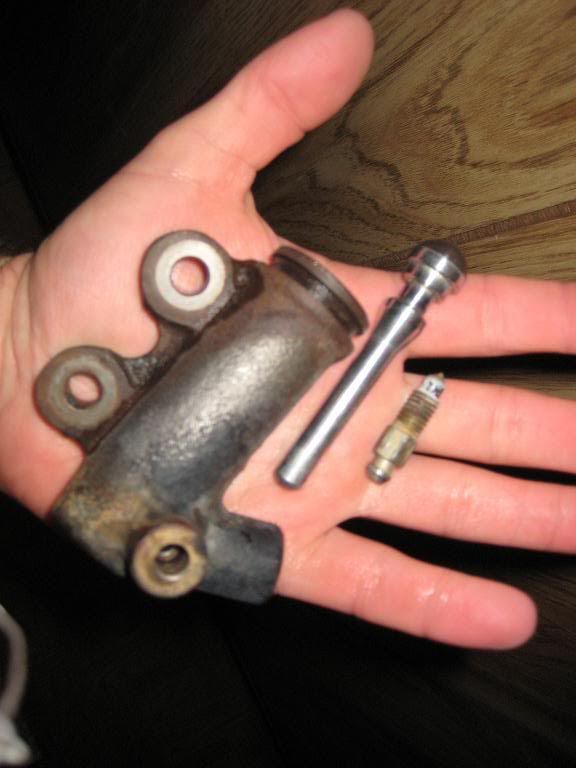
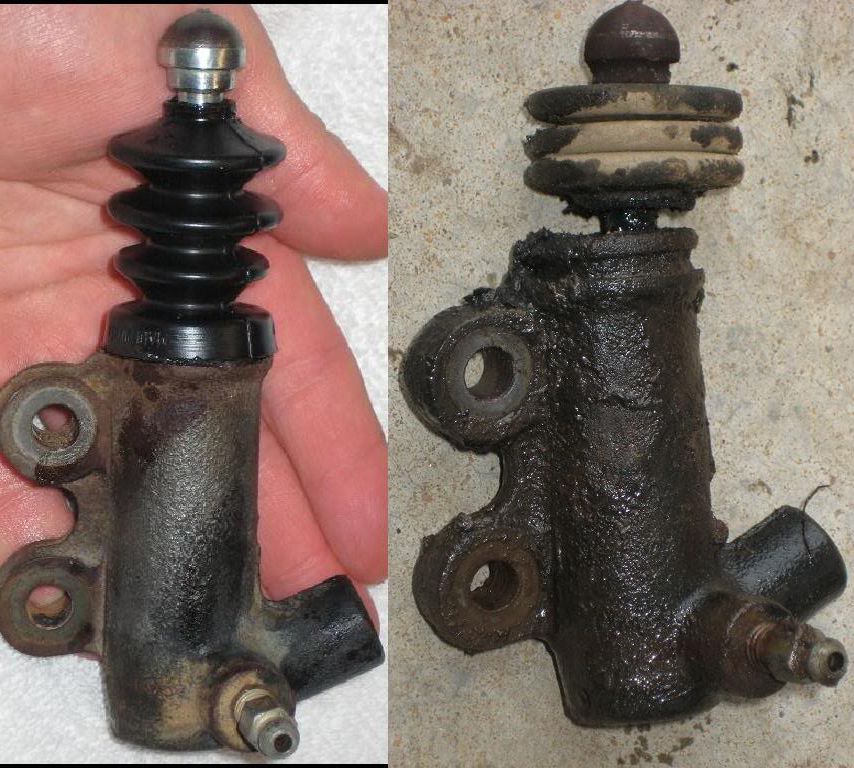
First this what your kit should include
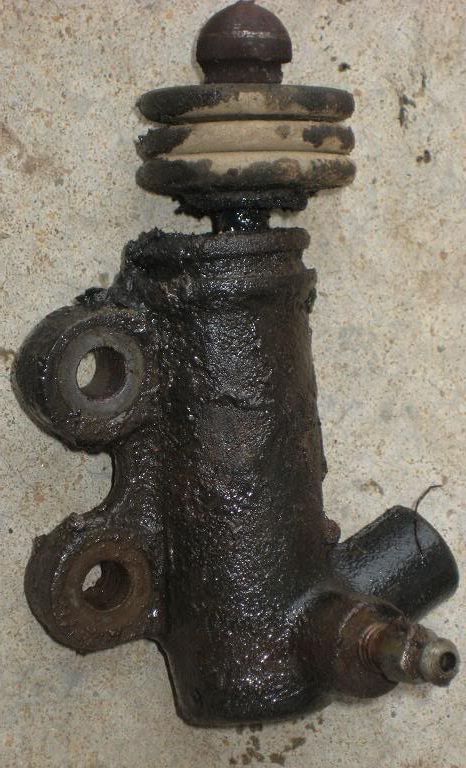
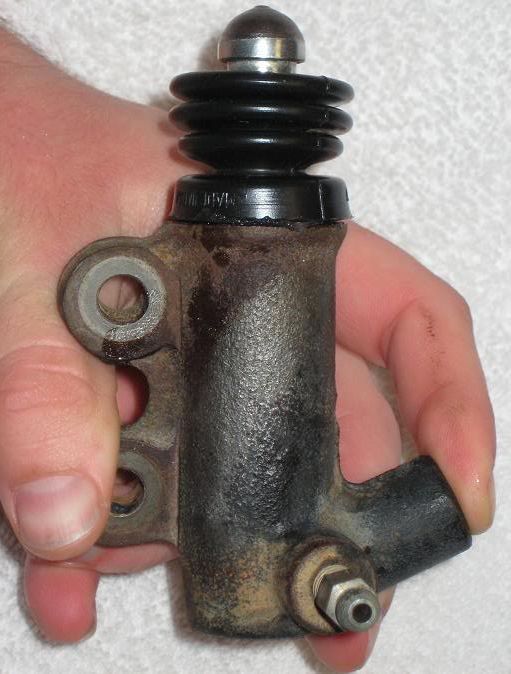
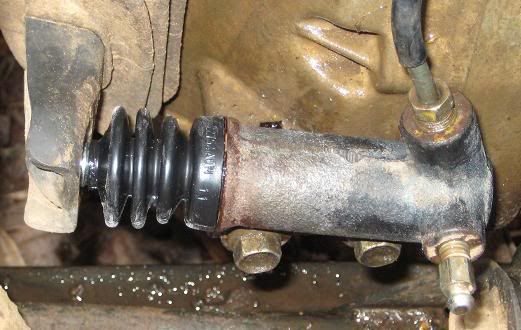
Next you'll want to locate the slave cylinder off. It is located on the passenger side, just behind the pass. side radiator fan, attached to the tranny, and touching the clutch fork. Facing the car...that's your left. It is also directly left of the dog bone motor mount (when facing the car).
It made it loads easier on me to access the slave cylinder by taking off the pass. side fan to gain access to the slave cylinder.
STEP 1
To do this you'll need your shallow 10mm, take off two top bolts and one bottom bolt. You will also need to remove the 6 bolts that hold the radiator in place to wiggle it around so you can get the fan out.
Once the fan is out of the way, if using a vacula or similar vacuum device, connect your hose to the bleeder valve. If not using such device then it's a good idea to connect a hose anyway...keeps the fluid from hitting paint.
STEP 2
You will want to flush out the old fluid. I haven't done this on my system...ever...so I got some gray/black fluid. If using the vacula (or similar) connect the hose to the bleeder, turn on, lightly unscrew the bleeder using your 8mm. There are two options here
I. Flush with old slave still on
II. Pull off the old slave and flush the line without it on
Either way once you get clear fluid you will pull ALL the fluid out
for I, just connect your hose, and
a. turn on the vacula
Open the the bleeder via 8mm wrench, do so only at a rate you will be able to keep up with, refilling the reservoir as it empties. Do this until it runs clean.
Tighten the bleeder valve.
b. pump the clutch pedal, keeping track of your fluid levels. Keep refilling and pumping until you get clear fluid.
let out the bleeder valve using your 8mm wrench. It should bleed via gravity a little...push the clutch pedal in once or twice...making sure to refill the reservoir. Repeat until the fluid runs clean.
For II
Remove slave (see below)
Attach your hose to the hanging line. Follow procedures outlined above.
Debate:
I can see the benefit of taking off the slave then flushing, so you aren't pulling fluid through a dirty slave...but I had no problems getting mine clean. It did take about 3-4 resv. refills to do so. But again, mine hasn't been flushed...ever.
CONTINUE:
REMOVAL OF SLAVE:
STEP 3
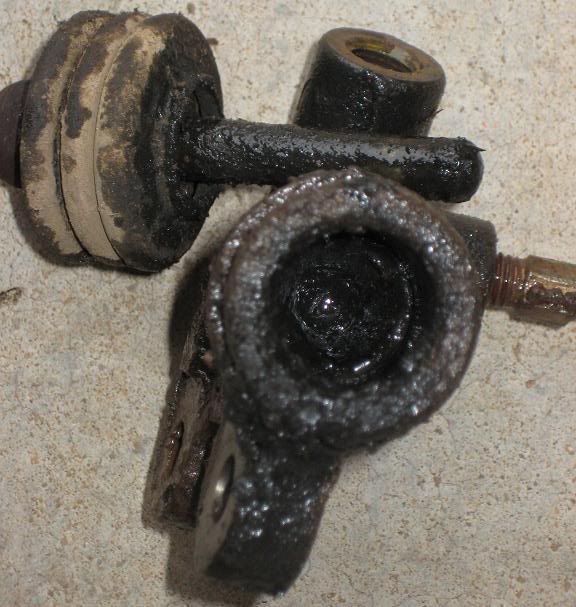
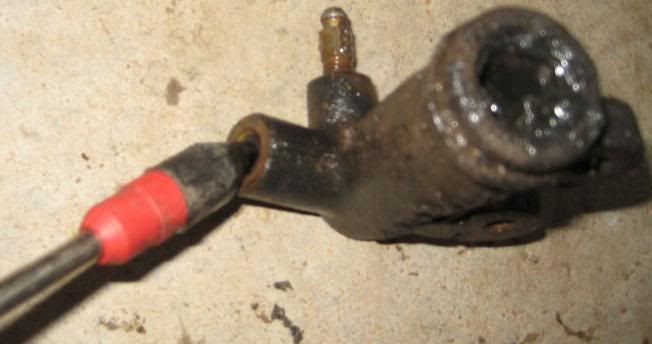
Now that that the fan is out of the way, you will want to remove the hydraulic line feeding the slave cylinder. For this, use your 10mm open end wrench. I used a snap-on wrench designed with teeth to not strip hard to remove fasteners. I had little resistance so a regular 10mm wrench should do, if it feels stiff, use a flare nut wrench.
STEP 4
Now that the hydraulic line is removed, use your deep 12mm socket and your ratchet. It would be more difficult to clear everything with a shallow...so...save your knuckles, don't try it, use the deep socket
BE CAREFUL, if your boot is horribly nasty and torn completely, when you remove the slave the plunger may shoot off, it's not hard to find but keep an eye on it.
YOU WILL RE-USE THE PLUNGER!!!!
Another possibility, rather unlikely, is that the internals may all shoot out. If you have a rebuild kit this is inconsequential, but make sure you don't poke your eye out
There are two bolts to remove, they are under the slave and are parallel to each other.
STEP 5
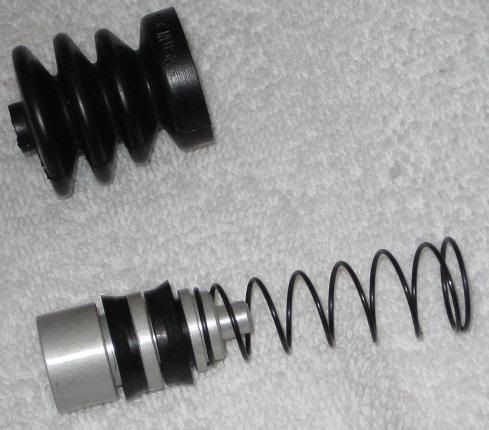
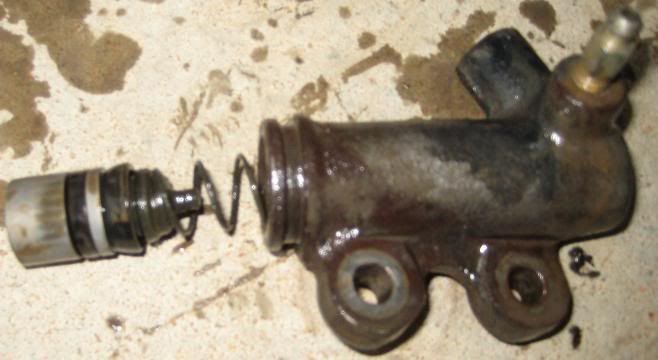
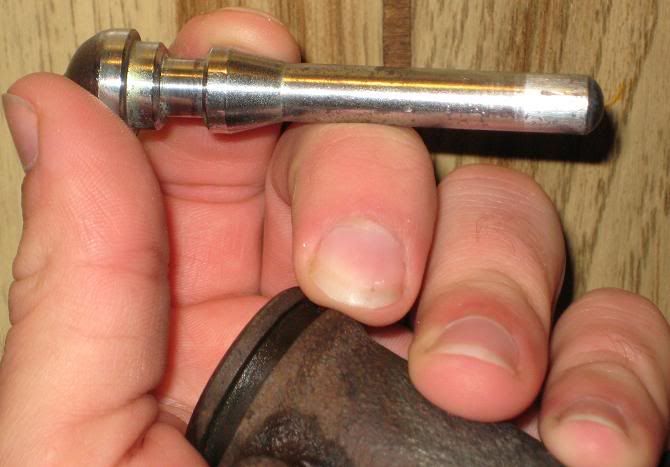
Pull the dust boot from the slave, the plunger should come with it.
STEP 6
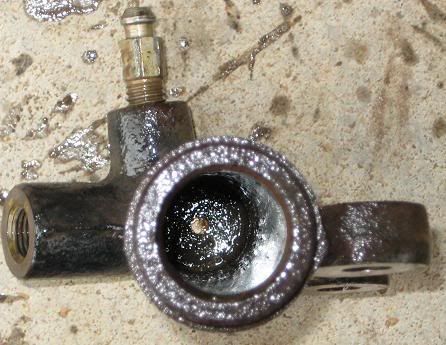
Place your air gun's rubber tip to the inlet of the slave (where the hydraulic line was connected), place your hand over the hole. Apply A LITTLE pressure. This will push the internals out.
Mine had a rust lip on it that prevented the internals (piston and a spring) from popping out. Simply push it back in and air it out. Once pushed in feel free to add some solvent or other cleaner.
Repeat step 6 until the internals come out. BE CAREFUL!!! The pressure created can be VERY dangerous here...shooting out the internals is not a good idea.
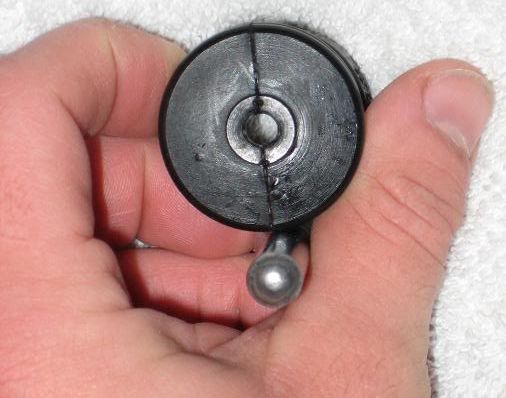
here is how the plunger removed and the top of the piston look. Mine were dirty dirty.
How the blowing looks
and it's out
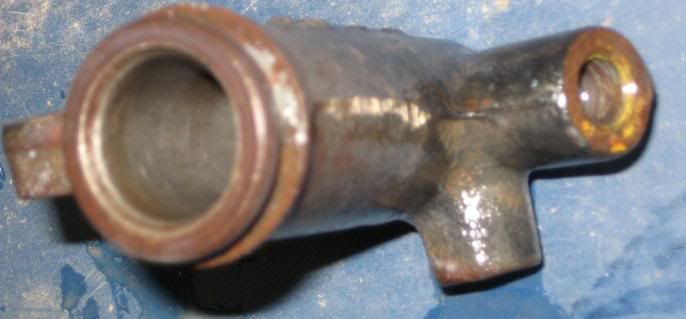
Here you can see where the rust lip is by the change in color from shiny to...well rust.
I should have seen how far I could shoot these...we could start a record breaking thread
And while a new slave costs $20, this kit cost like $10
Here's how it goes.
Tool list:
10mm flare nut wrench
OR 10mm open end wrench
12mm deep socket
ratchet
10mm shallow socket
8mm open end wrench
rebuild kit...see pic
2-3 bit honing tool (brake cylinder hone)
(11/16" - 2 1/2" [17.4mm - 63.5mm] )
{I haven't measured the inner diameter but this one worked perfectly}
air gun with rubber tip
long bar
vacula (to pull brake fluid out of line thus flushing lines)
SOS pad (or equivalent)
gasoline
new or used toothbrush (depends on your budget)
power drill/screwdriver (LOW setting is a must)
First this what your kit should include
Next you'll want to locate the slave cylinder off. It is located on the passenger side, just behind the pass. side radiator fan, attached to the tranny, and touching the clutch fork. Facing the car...that's your left. It is also directly left of the dog bone motor mount (when facing the car).
It made it loads easier on me to access the slave cylinder by taking off the pass. side fan to gain access to the slave cylinder.
STEP 1
To do this you'll need your shallow 10mm, take off two top bolts and one bottom bolt. You will also need to remove the 6 bolts that hold the radiator in place to wiggle it around so you can get the fan out.
Once the fan is out of the way, if using a vacula or similar vacuum device, connect your hose to the bleeder valve. If not using such device then it's a good idea to connect a hose anyway...keeps the fluid from hitting paint.
STEP 2
You will want to flush out the old fluid. I haven't done this on my system...ever...so I got some gray/black fluid. If using the vacula (or similar) connect the hose to the bleeder, turn on, lightly unscrew the bleeder using your 8mm. There are two options here
I. Flush with old slave still on
II. Pull off the old slave and flush the line without it on
Either way once you get clear fluid you will pull ALL the fluid out
for I, just connect your hose, and
a. turn on the vacula
Open the the bleeder via 8mm wrench, do so only at a rate you will be able to keep up with, refilling the reservoir as it empties. Do this until it runs clean.
Tighten the bleeder valve.
b. pump the clutch pedal, keeping track of your fluid levels. Keep refilling and pumping until you get clear fluid.
let out the bleeder valve using your 8mm wrench. It should bleed via gravity a little...push the clutch pedal in once or twice...making sure to refill the reservoir. Repeat until the fluid runs clean.
For II
Remove slave (see below)
Attach your hose to the hanging line. Follow procedures outlined above.
Debate:
I can see the benefit of taking off the slave then flushing, so you aren't pulling fluid through a dirty slave...but I had no problems getting mine clean. It did take about 3-4 resv. refills to do so. But again, mine hasn't been flushed...ever.
CONTINUE:
REMOVAL OF SLAVE:
STEP 3
Now that that the fan is out of the way, you will want to remove the hydraulic line feeding the slave cylinder. For this, use your 10mm open end wrench. I used a snap-on wrench designed with teeth to not strip hard to remove fasteners. I had little resistance so a regular 10mm wrench should do, if it feels stiff, use a flare nut wrench.
STEP 4
Now that the hydraulic line is removed, use your deep 12mm socket and your ratchet. It would be more difficult to clear everything with a shallow...so...save your knuckles, don't try it, use the deep socket
BE CAREFUL, if your boot is horribly nasty and torn completely, when you remove the slave the plunger may shoot off, it's not hard to find but keep an eye on it.
YOU WILL RE-USE THE PLUNGER!!!!
Another possibility, rather unlikely, is that the internals may all shoot out. If you have a rebuild kit this is inconsequential, but make sure you don't poke your eye out
There are two bolts to remove, they are under the slave and are parallel to each other.
STEP 5
Pull the dust boot from the slave, the plunger should come with it.
STEP 6
Place your air gun's rubber tip to the inlet of the slave (where the hydraulic line was connected), place your hand over the hole. Apply A LITTLE pressure. This will push the internals out.
Mine had a rust lip on it that prevented the internals (piston and a spring) from popping out. Simply push it back in and air it out. Once pushed in feel free to add some solvent or other cleaner.
Repeat step 6 until the internals come out. BE CAREFUL!!! The pressure created can be VERY dangerous here...shooting out the internals is not a good idea.
here is how the plunger removed and the top of the piston look. Mine were dirty dirty.
How the blowing looks
and it's out
Here you can see where the rust lip is by the change in color from shiny to...well rust.
I should have seen how far I could shoot these...we could start a record breaking thread
 __
__


 )
)

Comment