
Saw this on ht and thought this might be helpful for those that have headliners as gross as mine.
Originally posted by AnotherEJ
So I wanted to redo my headliner after I saw it was starting to come loose and came across a headliner thread. No one had a DIY for one though and I searched and came up with nothing for a car with a sunroof and decided to make one.
The pictures aren't the best because I couldn't find the camera and had to use my phone :thumbdown: I will try to find pictures for the beginning as a before reference to make it easier to follow.
I am missing pictures for some of the steps but its not that hard.
First remove the passenger handle/ooh crap bar on the roof, the clothes hook on the driver rear, the sun visors by removing the screws(duh)
Then remove the the cover around the rear view mirror by pulling down on either side. I don't have a picture but its just a little nub that sits in a notch on either side.
The last thing is to remove the dome light cover and take the two 8mm nuts out holding the done light up.
After all these things are removed there is nothing holding the headliner in, it is just resting on the side panels
Pop the panels out but lightly pulling them outwards so they slide out of the clips.
There is a plastic strip near the back windshield that pulls down(with the clips just like all other interior panels) and will come completely out.
Simply pull the panels down out of the way of the headliner and slide the headliner forwards toward the curvature of the windshield.
You will have to pull down on the headliner around the sunroof the get it around the rubber surrounding the edges of the sunroof opening.
I pulled the whole thing forward to get it free of the rear panels. Once it is free turn the liner sideways to get it out of the car.( If you fold your seats back its a lot easier to remove.
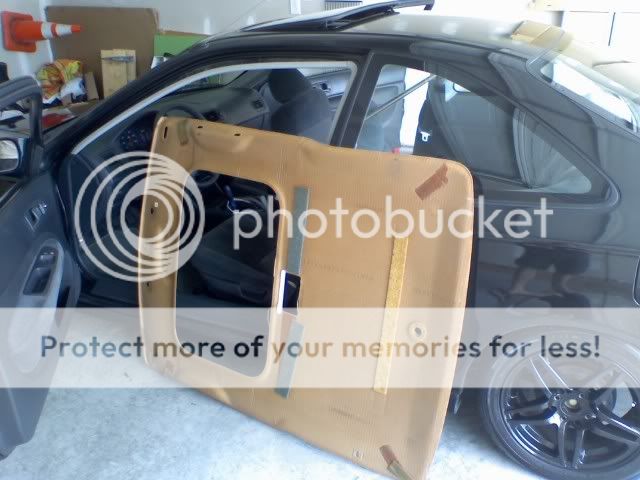
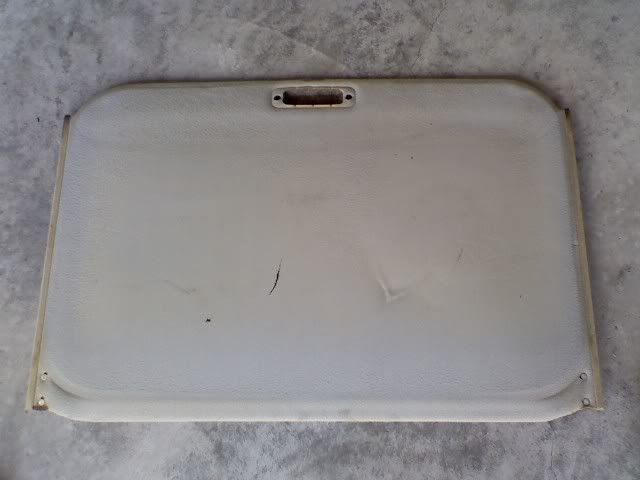
Headliner out.
Then the fun begins. Getting to the slide piece.
Pinch the clips that hold the brown hose on at each end and pull them off of the nipple.
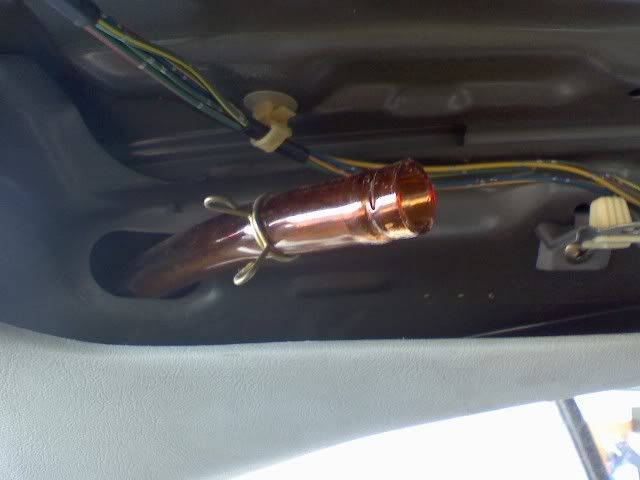
Unhook the 2 connections for the sunroof motor
(there will also be a plastic clip holding the wire to the assemble that needs to be pushed out to get free)
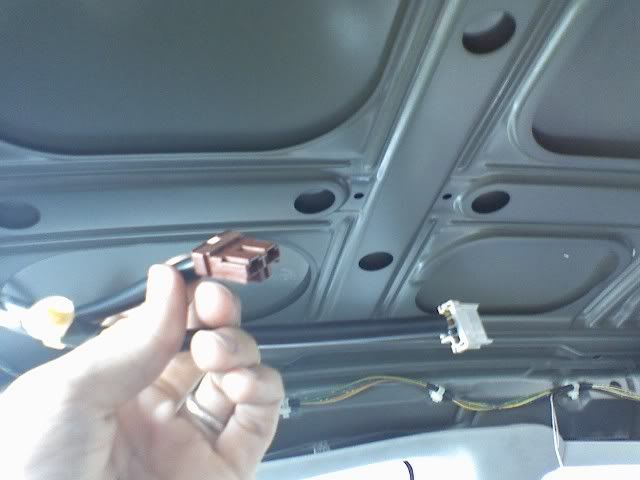
There are two clips that hold the wires for the dome light to the assembly( dont have a picture) remove those also so the light hangs free of the assembly.
Remove the ten(I believe, maybe 8) 10mm bolts that hold the sunroof assembly in. Leave the 2 at the front and 2 at the rear in until last so it will not fall on you.
Once you are ready to lower it down if you have someone to help you hold it get them. If not, lean your seats up with your headrests as high as they will go.
Loosen the 2 rear bolts and remove the 2 front ones resting the assembly on the headrests.
Remove the rear 2 bolts and hold the assembly from falling down.
If you have someone to help you this is where you need them. It is not too heavy but very awkward to remove by yourself. I nicked my door getting it out by myself.
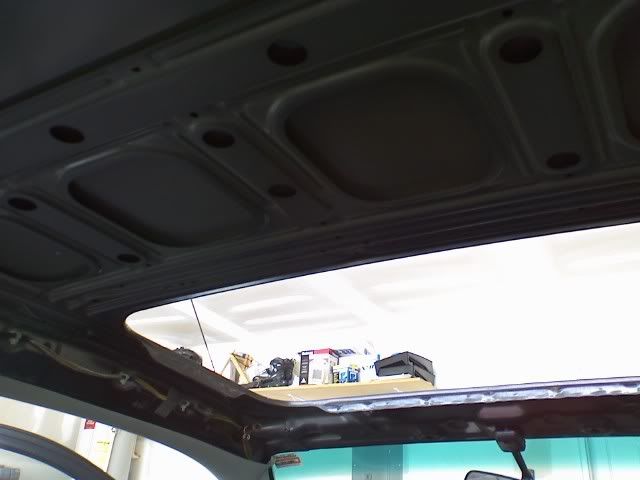
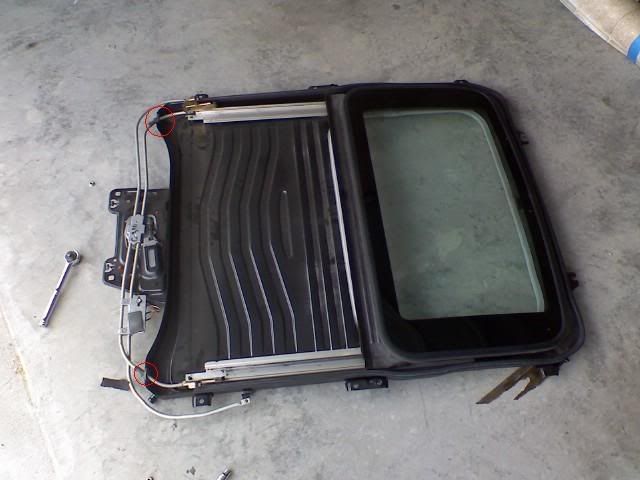
Assembly out
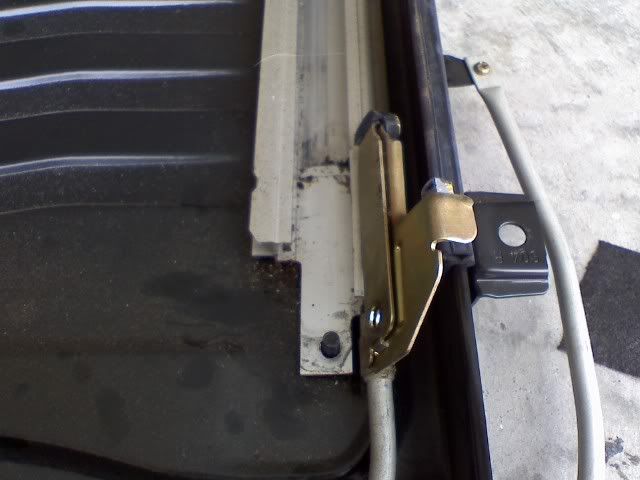
Next remove the 10mm bolts on each side(one per side) of the track for the slide piece.
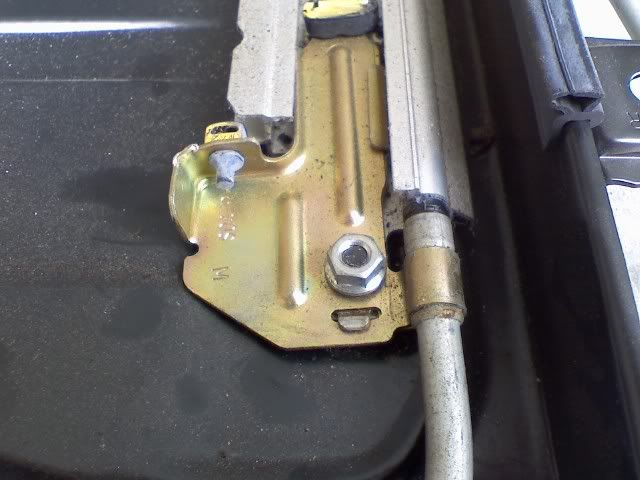
Remove the bolt and fold that gold bracket up off of the stud so the bumpstop is clear of the track.
Pull up on the metal tubes containing the springs for the slide piece at the rubber grommets(in red) while sliding the slide piece out.
It might take some fighting but it should come easily.
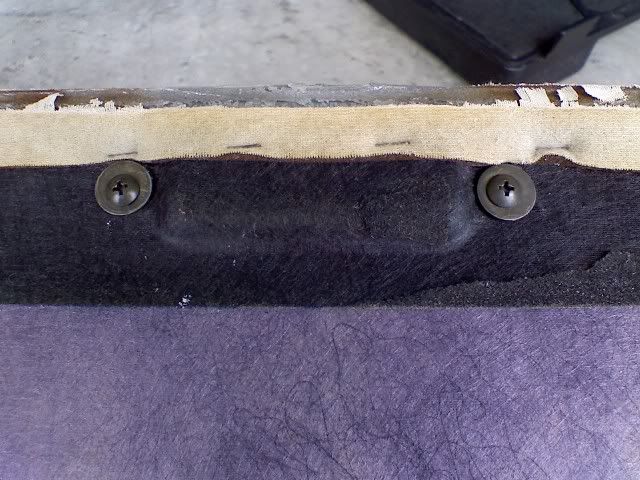
Once its out unscrew the 2 screws from the back to remove the cup handle.
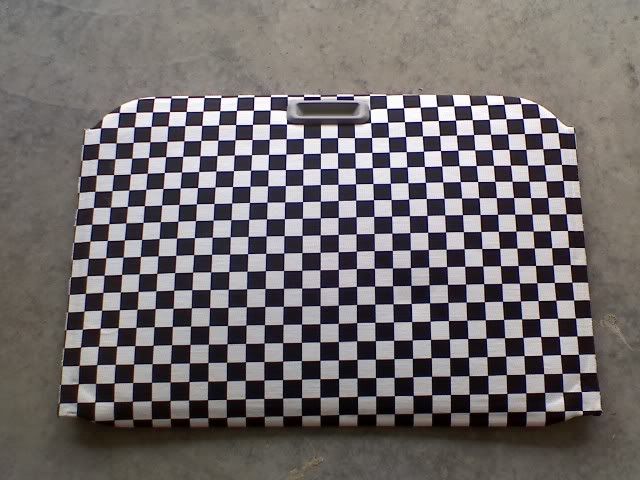
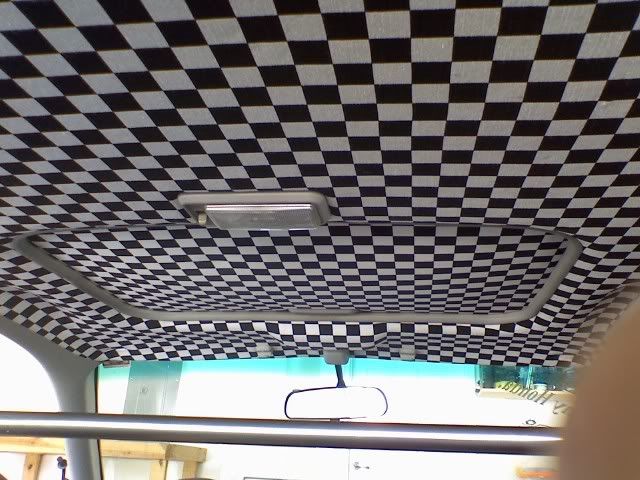
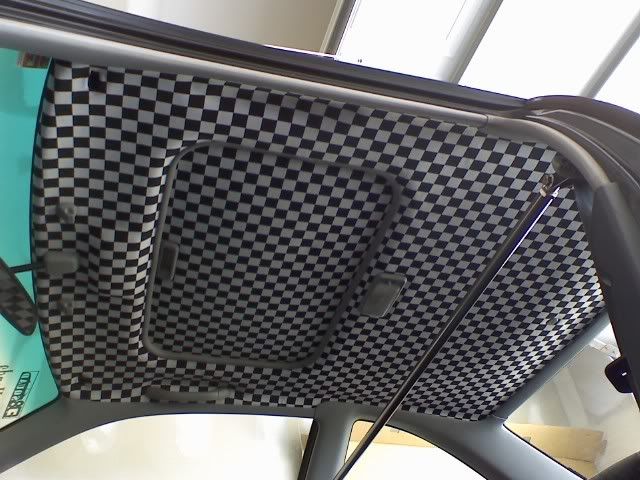
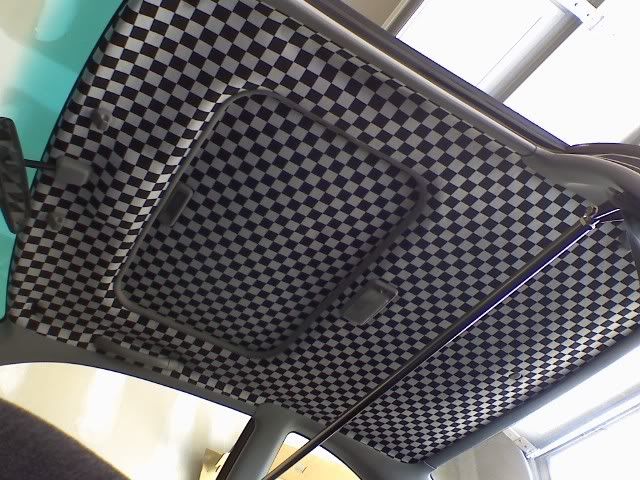
Now that everything is out you can start covering it with the fabric of your choosing =)
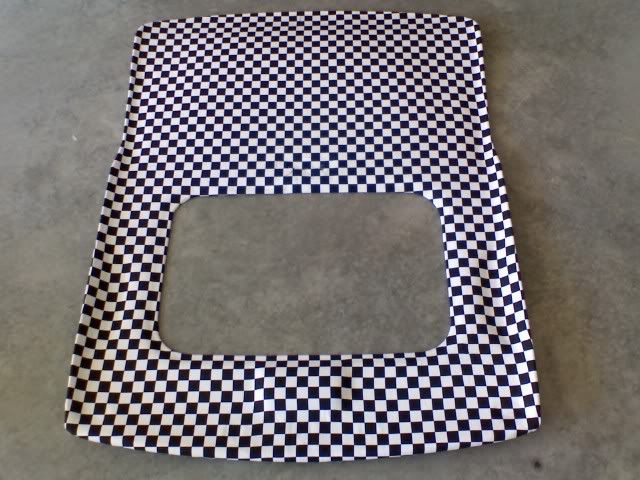
I chose this classic checkered design

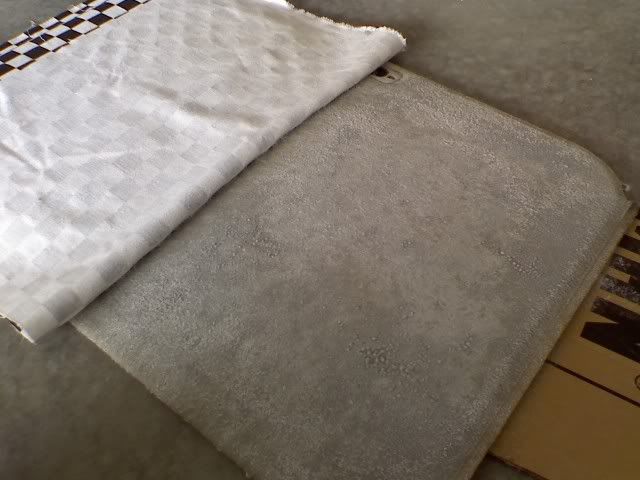
Lay your fabric on top of your headliner and cut it to a little larger than the size of the liner.
Repeat for the slide piece.
One your fabric is the cut, lay it where you want it and fold one side over and spray your glue on the surface and a little on the fabric(not too much or it will soak through and you will be able to see it)
Let it sit a few minutes before you apply the fabric so the glue has time to get tacky.
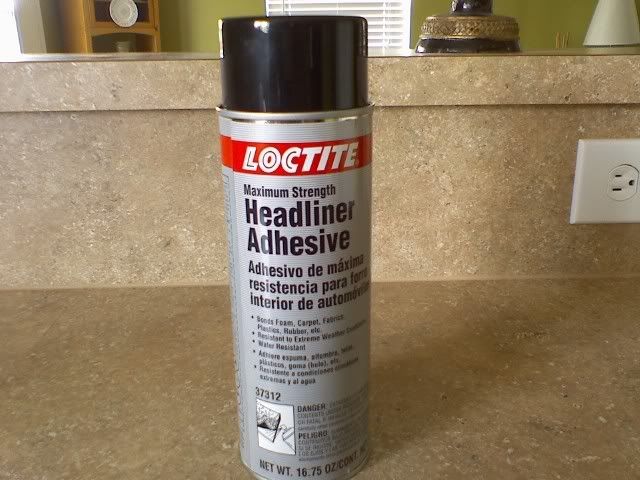
I used Loctite maximum strength
Repeat with the headliner itself.
The easiest way is to hold up one half and work the bubbles out with one hand. If you work quickly you have time to peel the fabric back if you mess up.
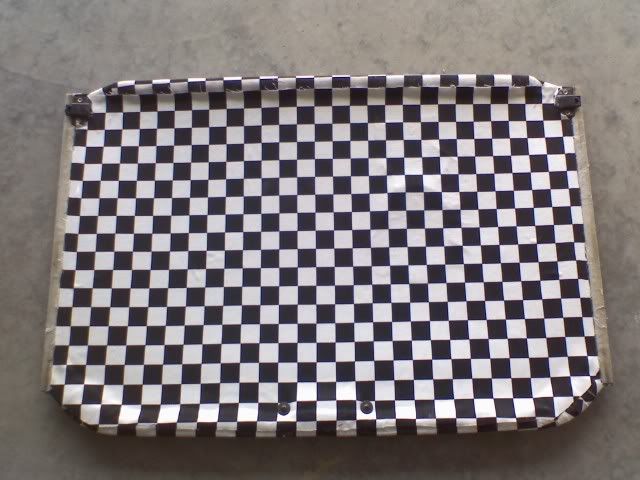
Once you have it rubbed on there good trim the excess and cut slits around the corners and in the openings so the material can be folded over and glued down on the other side for extra hold.
I folded the pieces over and tested to make sure they would fold tight and not loose the curve of the backing. After the glue has had time to dry flip the headliner over and spray glue on the backing and the overlaying pieces of fabric and fold them over the back of the liner.
I dont have any pictures of this but once you get all the pieces folded over and glued its ready to dry over night.
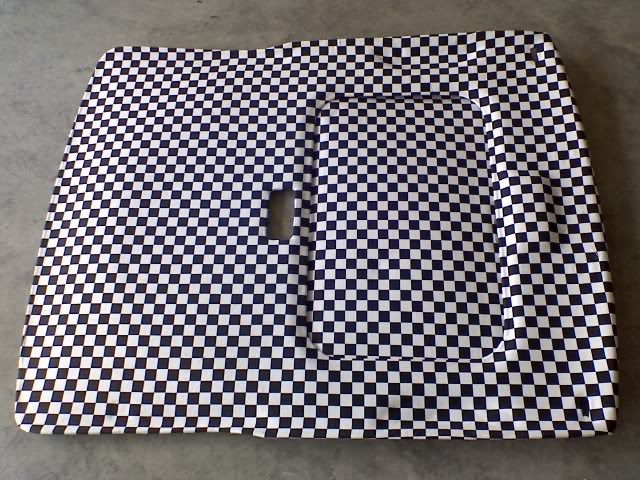
I had already attached the slide handle on there after cleaning it up.
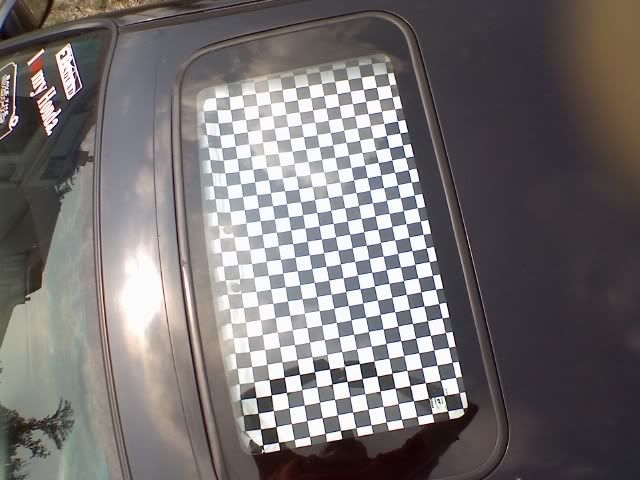
I wanted to cover up the factory backing on the slide piece as it was faded and looked terrible so I cut more material to shape and glued it to the side that would be sticking up to be seen through the sunroof.
The pictures aren't the best because I couldn't find the camera and had to use my phone :thumbdown: I will try to find pictures for the beginning as a before reference to make it easier to follow.
I am missing pictures for some of the steps but its not that hard.
First remove the passenger handle/ooh crap bar on the roof, the clothes hook on the driver rear, the sun visors by removing the screws(duh)
Then remove the the cover around the rear view mirror by pulling down on either side. I don't have a picture but its just a little nub that sits in a notch on either side.
The last thing is to remove the dome light cover and take the two 8mm nuts out holding the done light up.
After all these things are removed there is nothing holding the headliner in, it is just resting on the side panels
Pop the panels out but lightly pulling them outwards so they slide out of the clips.
There is a plastic strip near the back windshield that pulls down(with the clips just like all other interior panels) and will come completely out.
Simply pull the panels down out of the way of the headliner and slide the headliner forwards toward the curvature of the windshield.
You will have to pull down on the headliner around the sunroof the get it around the rubber surrounding the edges of the sunroof opening.
I pulled the whole thing forward to get it free of the rear panels. Once it is free turn the liner sideways to get it out of the car.( If you fold your seats back its a lot easier to remove.
Headliner out.
Then the fun begins. Getting to the slide piece.
Pinch the clips that hold the brown hose on at each end and pull them off of the nipple.
Unhook the 2 connections for the sunroof motor
(there will also be a plastic clip holding the wire to the assemble that needs to be pushed out to get free)
There are two clips that hold the wires for the dome light to the assembly( dont have a picture) remove those also so the light hangs free of the assembly.
Remove the ten(I believe, maybe 8) 10mm bolts that hold the sunroof assembly in. Leave the 2 at the front and 2 at the rear in until last so it will not fall on you.
Once you are ready to lower it down if you have someone to help you hold it get them. If not, lean your seats up with your headrests as high as they will go.
Loosen the 2 rear bolts and remove the 2 front ones resting the assembly on the headrests.
Remove the rear 2 bolts and hold the assembly from falling down.
If you have someone to help you this is where you need them. It is not too heavy but very awkward to remove by yourself. I nicked my door getting it out by myself.
Assembly out
Next remove the 10mm bolts on each side(one per side) of the track for the slide piece.
Remove the bolt and fold that gold bracket up off of the stud so the bumpstop is clear of the track.
Pull up on the metal tubes containing the springs for the slide piece at the rubber grommets(in red) while sliding the slide piece out.
It might take some fighting but it should come easily.
Once its out unscrew the 2 screws from the back to remove the cup handle.
Now that everything is out you can start covering it with the fabric of your choosing =)
I chose this classic checkered design
Lay your fabric on top of your headliner and cut it to a little larger than the size of the liner.
Repeat for the slide piece.
One your fabric is the cut, lay it where you want it and fold one side over and spray your glue on the surface and a little on the fabric(not too much or it will soak through and you will be able to see it)
Let it sit a few minutes before you apply the fabric so the glue has time to get tacky.
I used Loctite maximum strength
Repeat with the headliner itself.
The easiest way is to hold up one half and work the bubbles out with one hand. If you work quickly you have time to peel the fabric back if you mess up.
Once you have it rubbed on there good trim the excess and cut slits around the corners and in the openings so the material can be folded over and glued down on the other side for extra hold.
I folded the pieces over and tested to make sure they would fold tight and not loose the curve of the backing. After the glue has had time to dry flip the headliner over and spray glue on the backing and the overlaying pieces of fabric and fold them over the back of the liner.
I dont have any pictures of this but once you get all the pieces folded over and glued its ready to dry over night.
I had already attached the slide handle on there after cleaning it up.
I wanted to cover up the factory backing on the slide piece as it was faded and looked terrible so I cut more material to shape and glued it to the side that would be sticking up to be seen through the sunroof.


Comment