Announcement

Collapse
No announcement yet.

Grumpys93 : 1993 Accord LX

Collapse
X
 
  • Filter
  • Time
  • Show
Clear All
new posts

  • Grumpys93
    replied
    So today I took some time to look around the engine bay for anything that I may have overlooked. I came across a small coolant leak from the Electronic Air Control assembly (forgot its name) on the front of the intake manifold. So I took the one off the h22 and swapped it over. I also found a small pin hole in one of the coolant lines running to it, so I cut the hose and clamped it back into place.

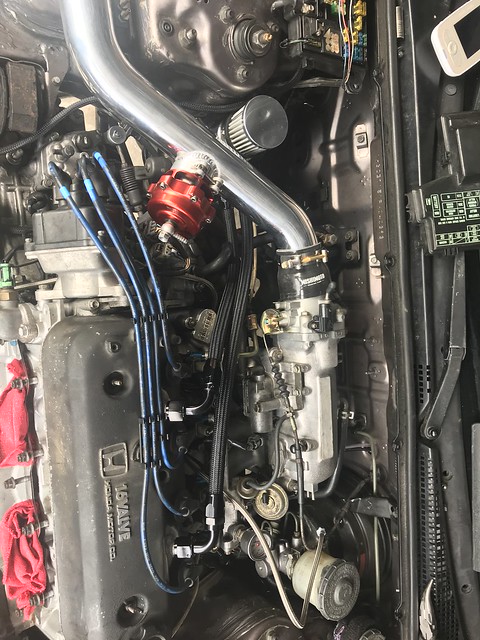
    I also decided to finally install the stainless steel brake lines Mark hooked me up with in the front end. Only reason I put this off was didn't want to have to bleed the system, but since I have down time why not.


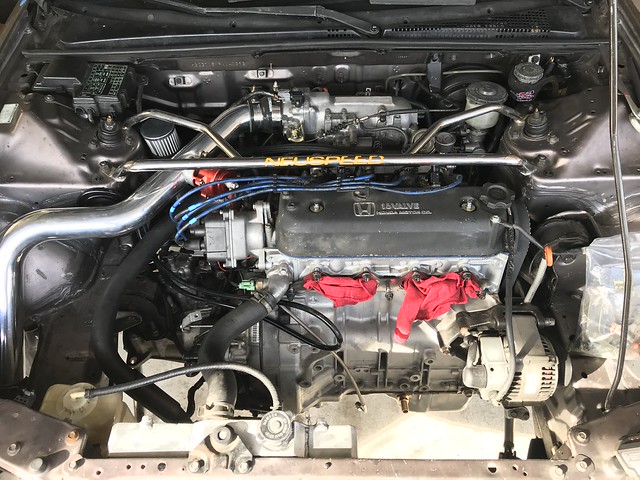
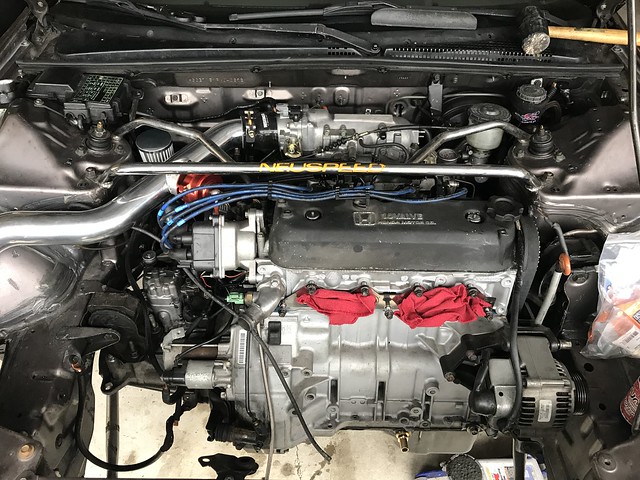
    Not a very exciting picture but you can also see where I routed the alternator wire under the crank pulley. Anyways its progress. I plan to go to the junkyard next week and pick up 2 fender liners, top timing belt cover and any other goodies I can find.
    Last edited by Grumpys93; 03-07-2019, 01:42 AM.

    Leave a comment:


  • Grumpys93
    replied
    So for me to remove the bumper, all I have to do is remove the two nuts inside the engine bay, pull the bulbs for the bumper lights, and then undo the bumper quick disconnects and Ill have access to the couplers and intercooler.

    I do like things symmetrical and try to get as close as I can. I think I am pretty symmetrical with the front end. The past couple days I have been marking off things on the list of what needs to get done.

    I finished routing the ground from the battery negative to the engine, so now I can breathe a little easier. I still need to purchase firewall pass through but this can be done at a later time.

    I also finished the front end, minus sanding, painting, and mounting the G-square Eyelids,but here is the finished product:


    I then set the TPS as per Cisco's(HondaFan81) so now at fully closed it reads .46 and at WOT 4.65. Mounted the radiator, connected the hoses and filled the system up. I will continue to bleed it once the engine is somewhat running. I have pretty much finished mounting everything inside the engine bay, the only things I have left are: mounting the new manifold once it is complete, mount the wastegate, connect the boost solenoid hoses to the wastegate, finish routing the hot side piping. Once thats all done I'll pour in the conventional oil for warm up, prime the engine, and then attempt first start and check for leaks. I still need to figure out a basemap for start and warm up. I believe Blake will make one for me.

    Anyways enough blabbing here is a picture of the engine bay, the anticipation is killing me!

    Last edited by Grumpys93; 03-05-2019, 11:11 PM.

    Leave a comment:


  • Raf99
    replied
    ya, i had cut my bumper for fog lights originally! Went to the shop with them in and we quickly found out we had to ditch them. I had collected numerous photos of people who made the fogs work with an intercooler but the angle was sharp for the piping or hung too low for my liking. It also meant you had to run a different intercooler piping setup than I had (one that goes a different route than what you and I run).

    But I will note this. I'm glad I have large holes there. The amount of times I had to reach in there to fix a clamp, fix some wiring, or adjust something is countless! You may find the same. You'll have one connection point in the corner of the bumper with two clamps in the back where you can't reach with the bumper on. If these clamps come loose or you blow the piping out; if you cannot reach in there you have to take the whole bumper off again to get at it. But I do like your cutouts more than mine!

    The other note is that my intercooler is actually attached to the bumper rebar with 3 large bolts. So I undo my piping from the intercooler and then the bumper and intercooler comes off as one. You will do A LOT of this take off and putting back on nonsense. Make sure the setup works in your favor for this too. But looks great! If you are as fussy as I am you'll want everything to be symmetrical.

    Leave a comment:


  • Grumpys93
    replied
    So got busy working on the bumper cover yesterday since I had a couple hours before I had to pick my daughter up from daycare.

    I started hacking up the black bumper to find out what I wanted and needed to cut to make the front bumper flow.

    I first decided to cut the foglight outline out on the driver's side and expose all the piping and on the passenger side, only what was needed to make it clear the intercooler:


    Then with the help from Will(Rilas) and Mark(NH503) we came up with this idea:


    So cut out what is needed and then instead of a straight vertical line "C" shape it.

    I decided we have a winner and starting hacking up the painted front bumper cover. I am about 90% complete, I just have to cut a little bit out the bottom to clear the coupler and it will sit flush. I then have to install the CD5 lip and the bumper will be complete.


    I think once the lights, lip, grill, and eyelids are installed, the front end will look even better then what I thought it would.

    Leave a comment:


  • Grumpys93
    replied
    Originally posted by Raf99 View Post
    I guess if you're aiming for 500HP+. I was under the impression the current ones are rated up to 600HP.
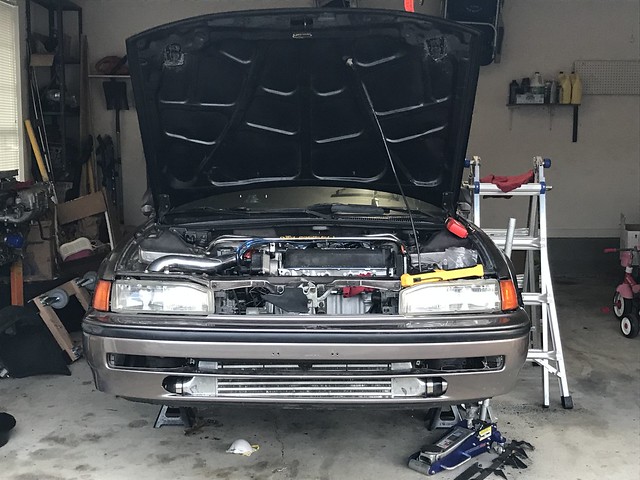
    I just looked on their website and said rated up to 22 PSI, I trust the PSI rating more then HP rating. As HP various differently from engine to engine, where as PSI is the same across the board.

    I honestly only have one horsepower goal right now and that is anything over 350whp. But I know a couple months down the road that goal will increase as what is occurring with your setup. We are greedy

    But today I decided to raise it up and cut up the support bar a little more to see how it would look and if it would clear the bumper. Which I am very pleased to say it did. The intercooler no longer sits lower then the bumper cover. I will now have to cut out some of the bumper cover to accommodate the big collectors on each side and it should slide on perfectly.

    Raf, do you have any pictures of where you have to cut up your bumper cover to allow the intercooler piping to fit? I think I may have to follow the foglight outline, but I don't want to cut to much. I think I am going to buy a hacksaw and then use the dremel for more precision.

    Anyways, here is the pic of the intercooler raised and sitting behind the Support bar:


    I am going to hold off on cutting circles in the front of the intercooler until I can see what my Intake Air Temperatures are. If I need to lower them, then I will do the cool Civic thing and put a couple holes in front of the intercooler.

    I also torqued down the crank pulley bolt, installed the alternator, I am almost to a stopping point, except the bumper cover. As everything else that needs to be installed is waiting on the turbo manifold.

    Leave a comment:


  • Raf99
    replied
    Originally posted by Grumpys93 View Post
    According to their website that intercooler is rated at 22psi. Which would be the limiting factor in me increasing power. My plan is to run 18-21 psi and then increase it later on to 24 psi. I know if I run a lip you won’t see the bottom of the intercooler hanging out I just have to save some bumper cover for it to mount on.
    I guess if you're aiming for 500HP+. I was under the impression the current ones are rated up to 600HP.

    Leave a comment:


  • Grumpys93
    replied
    According to their website that intercooler is rated at 22psi. Which would be the limiting factor in me increasing power. My plan is to run 18-21 psi and then increase it later on to 24 psi. I know if I run a lip you won’t see the bottom of the intercooler hanging out I just have to save some bumper cover for it to mount on.

    Leave a comment:


  • Raf99
    replied
    Sell that giant thing and make a profit 
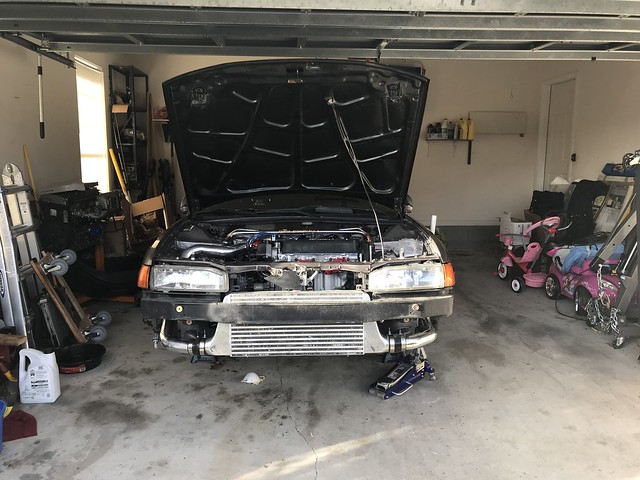
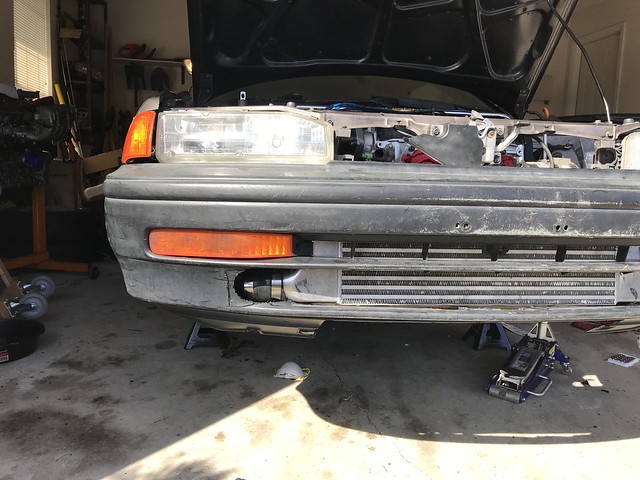
Only $160 for a mishimoto intercooler isn't it ?
    https://www.mishimoto.com/mishimoto-...ler-small.html
    Last edited by Raf99; 02-24-2019, 08:08 AM.

    Leave a comment:


  • Grumpys93
    replied
    Ya I forgot that it turns into molten hot lava after you cut it. The intercooler hangs about an inch lower then the bumper cover. So I am trying to decide whether to mount the intercooler differently and raise it more which would mean I would pretty much kiss the top of the support bar goodbye. We will see. I’m going to do some measuring.

    Leave a comment:


  • Raf99
    replied
    It's fun cutting the fiberglass bumper rebar isn't it :P (not)
    That bumper skin should fit right over the intercooler now if you already cut the rebar part. I think........

    Oh, and say goodbye to those fog lights
    Last edited by Raf99; 02-22-2019, 08:39 PM.

    Leave a comment:


  • Grumpys93
    replied
    So got some small work done on the Accord, when I was routing the AEM Oil Pressure gauge I noticed that the Clutch master was leaking. So decided to replace that with a new one, install was fairly easy and bleeding the clutch as well.

    Odd vs New:


    Since Raf pointed out I need to clean up the rest of the bay I went ahead and cleaned up the reservoir as best as I could:

    Before:


    After:


    I then decided to start tackling the crash bar and bumper cover and though I made the intercooler fit inside the crash bar like a glove, I think trying to get the intercooler to fit in the bumper cover and look decent or good is beyond my skills. So I will be seeking a body shop sometime in the future to do that job for me.


    After that I mounted the Neuspeed 4 point strut bar and called it a day:

    Leave a comment:


  • Grumpys93
    replied
    Yep I am rocking the esp traction bar. Have been since his first batch. Still one of the best purchases I have ever made.

    Leave a comment:


  • Raf99
    replied
    I knew he'd have to make a new one.... sucks, but oh well. Lesson learned.
    I think you have a ESP front lower sub frame? Needed with a 3" exhaust

    Leave a comment:


  • bjaccord
    replied
    Looking really good. Too bad about the manifold, I am sure the next one will be great.

    Leave a comment:


  • Grumpys93
    replied
    So a little set back has occurred, as I stated earlier the manifold Blake designed did not clear the hood, so instead of hacking up that beautiful manifold, along with the amount of time it would take to modify it, he could build me a new one.

    So Blake is redesigning a new manifold, instead of going with a hybrid, ramhorn/bottom mount, we are going strictly bottom mount/equal length.

    I am not to worried as this allows me time to tackle the other small tasks I wanted to get done.

    So for valentine's Day my wife looked on my amazon list and bought a few things:


    New clutch master, as my 26 year old one is now leaking, 2awg wire to finish the battery to engine ground, some edge guard to protect the intercooler piping passing through the cut frame.

    I then finished mounting and routing the oil catch can hoses:


    Once that was done I mounted and wired up the MAC 4 port boost solenoid, all I have left to do is connect the vacuum lines to the wastegate. This will allow me to do boost by gear and increase boost on the fly.


    Some other things I did but didn't take pictures was change out and route the longer 90* bend oil feed line as well as started removing the clutch master cylinder.

    It's slowly coming along guys, almost there.
    Last edited by Grumpys93; 02-18-2019, 01:38 AM.

    Leave a comment:

Working...
X