Announcement

Collapse
No announcement yet.

Chubbykai/TheNextEpisode : 1989 Honda CRX HF

Collapse
X
 
  • Filter
  • Time
  • Show
Clear All
new posts

    Chubbykai/TheNextEpisode : 1989 Honda CRX HF

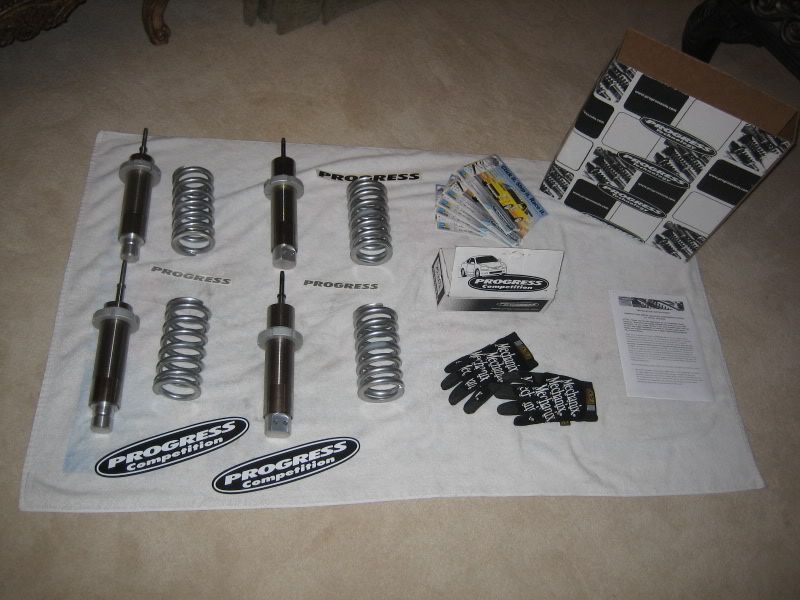
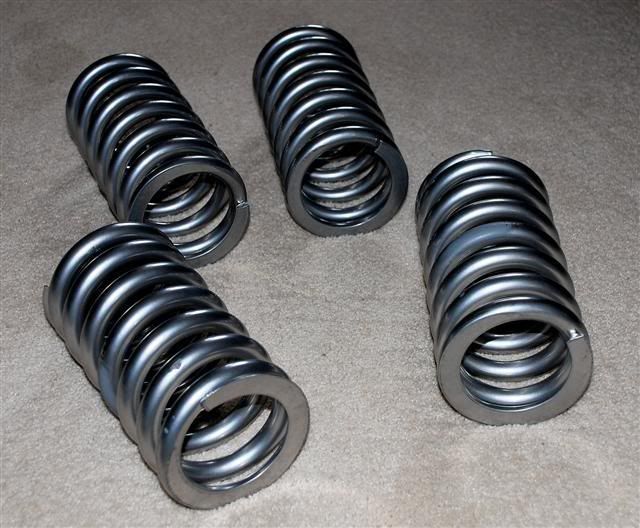
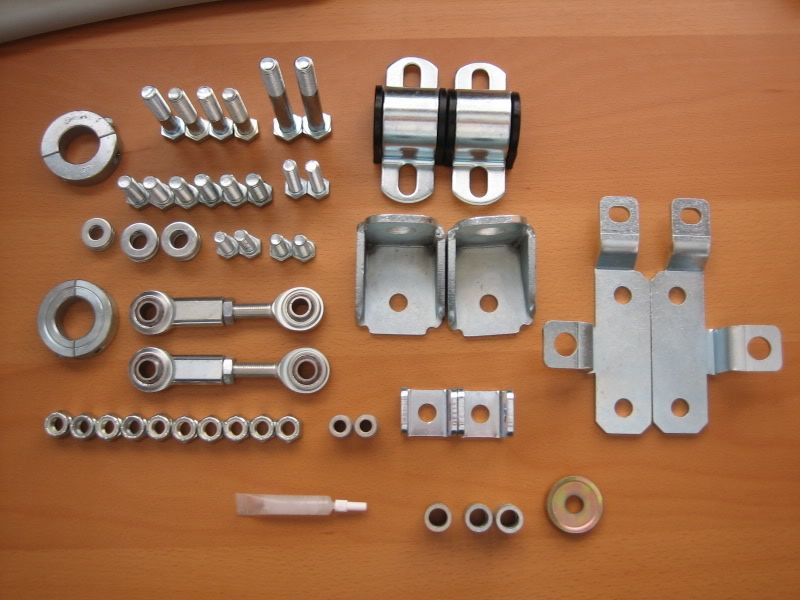
    Reserved for eventual parts list.


    The list will be updated as we retell the story.
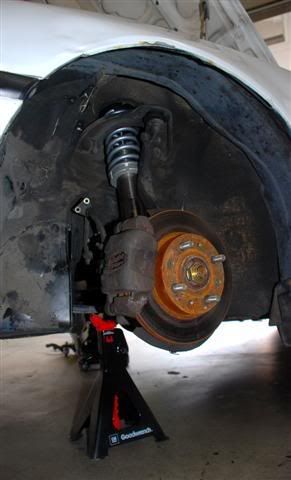
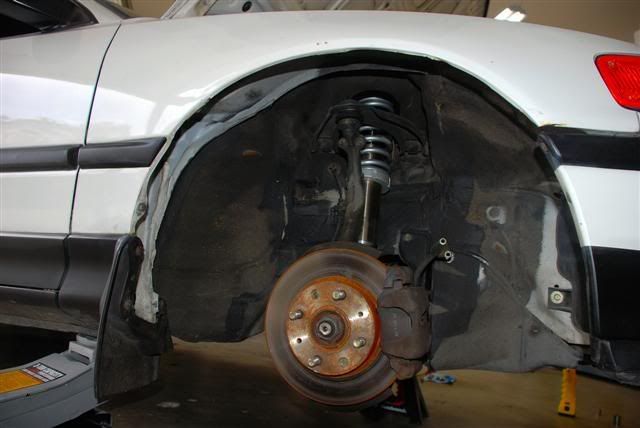
    For now, scroll down.

    #2
    Prelude

    About a year and a half ago, Jon (Chubbykai) and I were dreaming, like usual, about potential project cars. We were always attracted to the Civic hatch shape, and its 2000-2100 lb curb weight was massively appealing. Also, we had the H22 running smoothly, in the Accord at the time, begging to be squeezed into the tiny engine bay of a civic.

    At one point, we even titled our dream project build, “Seeing the light.” Nothing religious of course, just a note on the revelation of potential in cheap, bantamweight performance.

    The title clinched it. We wanted a project, and we knew what car we wanted to work on. We’d go 50/50 and try to keep total costs under 11,000.

    So we got to it, searching Craigslist for weeks. To be honest, Jon was far more diligent regarding searching and calling around. It seemed like every Civic we found was either poorly modded out or beat to death by a previous owner who couldn’t get it passed smog. We didn’t really need it to pass smog, but it was a good sign of if the owner kept the car in decent shape. A car that passed smog usually was a car that was depended on, and accordingly cared for.

    During the search for the project hatch, we’d often get hits for CRXes. They were consistently cheaper than hatches, they showed up more often, they were usually in better shape, AND they weighed roughly 200 pounds lighter than the lightest hatch. Our craigslist searches soon included the keyword “CRX.”


    Several weeks later, Jon came across a clean CRX very close to home. We set up a meeting, checked the car out, and promptly turned it down. It was reasonably clean, but the guy wanted 2200 bucks for it. It passed smog, but was not without its problems.

    A week later, we gave in and went back to the guy. The CRX had its good points; it was pretty much without dents, had a straight chassis, sort of idled, passed smog, AND, most importantly, was an HF. The HF was the lightest model of the CRX family.


    2150 bucks later, we had ourselves a hole to throw money into.

    The hole had 14” rims and not a single matching tire, springs cut so much that it would scrape on a 17 mph right turn or a 12 mph left turn, shocks blown to hell, and a horn that activated on right hand corners. The corner lights that felt like they were secured with chewing gum and there were remnants of a rotting orange in the passenger side foot well. Still, we loved the little wreck.

    We wanted a track car with the potential of driving on the street. We had big plans for it, starting with suspension work.


    More to come.
    Last edited by TheNextEpisode; 09-03-2010, 02:01 PM.

    Comment


      #3
      Suspension Plans

      It’s exciting to pour money into an engine, chasing greater and greater horsepower figures. For that reason, we decided not to.

      We would begin by securing our groundwork. Going with the budget theme, we began searching for a Koni Yellow/Eibach sleeve set up. Autocrossers have had lots of luck with similar set ups, and the 600-700 dollar price range was not very painful.

      SportCompactCar, however, stated that they had great results with Progress Series 1 Time Attack coilovers. Progress guaranteed excellent performance, and had many customers willing to support their statement. At $1160 taxed and shipped, however, the price-inflicted pain was far higher. Chubby convinced me otherwise, and a couple weeks later, the custom built coilovers arrived. They were rated at 450 lbs/in front and 650 lbs/in rear. They were not damping/rebound adjustable.

      It was the first time that either Chubby or I assembled coilovers. It’s an easy process, but there’s more to it than assembling a shock/spring set up. Going slowly, and cleaning all parts we came across, we did two in half of a day. We actually did one in about 5 hours and the second in 45 minutes.


      1200 bucks…


      Ride quality? What?


      Aww, look at the teenie little discs. Hehe


      mmmm cobwebs


      No need for a spring compressor, there was a 1/2" of total play between the spring perches and the old spring.


      Confusion during assembly. (ZOMG SHOES)


      First up!


      And shortly after, the second coilover was in.


      The coilovers looked like diamonds in the rough, with everything else so dirty.


      The drums don’t even make good paperweights. They’re too light.

      The following day, Chubbykai installed the rears.

      The springs are really freaking hard. For track applications, I’m sure it’s ideal. But wow. You feel the footprints of caterpillars on smooth streets and feel like your falling into the Grand Canyon if you even a clip the edge of a patched pothole. OK, maybe it’s not that bad, but the coilovers are definitely one of the things pushing us to take the CRX off the road for good.

      We’d aim to install the sway bar and bushings next.

      Comment


        #4
        nice i love build threads.

        Comment


          #5
          More pics of wheels in your sig... NOW!

          1999 BMW M3
          2001 Honda CR-V SE RT4WD
          2005 Chevrolet Tahoe Z71
          2015 Suzuki V-Strom 650

          Comment


            #6
            Wow. that is such an awesome picture of the little hellion to be. It makes it look even smaller and more appealing. Did you buy it that clean?

            Comment


              #7
              body just look so clean........

              ...........AE86-GTS: SOLD.................................................. ........CB7-DX: SOLD

              Comment


                #8
                Thanks for the comments guys, replies are great motivation to keep posting on the build thread!


                The rex was pretty darn clean. The paint looks a heck of a lot better after we buffed it. I'll touch briefly on that later. The shell has small rust spots, the largest of which is about half an inch in diameter. We're gonna get on them quickly though, as we're hoping to repaint the car white.


                Regarding pictures of the wheels, I don't want to get too ahead of myself and get out of chronological order. That said, I'll include this picture for now.


                Finals week is coming up right now, and studying is kicking my tail. I'll write an update soonish, maybe I'll get a chance tom.

                Comment


                  #9
                  I love crx's . cant wait to see how clean it looks after paint , considering how clean this thing already is , nice work man
                  93 accord Black 10th Anniversary (REBUILD)
                  http://www.cb7tuner.com/vbb/showthread.php?t=125009

                  1992 Accord Lx Frost White - SOLD
                  1993 Accord Se Coupe - Totaled
                  1992 Accord Ex Sedan 5 speed - SOLD
                  1992 Accord Lx Coupe - SOLD
                  1990 Accord Ex Sedan 5 Speed - Daily Driver
                  1993 Accord 10th Anniversary - STOLEN (REBUILD)

                  Comment


                    #10
                    Those wheels look great, as does the whole damn car!

                    1999 BMW M3
                    2001 Honda CR-V SE RT4WD
                    2005 Chevrolet Tahoe Z71
                    2015 Suzuki V-Strom 650

                    Comment


                      #11
                      bump this up I want more pics...very nice

                      SOLD!!
                      Boosted H22
                      375whp 298 ft/lbs at 15psi

                      MEMBERS RIDE THREAD<<<CLICK FOR VIDS AND COOL PICS

                      Comment


                        #12
                        haha thanks for the bump. I was slacking on cb7tuner for the last couple weeks, I'll start writing the next installment now.

                        Comment


                          #13
                          Hard springs are great, but when the bushings are as pliable as the CRX’s were, there’s still a fair amount of slop before the springs take up cornering forces. Master set bushing kits are reasonably priced, so we purchased a set.

                          We heard varying reports regarding Energy Suspension and Prothane bushing kits. Claims were that ES kits tended to squeak more than Prothane kits. Others said that with enough grease, the ES kits were just as quiet as the Prothanes. As the ES kit was cheaper, we went with ES.


                          Soon after purchasing the kit, we realized that the ES kit didn’t include the upper rear control arm bushings. Those bushings alone from Prothane are 75 bucks. That happens to be the price difference between the energy suspension master set and the Prothane master set (which includes the rear UCA bushing). We ended up selling our mostly unopened ES bushing master kit and went with the Prothane master kit. The Prothane bushings look a little more solid; a lot of the bushings come with outer sleeves and there's a lot of one-piece bushings in places that ES uses four-piece bushings. Not that ES is inferior, just that it’s good to keep things simple and part numbers limited.


                          The upper rear control arm bushings that cost the extra 75 bucks.


                          We also chucked out another 10 sawbucks for the two rear trailing arm bushings. The OEM pieces were deteriorated beyond help.


                          Visiting the junkyard for some part, we stumbled across a DA with ABS and a complete rear disc brake assembly. We snatched the trailing arms, knuckles, calipers, brake lines, discs, and e-brake cables. We had big plans for the front brakes, and the DA discs were a good upgrade for the back. The DA setup is pretty much bolt-on, the only setbacks being the compensator arm and the emergency brake cables. The CRX compensator arms bolt in fine, however, and CRX SI brake cables solve the emergency side of the stoppers. The e-brake cable situation was kind of interesting, and I can do my best to recall it if anybody wants to hear.


                          The longer CRX compensator arm is the one to use.


                          There was obviously no need for the ABS equipment.

                          After finishing up the rear brakes minus the e-brake cables, we put the car up on jack stands and completely disassembled the front and rear suspension. We failed pretty hard at our first attempt at bushing removal. We tried using a hammer, screwdriver, and hacksaw, but progress was slow. 3 bushings removed in 3 hours was not cutting it.


                          Our savior came the following week in the form of a hydraulic press. In several hours, all the other bushings were popped out. We then cleaned all the suspension parts thoroughly in gunk and paint thinner. We dremeled off any rough edges, which, on the larger pieces, took some time.


                          The trick for removing bushings is to find a socket that will slip just into the suspension piece, while being large enough to push out all of the bushing.


                          Comment


                            #14
                            Also in were:


                            and a Progress 24mm adjustable rear sway bar:


                            And resting.


                            Time to sleep. Tomorrow is the first day of spring quarter classes.

                            Comment


                              #15
                              Good update
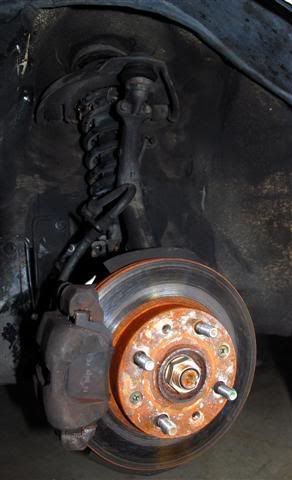
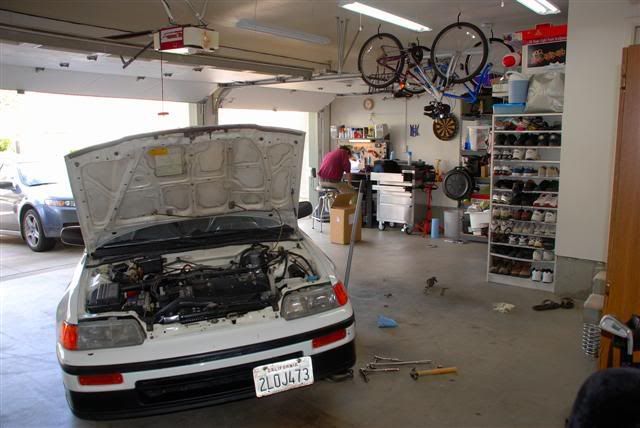
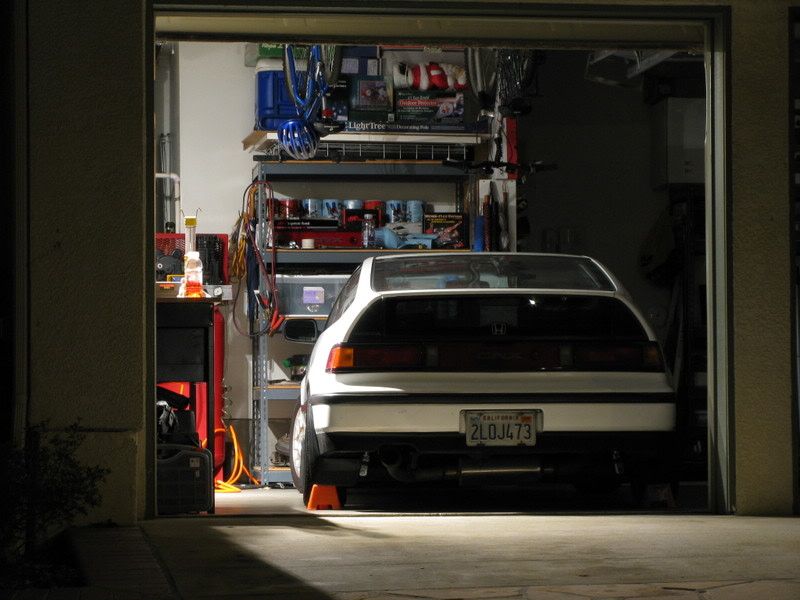
She's going to be really sweet

                              SOLD!!
                              Boosted H22
                              375whp 298 ft/lbs at 15psi

                              MEMBERS RIDE THREAD<<<CLICK FOR VIDS AND COOL PICS

                              Comment

                              Working...
                              X