I'm glad my DIY was able to help figure that out! I figured the pics were probably gone. I downloaded everything, but haven't re-hosted them since I was hoping we would be able to eventually do it here and I wouldn't have to redo the links more than once.
Car is looking good and the suspension refresh should make it feel like a million bucks!
Question: I couldn't tell from the pics, but did you media blast the control arms before you refinished/rust coated them? I think a media blaster is on my "to do" list so that I can generally clean stuff up.
Keep up the great work! Seeing your progress on this old gal is upping my motivation level and probably a lot of other people's too.
Announcement
Collapse
No announcement yet.
SSMAccord : 1992 Accord EX
Collapse
X
-
Wish I hadn't thrown my wagon's rear toe arms in the trash after installing the FFCs, or I'd just send them to you. As for the front sway bar, I do searches on here and people always seem to talk down the need for a front upgrade, but it made a massive improvement on my RSX, which is pretty stiff from the factory. On that car, I installed the rear bar first, then the front about six months later just to feel the individual changes. I feel like I noticed a bigger change with the front bar than the rear. I'm definitely stiffening up the front on my wagon; these cars have way too much body roll stock. None of our options are stiff enough that they'll be pulling up on the inside tire in a hard corner.
Looking good, though. Gold's a fantastic contrast color with black.
I see the elongated hole on the ESP bar. Did it not fit?Last edited by CyborgGT; 12-07-2020, 02:56 AM.
Leave a comment:
-
2020 Projects / Chassis Update
At the beginning of 2020 B.C. (Before Covid) one of the local salvage yards had a pretty rusty CB9 in the lot. Despite it being wintery and cold here, I decided to tackle getting the solid rear LCAs off. The rearmost arms came off fairly easily, the toe arms however were seized in place as I expected them to be. Due to how the car was perched, with the subframe supporting the car, I couldn't get them off in a timely or safe manner so I decided to come back another day and get them off. The next week happened to be the be the beginning of Covid restrictions...needless to say by the time that eased up the CB9 was gone as were the solid toe arms. Figuring that track days would be few and far between in the pandemic, I figured it was a good a time as any to tear in to the CB chassis for a refresh.
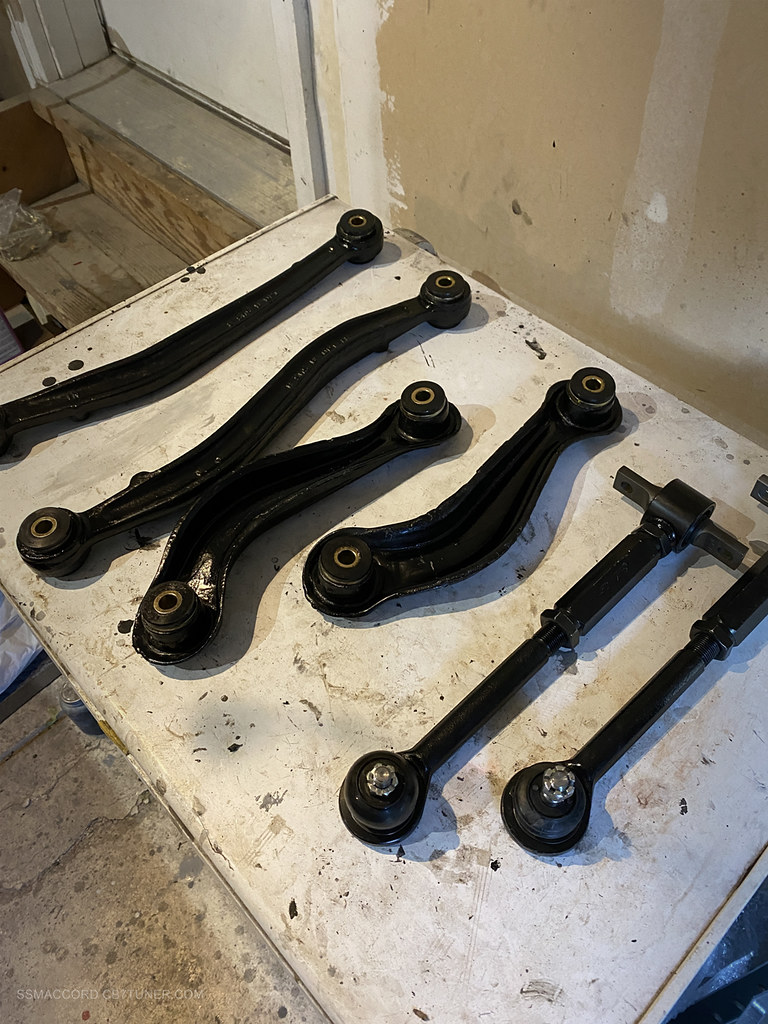
Using the CB9 LCAs and some stamped CB toe arms, I decided to foray into removing the tired old rubber bushings and replacing them with polyurethane bushings to help tighten up the handling. I started with the rear since I wouldn't have to disassemble the car to begin the process. Being rustbelt parts, I had to do some electrolysis rust removal on them of course. After that process was over I trekked to Harbor Freight to acquire a press to remove the old bushings. After some finagling I managed to remove the old bushings from the arms.


To hopefully prevent future corrosion, I used a Eastwood rust encapsulator on the arms and then top coated them with Rustoleum black before installing the sleeves and PU bushings. To round out the rear refresh, I decided to replace the upper LCA with Moog adjustable units that turned out to be SPC parts. I didn't know that there are 2 versions of adjustable LCAs (straight and bent) when I ordered these, I may have to order the bent versions if these have the interference issue with the curvature of the rear knuckle.

I also used the opportunity to replace the refresh the rear knuckles and replace the lower strut mount with additional urethane bushings.

Since I had been running the CD rear knuckles with a CB rear subframe, I figured that the urethane LCA bushings would not allow enough flex to continue with that setup. I sourced a local CD subframe that ended up being too rusty for me to feel okay using it safely. I then sourced an eBay part that was much better than the local part, I still used the rust encapsulator and paint to prevent future corrosion. The trailing arms got a window weld mod and matching paint job too.

Since the rear subframe was being reinstalled it was the opportune time to install the rear Spoon Rigid Collars as it would only be difficult once everything was reinstalled on the car. Also, new eccentric bolts for the toe arms and copious amounts of anti-seize to allow for the rear toe adjustment to work as intended and future serviceability.


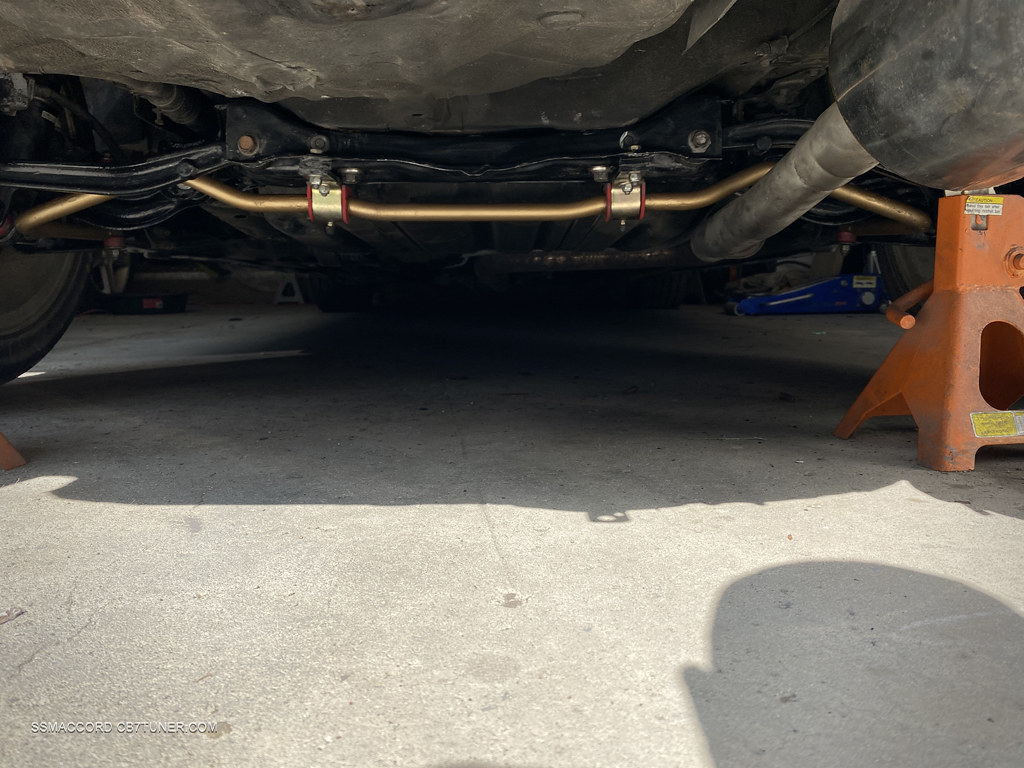
Part of the overhaul here was to upgrade the rear stabilizer bar, I had managed to acquire a Progress unit a couple of years ago from Baracuda and put it in storage for future use. I hadn't bothered to unwrap it when I received it so it was a bit of a surprise to find out that it had been painted gold, I suppose that doesn't affect how it works though. Changing to the CD rear subframe did make the install of the bar a bit more irritating due to the part being wider in the intended mounting location for the brackets.Thanks to Owequitit and his DIY for providing insight during this install. It seems that I am going to need to address the exhaust system sooner or later as the mid pipe has corrosion though.


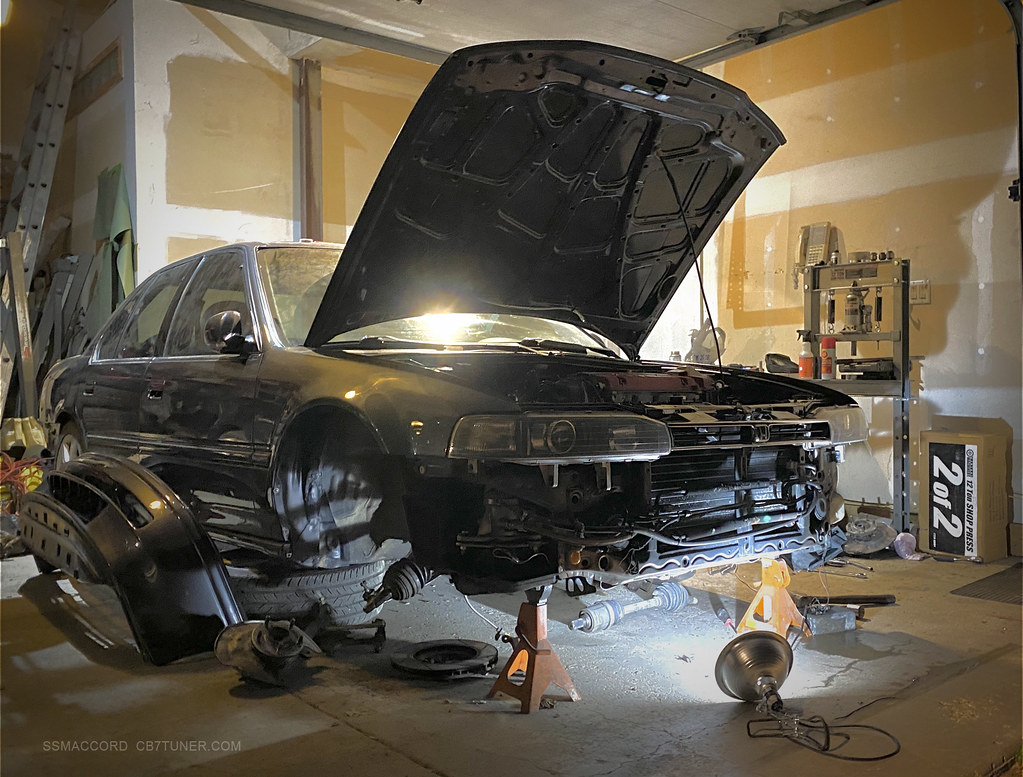
The front refresh was less eventful. I wimped out on extracting the bushings from the front LCAs myself as the press seemed to be under duress when I attempted to extract them. I wound up sending them off to the machine shop to have the bushings removed. From the looks of it, heat and a chisel were needed to remove them; I used the HF press to install the new sleeves and bushings. The upper anchor joints were easier once I figured out a sleeve and socket setup to extract them. These parts also got the rust encapsulation/paint treatment and then reassembly. The front rigid collars went on pretty easily, likely aided by the rear mount being out at the same time since I felt it needed a refresh since I am trying to track down a drivetrain vibration. This allowed the subframe to drop a bit more than if the mount was in place.

Seeing as the rear stabilizer bar was already painted gold, I figured I might as well rust encapsulate and paint the front stabilizer bar to match. I also have a larger CL bar that I painted at the same time if I determine that I need it in the future.

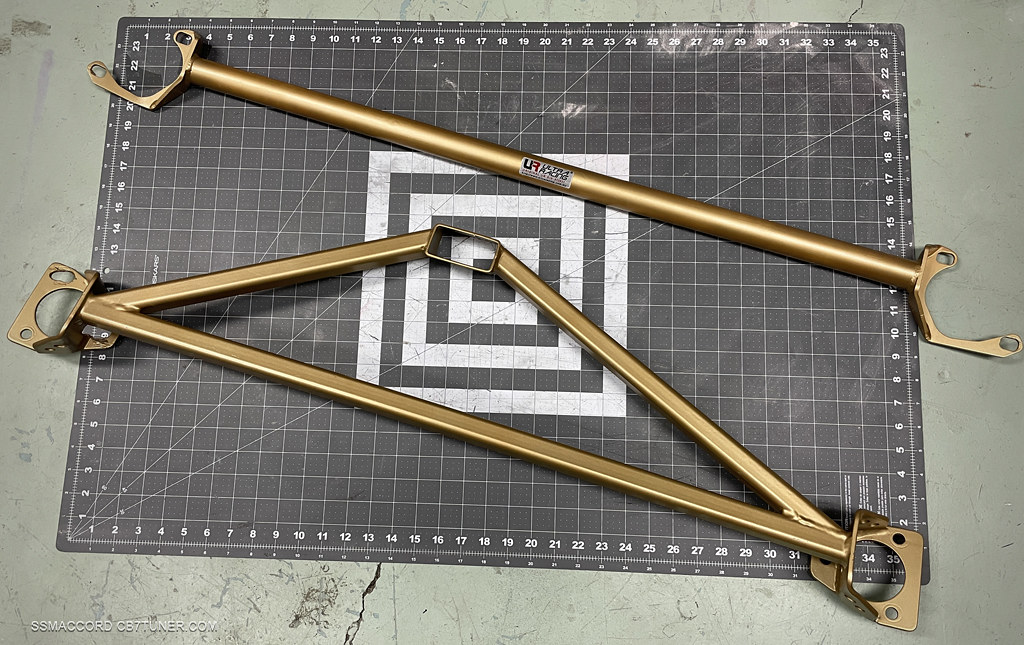
Rounding that out, I got in on an ESP group buy back in 2015 as well as an Ultra Racing rear bar. These also got painted to match the stabilizer bars. Installation was interesting, particularly for the ESP bar.

Leave a comment:
-
The doors haven't changed. The LEDs were always there from the primer, I just hadn't run the wires until I took the doors off for painting. They aren't visible on the door.


Leave a comment:
-
This is what the armrests look like separated from the door panel.Originally posted by Grumpys93 View PostThese are great mods! I especially love the armrest light. Curious how you did this as I may steal this idea from you.

There is a V shaped cut through the vinyl skin and the underlying foam of the armrest. I used a side emitting LED strip (in hindsight I think any LED strip will work, but the smaller the better in the limited space) that is carefully affixed in the space.

*imagine the LED strip being the length of the groove

When installed you cant see the LED unless you are looking up from the ground.

Leave a comment:
-
Following the E46 setup, I ran a short ground from the battery to the ground location where the ABS control unit was previously bolted into. I modified the stock transmission ground strap to be a bit shorter and it is grounded in the engine bay below where the stock battery would be. I do have a circuit breaker that I may install in the trunk, probably in the nook where the jack is located.Originally posted by Raf99 View PostGreat stuff. Are you going to ground to the transmission and ground in the truck too for the battery?
 Last edited by SSMAccord; 11-26-2020, 12:33 PM.
Leave a comment:
-
Gladly. I have an additional armrest that I can photograph the underside of. I’ll do it after the holiday when I return home.Originally posted by Grumpys93 View PostThese are great mods! I especially love the armrest light. Curious how you did this as I may steal this idea from you.
Leave a comment:
-
Great stuff. Are you going to ground to the transmission and ground in the truck too for the battery?
Leave a comment:
-
These are great mods! I especially love the armrest light. Curious how you did this as I may steal this idea from you.
Leave a comment:
-
2020 Projects / Electrical Gremlins
Took the time at home to also take care of a few electrical tasks.
Viper alarm install: This was fairly straight forward as it is mostly just soldering and locating the correct wires. It was helpful that I had to remove the dash for bit as it allowed for easier access to some of the wires.
I also wired in a toggle switch to disable the "unlock" functionality for the power lock switches when it isn't needed.
Viper System

HVAC Aux Fan:
I am not sure if I am just accustomed to more modern and efficient HVAC systems or if the CB HVAC and DCC, along with the large greenhouse of the CB just dont allow for the cabin to ever get really comfortable in summer weather when it's really hot outside.Initially I thought that the blower motor wasn't working at full speed, but after running a few tests I ruled that out. Since the dash was out for the alarm install, I resealed where the junctions box meets the ducts as I found that there was a little bit of air leaking there. I was hoping that cooling issue may be a pressure leak. Still no dice.
So I attempted to make the system operate more efficiently by increasing the volume of air that is being circulated. I could not seem to find a higher output blower motor for the CB, so I figured I would have to supplement the airflow. The system is pretty tightly packaged but there is some space between the output side of the Evaporator Core and the junction box to fit a small fan.
Diagram

Evaporator Core w CPU Case Fan

Initially I went with a CPU case fan as it met the dimensions for what I needed. It fits in the cavity between the evaporator and the heater core, but the output was only 130ish CFM and didn't make a significant change to the airflow as was intended.
Since the first attempt didn't go quite to plan, I decided to up the volume of air by changing out the case fan with a 6" slim fan meant for a motorcycle application. At 600 CFM+ the airflow was increased enough that the vent temps dropped about 9 degrees and the volume of air being output increased significantly as well. The radiator fan has more depth that the CPU case fan (50mm vs 35mm) so it's placement was a bit more specific to avoid contact with the inlet doors for the heater core.
There is an auditory impact, an increased sound of air being circulated as well as the added sound of the fan motor, but I am considering a fair trade off so far.
Interior lighting:
These were pretty simple. Added the lit windows switches using CRV parts. I did sand away the ribs that to make them smooth like the original CB parts. Since I was adding the CRV lit switches, I also added the lit CRV mirror switch. I used the same LED here as the window switches, but LED is mounted differently and it affects the intensity. I might look into making it seem brighter, but it seems to work for now. I also added a pin light LED in the rear view mirror, the depth of the TLX mirror made this pretty simple. The light is very faint but helps to keep the center console area illuminated. I also decided to run power to the door leds with a on/off switch so that I can turn them off when I don't want them.
Window Switches

Rear View Mirror w LED

Door Armrest Ambient

Battery Relocation:
This was a project that was always in the cards, but I didn't want to take it on until the quarter panels were repaired. Initially, I was going to just retrofit an existing setup from an E46 generation BMW.
E46 Battery Cable

E46 Junction Box

The setup made sense, but the way that the cables mount to the battery wouldn't let the lid of the Summit Racing battery box close properly. I was able to use the junction/jump point connector in the engine compartment though. I couldn't find anywhere to mount it in the engine bay, so I created a mount using the Vacuum box. I grounded the battery to the trunk ground location and modified the starter harness and grounded it to the chassis where the ABS pump was previously located in the engine bay. This also seemed like the time to install the SE black trunk panels that I salvaged a few years ago. I also added DC2 trunk lights to the panels. The panels needed cleaning as they have been hanging out in a dark storage closet for a few years.
Modified Vacuum Box

Junction Box

SE Trunk Parts

Battery Relocated / DC2 Cargo Lights


Leave a comment:
-
This is EPIC! Definitely a hell of a quarantine project! Not only am I jealous, but I am subscribed.
Leave a comment:
-
2020 Projects / Shiny Stuff
Given that 2020 became well...2020 it turned out there would a lot of additional free time to work on hobbies.
With that in mind it seemed like time to tackle a few projects that I either didnt want to tackle before the car got bodywork/painted or parts that were in "cold storage". I have a tendency to buy cheap parts without having a plan or place to use them. Some of these projects are kinda random lol.
Coincidentally, I began this project on what I didn't realize would be the last real day of work in 2020. Turns out the company implemented work from home protocols that weekend and suddenly I homebound. Anyhow, I wanted to find a way to make the console seem less utilitarian. I attempted to use the 97-2000 Acura CL chrome trim ring to dress up that area. I think because I shaved the metal shift boot retainer and shift boot is flush with the console the CL trim ring sits proud of the boot and looked awkward installed. Also, it seemed unwise to glue the chrome part to the painted console due to it likely not being a very durable to do so.
As an alternative, I grabbed an additional console from the salvage yard (it happened to be a DX without cupholders) and decided to treat it the same way I did the plastic door parts. I used tape and a dremel to scribe a line in the console body to make it look like a separate trim ring. I probably should have used a thin cut dremel disc, oh well. I then sanded the grain down to make a smooth surface. After that I painted the ring to match the other gloss black parts. Finally, I painted the body flat/satin black to match the interior.
Console 1

Console 2

Console 3

Console 4

Console 5

Console 6

-
I bought these in 2013-ish but never had a need for them. I waited until after buffing the door jambs to install these. I did little polishing and such before installing them onto the Black 91 SE plastic sills.
Stainless Sill 1

Stainless Sill 2[

Stainless Sill 3

Stainless Sill 4

I also managed to extract BOSE badges for the front door speakers at some point and got around to installing them. The little mounts are quite fragile these days, ugh...
BOSE Badges

I also wanted to address the wrinkly chrome on the grille. I figured that I would just buy an aftermarket one and put the chrome parts on the grille I painted. Turns out, through the miracle of modern manufacturing, that aftermarket grille is one complete piece that is all chrome and then painted black where the OEM grill was black plastic. That also meant I needed a new Honda 'H' to mount there. Let's hope the grille holds up.
Grille 1

I also changed out the painted BB6 Prelude cluster rings for the chrome parts.
BB6 Gauge Rings

And I did acquire stainless window trim that was in better condition. I also needed a new moon roof deflector since I broke the mount on mine when I reinstalled it.
Window Trim
 Last edited by SSMAccord; 11-09-2020, 02:17 AM.
Leave a comment:


Leave a comment: