If this is your first visit, be sure to
check out the FAQ by clicking the
link above. You may have to register
before you can post: click the register link above to proceed. To start viewing messages,
select the forum that you want to visit from the selection below.
Just to add, I did my motorcycle last year. It was my first time painting something completely. It came out good, but my clear coat wasn't the best. I have some scratches all over my gas tank from contact with it while riding. I've been planning to redo it to the caliber you have as soon as I get a larger facility. That's at the top of my agenda with her.
Thanks for the inspiration.
Thanks. Painting is a tedious process. It took a while to get the clearcoat application to be wet enough to avoid too much texture and having it too wet where is sags and runs.
Any plans with badging, or going to keep it as is? Personally, I do feel like the car is missing something.
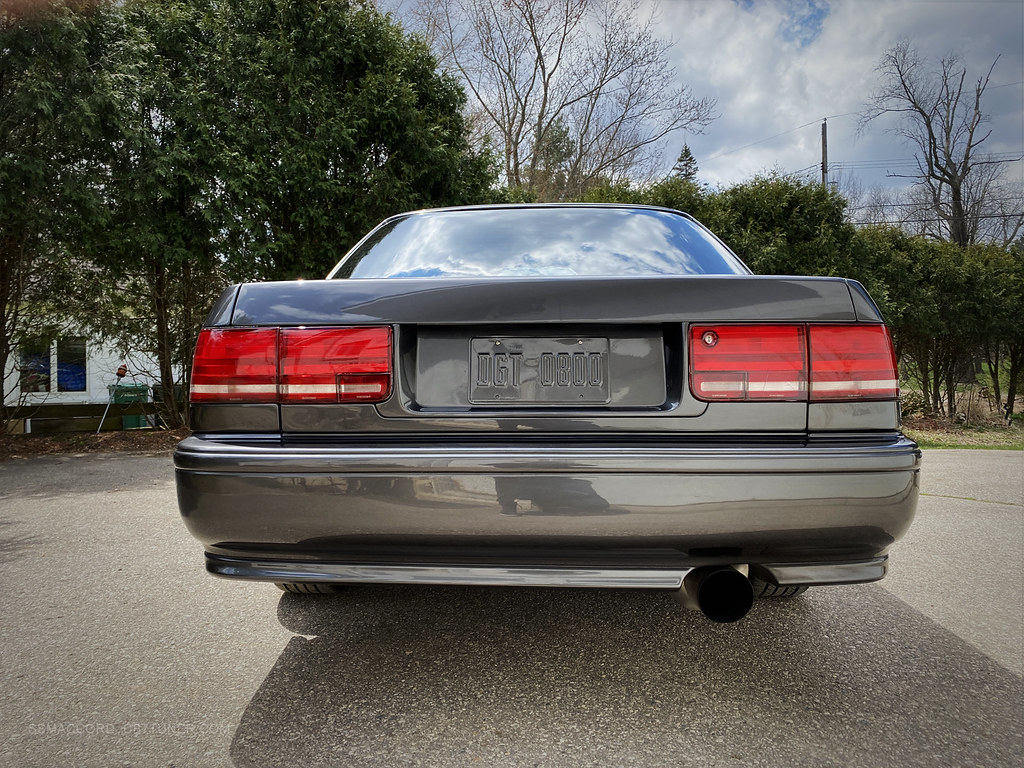
Man, I'd love to see those tail lights in person. Cameras rarely capture lighting well enough, but it looks promising. Great work all around.
Yeah, I will be putting the "H" emblem back in place. The old one was pitted and dull and I haven't put the new one due to the car still needing to be glazed and waxed. Once the weather is warmer I will likely tackle that.
Thanks. It has been a learning experience that's for sure.
I love those tail lights, I too feel that the tail lights are dated. I haven't come up with what I want for the rear, but those are very nice! Well done.
Thanks. I think they came out ok. I can check that off my list for a while I hope.
woh man. Looks amazing and you've convinced me i need to do the same. The amount of work you did on that ........., months ?? Can you come do my car ?
I'm guessing ... a good $500 or more in paint?
And what size compressor were you using? (my small one sucks when you get in the game mid paint... )
Thanks. I haven't planned to paint another car ever again. It was actually quite exhausting. Perhaps if this wasn't a complete color change it would have been less intensive.
I think I bought double the amount of paint because of being a noob. LOL. I wasn't sure how much I would need and how much I would waste. Also the temperature dependent reducers and such add up. I think the initial paint tally was $1500 in paint.
The compressor is a 60 gallon unit. It has enough capacity to be filled and then the motor turned off so that it doesn't kick in while spraying or the paint is curing and kick up dust.
I love those tail lights, I too feel that the tail lights are dated. I haven't come up with what I want for the rear, but those are very nice! Well done.
Just to add, I did my motorcycle last year. It was my first time painting something completely. It came out good, but my clear coat wasn't the best. I have some scratches all over my gas tank from contact with it while riding. I've been planning to redo it to the caliber you have as soon as I get a larger facility. That's at the top of my agenda with her.
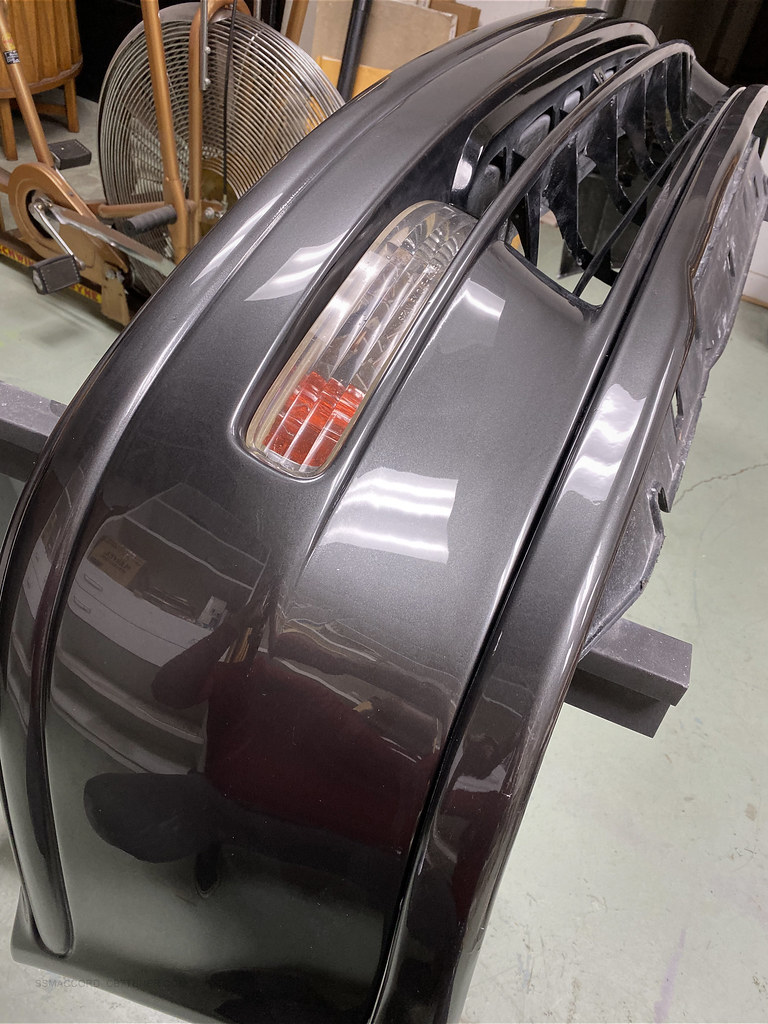
Color sanding continued on the bumper and all of the parts that have to assembled onto the car. I only documented the bumper, but all of the others parts would have to follow suite.
Bumper 1
At some point after the old car got decommissioned I picked up JDM/EDM Thin Side Moldings for a deal on Ebay. I also refinished those and color sanded these prior to reassembly. I did not use mounting tape when I reinstalled these which I may go back and do.
Side Moldings
I also managed to acquire a EDM License Plate Trim Insert. I painted both as I may swap them back and forth until I settle on one.
License Plate Trim
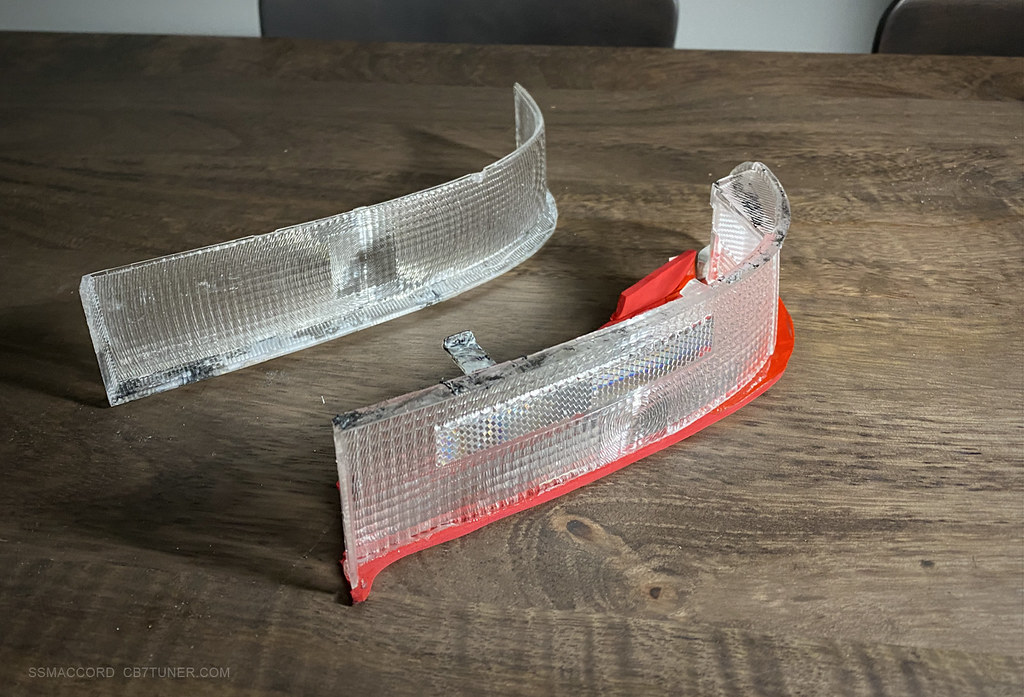
And this is my moment of rice. I had the thought one night after being behind a CB that the lighting execution of the running lights at night looked a little dated. So I wanted to modify the lighting to make them look a little more modern. I decided to execute a indirect LED running light and separate that function from the brake light function. After a bit of tinkering and bunch of arts and crafts I ended up with something I am content with. Using what was available and mostly fit the bill for what I intended, the lid from storage container is just about the profile of a CB7 light and paired with commonly available LED strips would likely create the effect I wanted.
Plastic Lid
Lighting 1
Lighting 2
Lighting 3
Lighting 4
Lit Mock-Up
To complete the idea I replaced the stock incandescent bulbs with Sylvania LED bulb and modified an Nissan/Infiniti LED CHMSL into the CB7 housing. For the license plate lights I thought to use LED modules from the last gen Ford Focus as they are plentiful in the salvage yards around here.
CHMSL
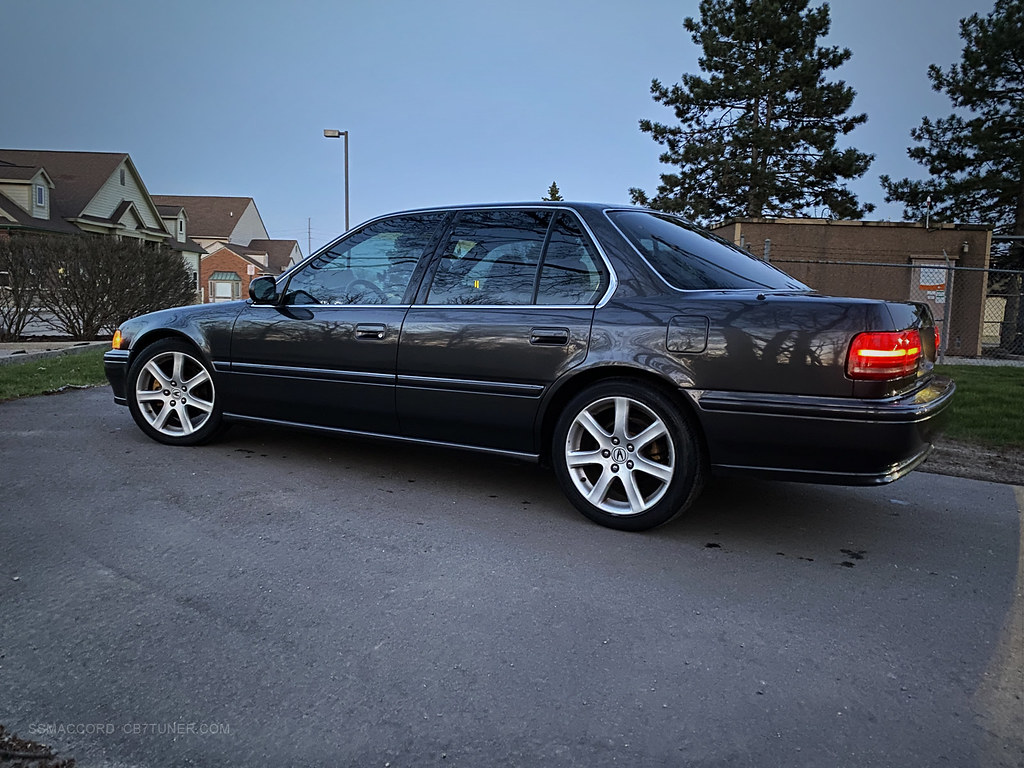
As this project had already consumed 10ish months of 2019 I had to just start putting parts back on the car in preparation for winter to arrive in Michigan and the temperature to start falling. Seeing as the garage is not heated, car projects go on the back burner until it's warm enough to feel like being outside again. So I got most of it put back together as best as I could remember. There are some seals, splash guards and grommets that need to be installed as well as the H logo for the decklid, the old one was a bit weathered so a new one will have to be acquired. When I was doing the reassembly I noticed that most of the stainless window trim is in need of replacement, so I will need to replace those. I haven't even fully installed the rear window trim as getting it off was a pain and I don't really want to break the new clips trying to change out the trim. It is also probably time to look for new wheels, I've had the TSX wheels for a long while and they are worse for wear and covered in painting dust after this whole ordeal.
Reassembled 1
Reassembled 2
Reassembled 3
Reassembled 4
Reassembled 5
Reassembled 6
Reassembled Dusk 1
Reassembled Dusk 2
Reassembled Dusk 3 *nightsight is doing whatever it wants with lighting*
Reassembled Dusk 4 *nightsight is doing whatever it wants with lighting*
And we are all up to date. There was a plan for 2020, but 2020 is 2020ing. The intent was to execute a bunch of chassis mods and have a pretty decent recreational track day season, but that all seem to be up in the air given our current situation.
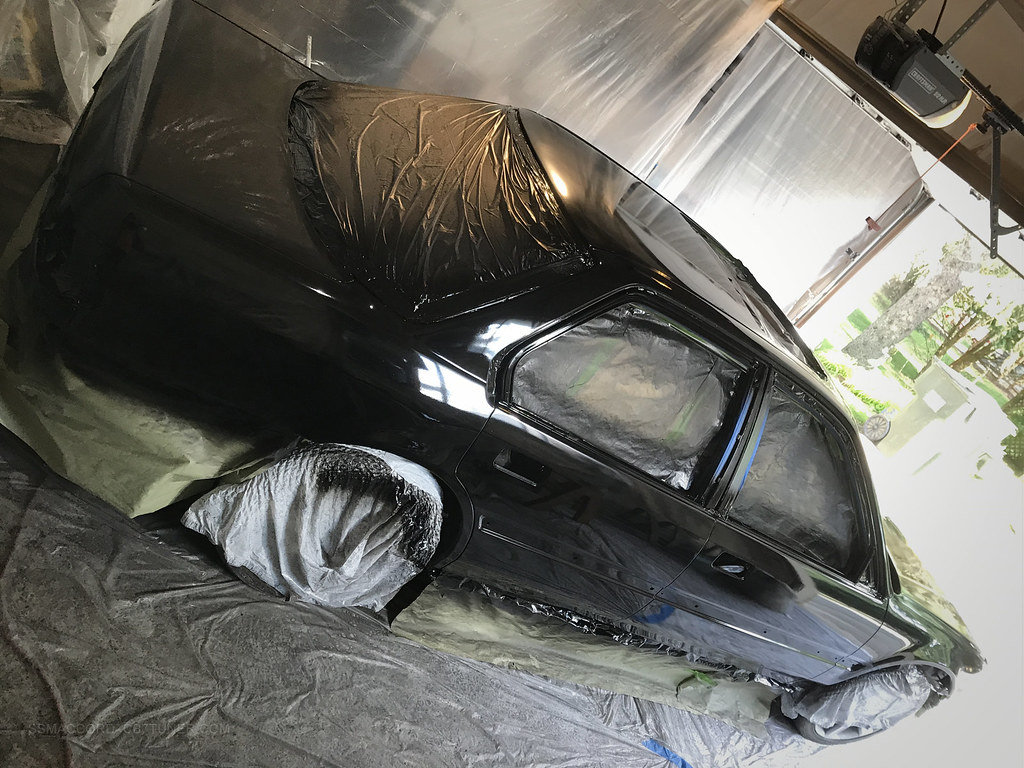
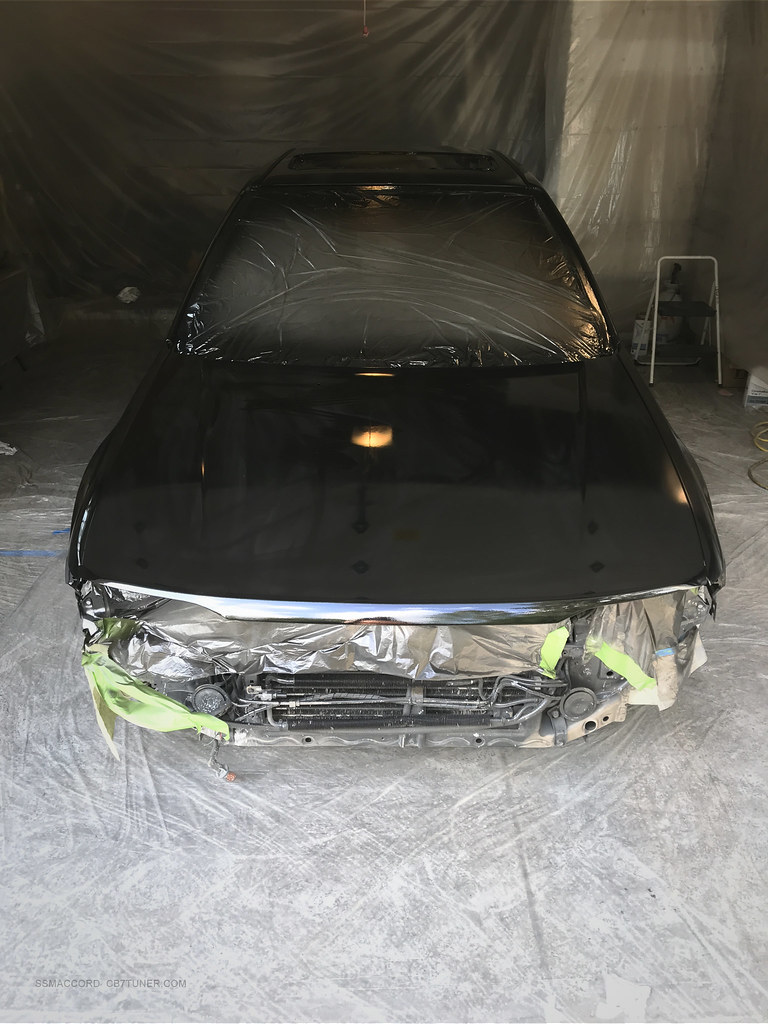
With the fenders, doors and hood reinstalled it was time to apply the black basecoat and first clearcoat. It was pretty uneventful, somehow I ended painting well into the 3am hour this night. Yikes.
Basecoat 1
Basecoat 2
Basecoat 3
After the finish was cured it was time to wetsand the finish with P1500 and P3000. Other than being kinda mindless, it wasn't too difficult considering some of the other tasks I had already endured.
Wetsand 1
Wetsand 2
Wetsand 3
Wetsand 4
]
With that bit of tedium over with application of the aluminum layer and clearcoat. This had a little bit of a learning curve, despite using the various reducers and activators to match the ambient temperature the clearcoat wouldn't always lay flat and ended up with a rougher than orange peel texture. That clearly was not the intent, but it wasn't a terrible inconvenience as I planned to flow coat the entire thing. But I also needed to make sure that the finish looked even before that happened. The passenger side of the vehicle had some mottled areas and needed to be addressed.
Initial Color Coat 1
Initial Color Coat 2
After the application of a few more layers of clearcoat there was enough of a surface that would allow for sufficient wetsanding. I had to let the finish cure for a few weeks and then descended into color sanding the entire car again.
P1000
P1500
P3000
P5000
Once the car was at P5000 it was starting to take on the glossy appearance I had hoped for. From there I decided to use the 3M Correct-It system to polish the finish.
Cut 1
Cut 2
Cut 3
The main body components color sanded. I still had to do the same to all of the plastic components before they would be permanently reinstalled.
Color Sanded 1
Color Sanded 2
Color Sanded 3
Color Sanded 4
Color Sanded 5
Color Sanded 6
Color Sanded 7 (I decided to not sand the surfaces that wouldn't be seen once assembled. You can see the contrast between the initial finish and the color sanded finish)
Nice !!! Amazing and inspirational! I did the same thing you were doing, but to the engine bay. You really went into more detail though. And I gotta say, if you wanted this much work done professionally (like Audi quality) you would be looking at 15K. It must be hard to decide where to stop sanding / painting? Clean your gun between coats?
Thanks. I don't think I quite understood how much work this would entail when I was having it estimated. I also didn't intend to get in this much over my head but it kinda spiraled into whatever chaos this is. Being that I had not done this before I kinda just got it to be smooth to the hand as I went up through the grit levels and when the surface looked even and smooth while it was wet with rubbing alcohol. I think I was cleaning the gun(s) anytime I was going to be not painting for more than an hour.
Nice !!! Amazing and inspirational! I did the same thing you were doing, but to the engine bay. You really went into more detail though. And I gotta say, if you wanted this much work done professionally (like Audi quality) you would be looking at 15K. It must be hard to decide where to stop sanding / painting? Clean your gun between coats?
Well...that would not go exactly as planned. The shop and I had come up with a plan for all of the rust repair, body work and paint previously. After the drop-off somehow that all went out of the window and the updated estimate of the service ballooned to $15k. (.__. ) Well that wouldn't work. Not only is $15k an enormous amount of money, it also would probably not be the most fiscally responsible thing to spend it on my project car that I bought for $450.
Far be it for me to haggle about the price of someone else's labor, so I had to regroup a little bit. Considering what I wanted, dents and dings repaired, antenna hole filled/blended, color change with jambs painted I figured that perhaps Maaco might be able to execute this. And off we went. This would also not go as expected, Maaco declined to even quote the job as it seemed like a job too large for them.
By that time I had already discussed with myself that I might have to paint this car myself. Have I ever painted a car? Well no, I did paint scale models in undergrad though. Do you have the equipment to paint a car? Nope. Do you have a spray booth to paint in? Also nope.
And so it began...
Sanding/blending the rust repair on the rear quarters
Sanding the body and dent repair
I overlooked this damage somehow. Apparently in a previous life the driver's door mechanism failed and someone did a choice maneuver to free the door and left the jamb looking like swiss cheese.
Door Jamb
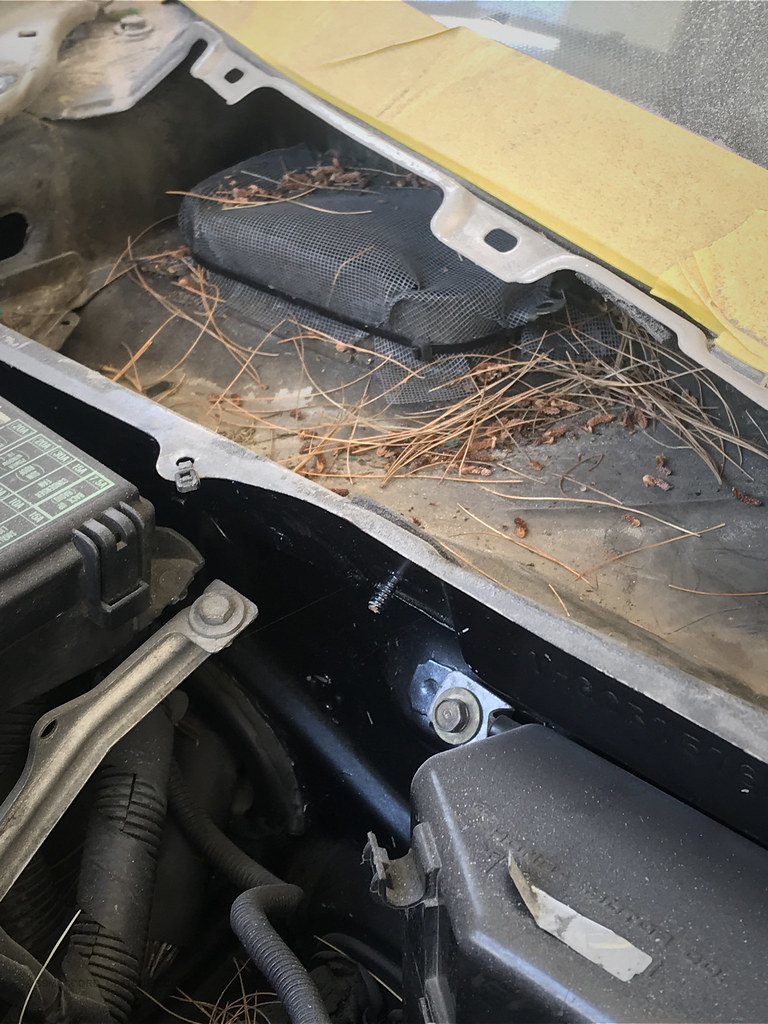
Fast forward 2 months: Body prepped, fenders, bumpers, doors and hood removed
Vent screen doing its job apparently
In the mean time I acquired A Devilbiss paint gun setup, air compressor, sanding devices and lots of plastic sheeting. For the corrosion resistance part of the paint job I went with Eastwood Epoxy primer.
Epoxy Primer
After that part of the process it was time to move on to the urethane primer stage of the process. The local paint supply place that I utilized for this uses Axalta refinish systems, to minimize the likelihood incompatible paint components I used Nason Select-Prime 2k Urethane primer. All of the parts would be getting this primer so they all had to be cleaned and prepped.
Since this was an ongoing project, gaps of time would pass before the next step could be tackled. One of those was the time between epoxy primer application and urethane primer application. As a result the epoxy primer needed to be lightly sanded before it could urethane primed.
Urethane Primer Prep
Urethane Prime 1
Urethane Prime 2
Urethane Prime 3
Urethane Prime 4
Urethane Prime 5
Urethane Prime 6
After that was another bit of sanding, actually this would turn out to be the low point of an entire experience of low points. Sanding the insides of doors and all of the B-surfaces that have corrugation and engineered provisions for clips and bolts is a tedious nightmare. *sigh
It was also about this time that I had to buy paint. I did a bit of research into the Machine Grey Mazda finish only to find out that this would also be an ordeal in itself. Turns out the production version of this is elaborate and that translates to the refinish application as well. I had already done the research into this, but the paint guy definitely knew and warned me that the process would be labor intensive.
Machine Gray Diagram
The refinish process outlines this procedure:
-Primer
-sand to P600/P800
-Apply Black basecoat
-allow to cure
--sand to P1500, wet sand to P3000
-Apply translucent metallic layer
-Apply final clearcoat
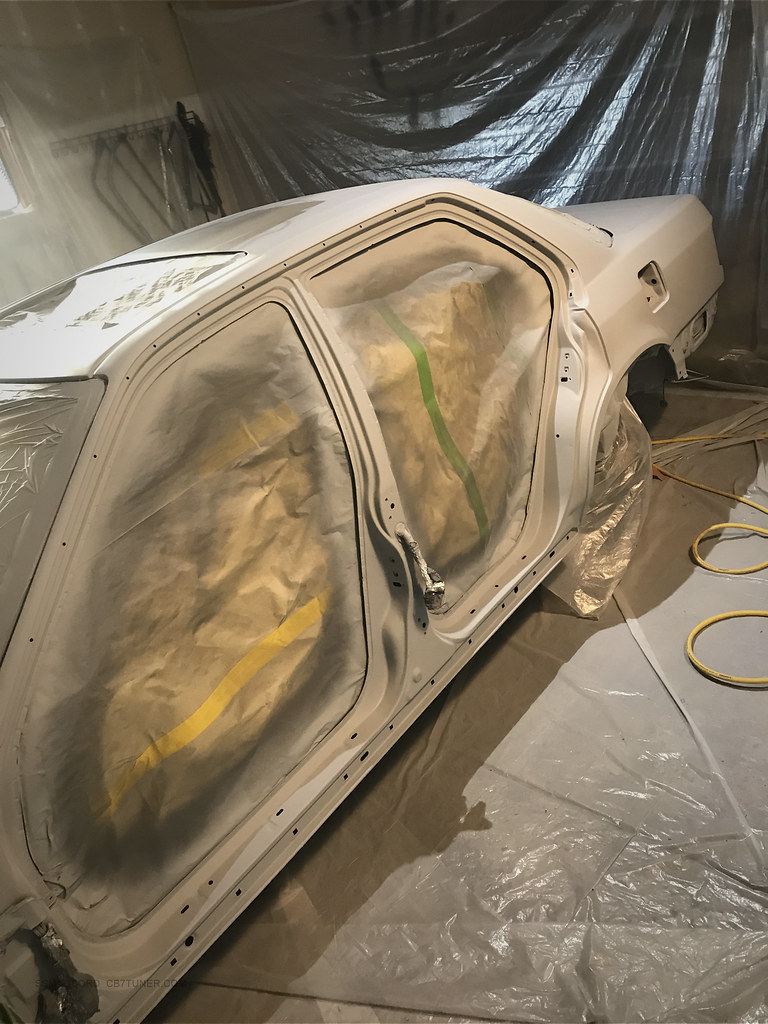
Paint acquired it was time to start the color application process. Seeing as the some parts insides of the doors and trunk would be virtually unseen after the car was reassembled I decided to paint those first in case there was a severe learning curve to spray the material. As these surfaces are not as critical (and also because they are a nightmare to sand) I decided to forgo the sanding process on the door jambs, inside of the trunk/hood/doors, and the lower rear panels behind the bumper.
Painted Jambs 1
Painted Jambs 2
Painted Jambs 3
Painted Jambs 4
I had not performed the final sanding of the urethane primered surfaces intentionally. I wanted to wait until after the jambs were painted and then sand away the overspray and do the final sanding at the same time. So once the jambs had cured it was time to reattach the doors and fenders. Putting the doors back on properly was not particularly fun. But after those parts were installed, the final sanding commenced.


Leave a comment: