Announcement

Collapse
No announcement yet.

Grumpys93 : 1993 Accord LX

Collapse
X
 
  • Filter
  • Time
  • Show
Clear All
new posts

    Originally posted by Grumpys93 View Post
    What company did you go with? Jet hot is extremely pricey.
    I used Millers Powdercoating just north of Atlanta. 770-931-1505. Owners name is Billy, they have a website with pics etc. www.millerpowdercoating.com

    They did all of my coatings including valve cover, strut tower bar, intake mani etc. I really don't remember the cost to be honest.

    Before you do any coatings make sure all your flanges are square and true, do any gasket matching, grinding etc so nothing is needed afterwards.

    I remember my garret turbo exhaust housing had to be opened a lot to match the standard T3 gasket and manifold flange that I used so double check all of that.
    Turbo H23a3 build has begun
    01-01-2019

    Comment


      If you don't mind me asking, how much is that manifold running you? Because it looks beautiful...
      Turbo H23a3 build has begun
      01-01-2019

      Comment


        Originally posted by bjaccord View Post
        If you don't mind me asking, how much is that manifold running you? Because it looks beautiful...
        He quoted around $800-900. Not including downpipe and dump tube.
        ~Nick~
        FSAE (F Series Accord Enthusiasts) ..."A dying breed thats taking it to the next level" Lucky #13
        MR Thread:http://www.cb7tuner.com/vbb/showthre...ight=Grumpys93

        Comment


          Originally posted by Grumpys93 View Post

          I plan on using POR-15, so I washed down the area with the degreaser they provide, and then did the whole process of keeping the metal wet with the metal prep solution they provide. They say to let it dry overnight: so here is where I stopped, tomorrow i will paint the POR-15. I know this isn't the proper way to treat rust, but I will eventually get a welder and teach myself to weld and fix it properly.
          You probably had water leaking into the trunk (tail light gaskets, lower rear window trim clips, left vent gasket, etc.). There is a small drain passage in the spare tire well floor, make sure that is clear. If you want a rust free spare tire well for if/when you try to weld it, let me know.
          90 LX 4dr 5 spd 396,014 (sold 1/1/2022) - MRT: http://www.cb7tuner.com/vbb/showthread.php?t=201450
          08 Element LX FWD AT 229,000 - MRT: fleetw00d : 2008 Honda Element LX - CB7Tuner Forums

          Comment


            So I put water in the drain areas around the trunk, with the trunk lid open I didn’t see any water. But when I closed it and came back from dinner I found a small puddle right by the rear wheel arc on the passenger side. I’ll snap a pic of the area I am referring to. I think I will put water in the drain again close the lid and look through the rear seat to see if I can see it leaking.
            ~Nick~
            FSAE (F Series Accord Enthusiasts) ..."A dying breed thats taking it to the next level" Lucky #13
            MR Thread:http://www.cb7tuner.com/vbb/showthre...ight=Grumpys93

            Comment


              The drain hole in the bottom of the well is about 4 inches at a 45 degree angle to the right and aft of the spare hold down. Looks like there is something stuck in it - is that area actually rusted out?
              90 LX 4dr 5 spd 396,014 (sold 1/1/2022) - MRT: http://www.cb7tuner.com/vbb/showthread.php?t=201450
              08 Element LX FWD AT 229,000 - MRT: fleetw00d : 2008 Honda Element LX - CB7Tuner Forums

              Comment


                It’s not fully rusted out. But it was close. I hit it with a hammer a couple times and it didn’t budge. So I think I saved it but only time will tell.

                Also Raf I’m happy to hear your experience is a positive one. I am hoping that it will last me that long so I can weld in a new to me spare wheel well and just stop the cancer completely.
                ~Nick~
                FSAE (F Series Accord Enthusiasts) ..."A dying breed thats taking it to the next level" Lucky #13
                MR Thread:http://www.cb7tuner.com/vbb/showthre...ight=Grumpys93

                Comment


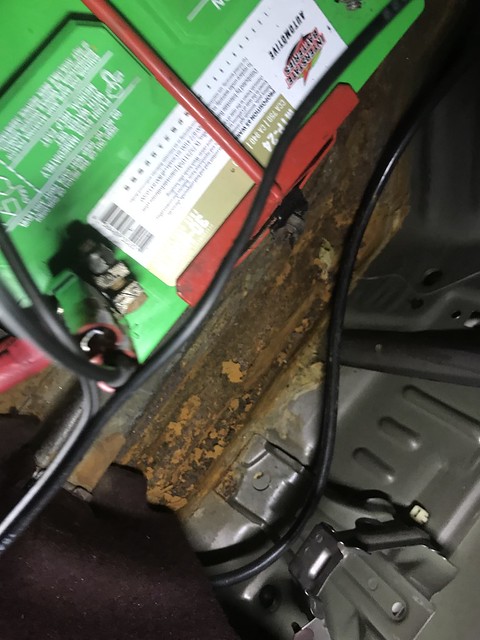
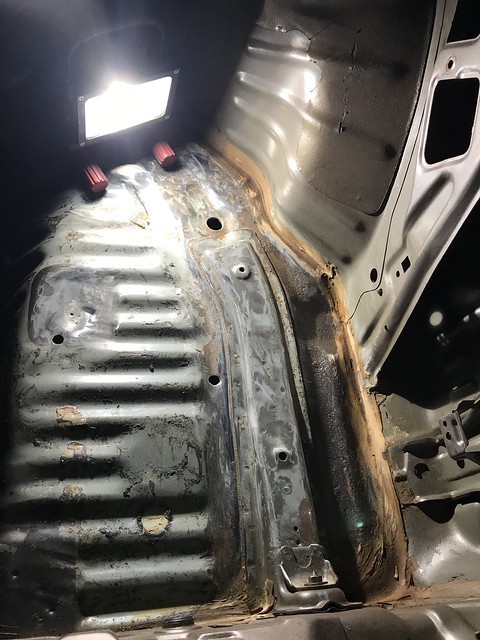
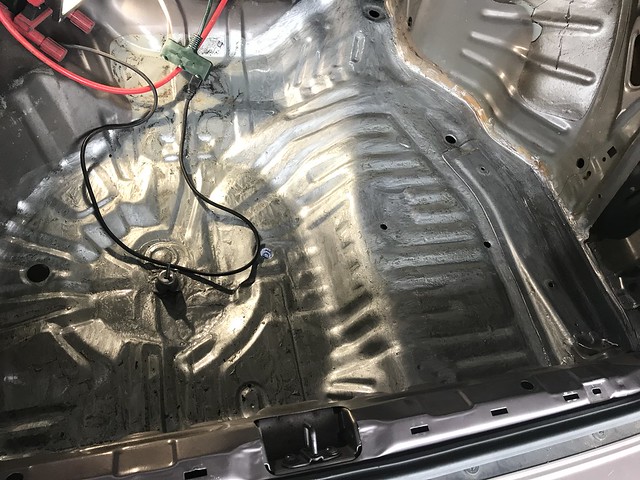
                  So got some more work done in the trunk area, dealing with the rust. I repeated the whole process with the passenger side of the trunk as I did in the spare wheel well area, sand, grind, wire wheel all the area with rust, then used the provided degreaser and metal prep solution. Then let it dry over night, and finally applied POR-15 Silver on the rust.

                  Heres how it started:


                  Grinded down, wire wheeled, degreased and prepped:


                  Finished product, I may apply another coat down the road but for now I am happy:


                  That brown stuff on the side is the frame sealant.

                  My next project is until I get all fab work back from Blake is to make the battery relocation I did almost 13 years ago more safe with a circuit breaker, firewall pass through, routing a ground like discussed in another thread here, battery box with vent tube, and possibly an external disconnect switch. Not sure where I am going to put the external disconnect switch, or if I will run one. Still on the fence about it.
                  Last edited by Grumpys93; 01-04-2019, 12:48 AM.
                  ~Nick~
                  FSAE (F Series Accord Enthusiasts) ..."A dying breed thats taking it to the next level" Lucky #13
                  MR Thread:http://www.cb7tuner.com/vbb/showthre...ight=Grumpys93

                  Comment


                    Looks great! It's amazing how thin that metal is. When I ripped out the spare wheel thing I ripped through the metal, creating a small hole in it. I too have to properly secure my battery but I cut a big piece of wood out to replace the OEM floor so I think the bolts need to go through that and then through the floor of the car. How u doing yours?

                    Comment


                      Looks fantastic Nick!

                      Why does it seem all 3 of us haven't found a good solution for fully mounting the battery? I mean mine is at least in a battery box. But it currently is not bolted or screwed down. Just strapped to the rear strut tower bar and a bolt in the wagon trunk deck on the side of the box keeps it from sliding around. I need to find a more permanent solution.
                      MRT: 1993 Honda Accord SE Coupe (Lola)

                      Comment


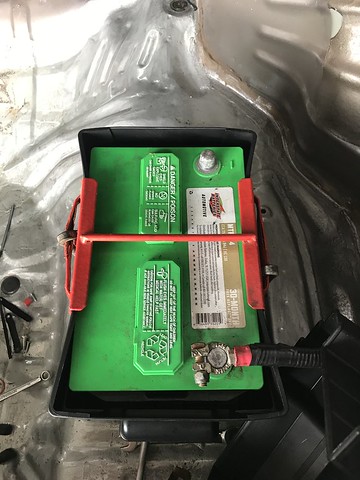
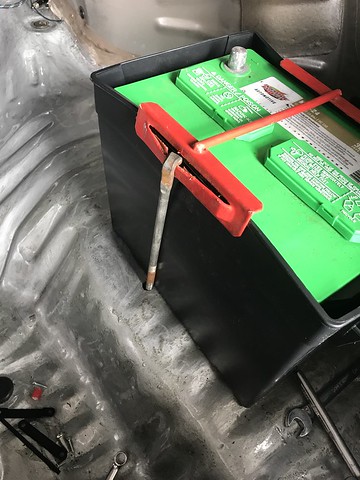
                        So if you look at the picture with the battery you can see the battery tie down bar(red bar). I bolted it through to where I can put nuts on underneath the car. They sit on each side of the muffler. I can snap a pic for you. But I bought a plastic battery box with a vent tube I plan to route outside. I plan to put the battery in the box, then drill two holes where the tie down bolts go through the box, so I can still anchor it to the frame of the car. Yet have the box to protect the battery. I then put silicone or make a rubber grommet to have the bolt go through and prevent water from getting into the trunk.
                        Last edited by Grumpys93; 01-04-2019, 09:44 PM.
                        ~Nick~
                        FSAE (F Series Accord Enthusiasts) ..."A dying breed thats taking it to the next level" Lucky #13
                        MR Thread:http://www.cb7tuner.com/vbb/showthre...ight=Grumpys93

                        Comment


                          Originally posted by Grumpys93 View Post
                          Not sure where I am going to put the external disconnect switch, or if I will run one. Still on the fence about it.
                          When I was racing years ago I had to have a cut off switch for the relocated battery, I mounted it in the body filler panel that is under the tail light. I bought a second one, painted it to match and mounted my switch in it. Then when I wasn't racing I was able to put the old one back.

                          It's held in with two 10mm bolts and can be swapped around very quickly.
                          Turbo H23a3 build has begun
                          01-01-2019

                          Comment


                            Originally posted by bjaccord View Post
                            When I was racing years ago I had to have a cut off switch for the relocated battery, I mounted it in the body filler panel that is under the tail light. I bought a second one, painted it to match and mounted my switch in it. Then when I wasn't racing I was able to put the old one back.

                            It's held in with two 10mm bolts and can be swapped around very quickly.
                            That's a good idea...

                            Comment


                              Originally posted by bjaccord View Post
                              When I was racing years ago I had to have a cut off switch for the relocated battery, I mounted it in the body filler panel that is under the tail light. I bought a second one, painted it to match and mounted my switch in it. Then when I wasn't racing I was able to put the old one back.

                              It's held in with two 10mm bolts and can be swapped around very quickly.
                              Originally posted by Raf99 View Post
                              That's a good idea...
                              That is a very good idea that I am going to do!

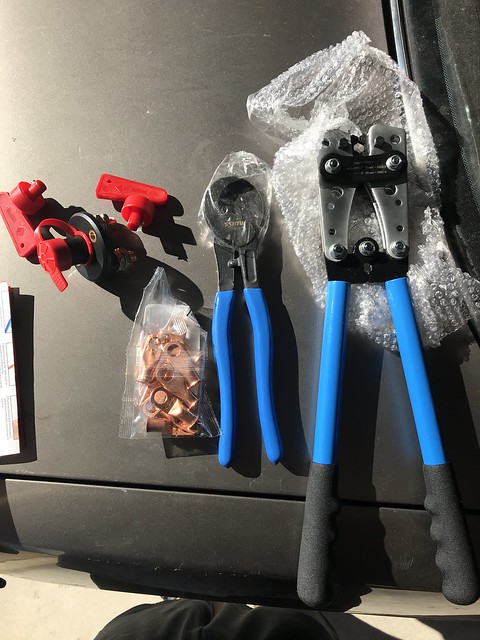
                              So today I got some parts in the mail:


                              Side note: it amazes me that a civilian company such as Amazon can make a federally owned company change its ways and deliver packages on Sunday.

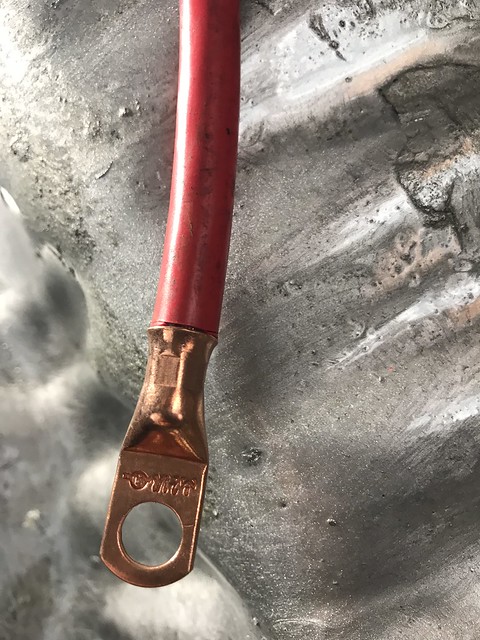
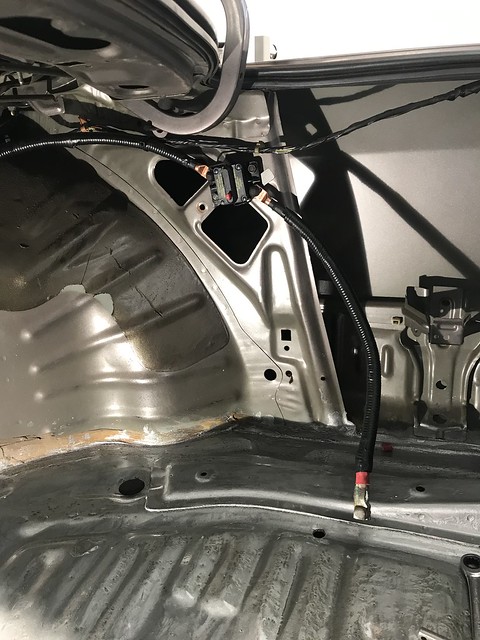
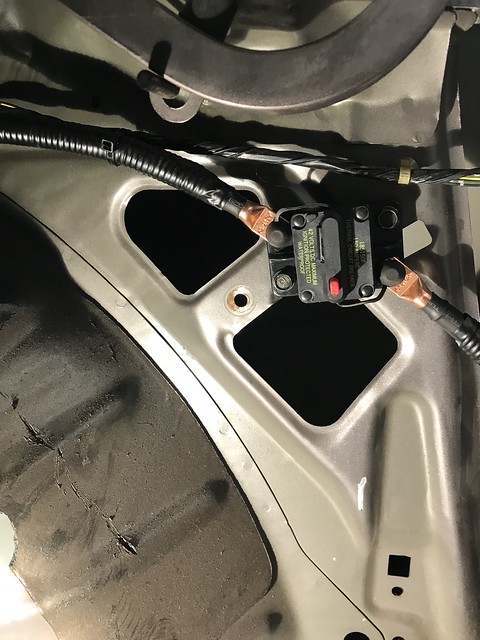
                              Anyways back to what I got done today. I completed phase one of making my battery relocation safe. I cut a portion of the positive cable and added a terminal onto it to connect it to the 180 amp Circuit breaker I bought a couple months ago:


                              Crimped and soon to be heat shrinked:


                              Phase 1 complete: Installed Circuit Breaker and attached cables, I plan to purchase plastic washers to prevent inadvertent arching or the circuit breaker shorting out on the frame.


                              Tomorrow I should be getting the battery box in which if I have time will install it and complete phase 2.

                              Phase 3 consists of incorporating the external quick disconnect switch using BJaccord's idea of the removable filler panel.

                              Phase 4 is adding the engine to battery ground.

                              I originally mentioned that I was going to put in a firewall pass through however I may hold off on that until I pull the dash in the future to completely remove all SRS compenents and wires.
                              Last edited by Grumpys93; 01-07-2019, 12:18 AM.
                              ~Nick~
                              FSAE (F Series Accord Enthusiasts) ..."A dying breed thats taking it to the next level" Lucky #13
                              MR Thread:http://www.cb7tuner.com/vbb/showthre...ight=Grumpys93

                              Comment


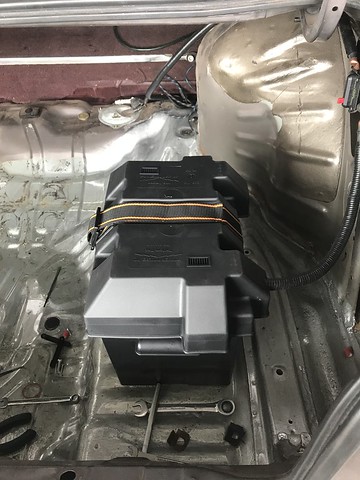
                                Today I was able to complete phase 2: I installed the battery box and mounted it to the frame, so it shouldn't be going anywhere. I originally wanted the battery mount to be inside the battery box, but space was tight and I didn't want to cut a bunch of holes in the box. So this was the next best thing and I think it works perfectly fine.


                                Battery box cap on and secured:


                                I still need to create a vent tube connection to vent the battery outside the car, but all in all I'm happy.
                                Last edited by Grumpys93; 01-09-2019, 10:29 PM.
                                ~Nick~
                                FSAE (F Series Accord Enthusiasts) ..."A dying breed thats taking it to the next level" Lucky #13
                                MR Thread:http://www.cb7tuner.com/vbb/showthre...ight=Grumpys93

                                Comment

                                Working...
                                X