
It's got a cat, but who knows how old the thing is and what it's internal condition is like. Does your state not have emissions? I'll be running a cat even when the H22 is in.
The JDM Si-T turn signals I ordered from Japan three days ago are already here. Still waiting for the Speedfactory transmission detent springs I ordered the same day from Washington state, lol.
-
Well that may be it then. Do you have a cat on your wagon or a high flow resonator? I have high flow, so I would believe that since there isn’t any material catching the carbon from the exhaust, this would be the mixture of water and soot.Leave a comment:
-
Yeah, that particular mark was the result of revving. I know water coming out of the exhaust is a sign of clean burning or the cat working as it should, I've just never seen it come out black like that. My RSX will spit out water, but never any carbon, and the mileage is only about 20k less than the Accord's.Leave a comment:
-
My car shoots out soot and water as well. But not to that extent. My lower drawer on my tool box is black because of it. Was that pic taken after revving it up some? But I imagine it’s simply the moisture from the cooling of the air in the exhaust system and the water loosening up the soot. So when you start the car, the exhaust gases push all that out. Once the exhaust warms up, you shouldn’t see it anymore.
but I’m sure you’ve seen normal cars go around driving especially in the morning and you see some water come out of their exhaust pipe. Even when it hasn’t rained in a while.Leave a comment:
-
Beats me. It seems to just be the typical water and carbon build up that you find in an exhaust system, but obviously a lot of it. I try doing a search for "exhaust spitting soot" and see pictures of people with the exact same problem, but the answers are all over the place. So many replies say it's normal, when it's definitely not normal. I've never seen a car do that before. I don't plan on running this engine through an emissions test, though, and I'll probably be keeping it for a future build in case I ever get another Honda (I would love an EF/CRX or EG one day), so it'll be torn down to check for obvious problems.Originally posted by PakaloloHonda View PostLeave a comment:
-
Leave a comment:
-
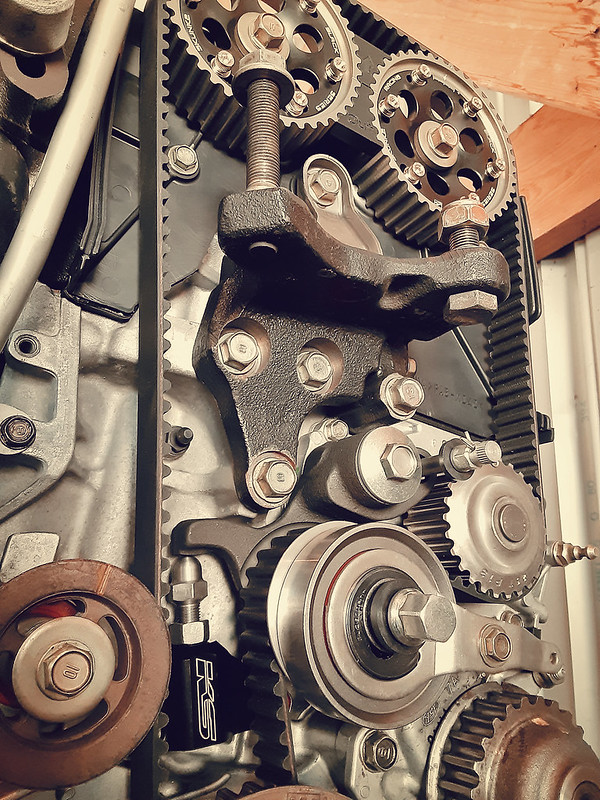
Catching up here. The whole timing issue has been a big setback, time wise. It almost got delayed another week because I thought I lost that spoon-shaped bracket and its spring for the balance shaft pulley tension. Got lucky, though.
Finally got around to cutting up the PLM header so it doesn't hang so low. Didn't want to get too close to the pan, though; I'm not sure how much that heat will affect the oil. The little loops for the spring bolts have since been cut and shaved smooth as well in preparation for the header to be welded up.


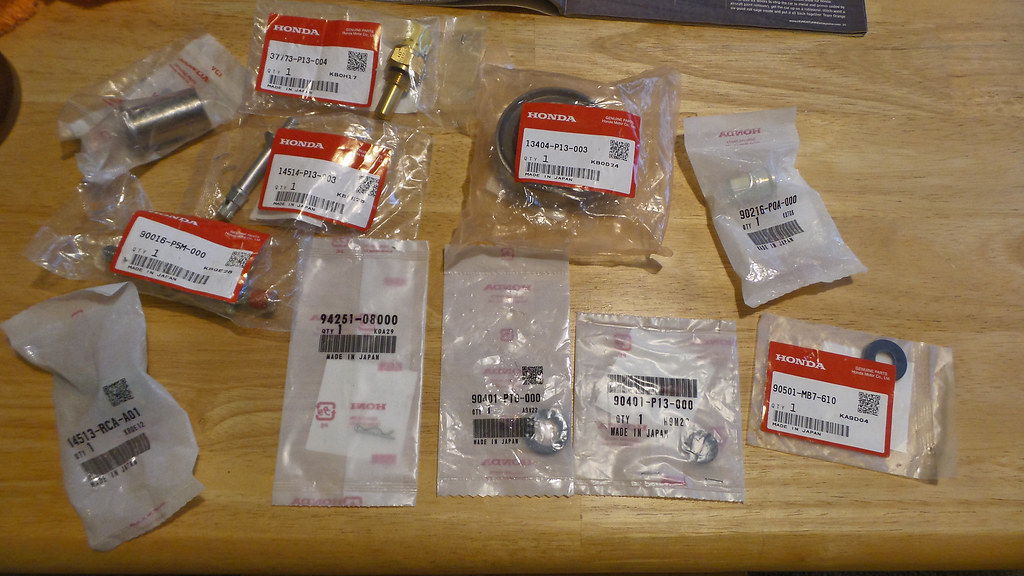
Here I'm unpacking the boxes of parts I've had in storage, seeing what I have and what I still need. Power steering line into the top of the pump is a biggie...

Back to the undoing of the H23 manual tensioner. Aside from the KS Tuned parts, I ordered everything from Honda. Even small parts I already had, I got them new just because I wanted them mint! The connector on a coolant temp sensor had also broken in storage, so it was replaced.

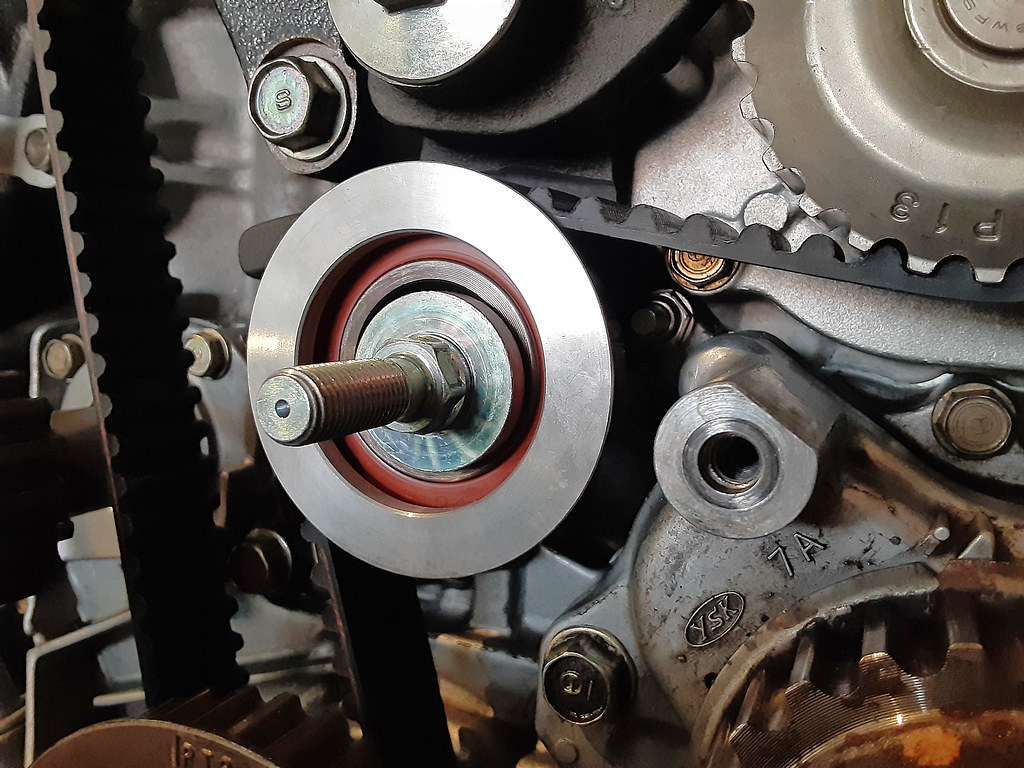
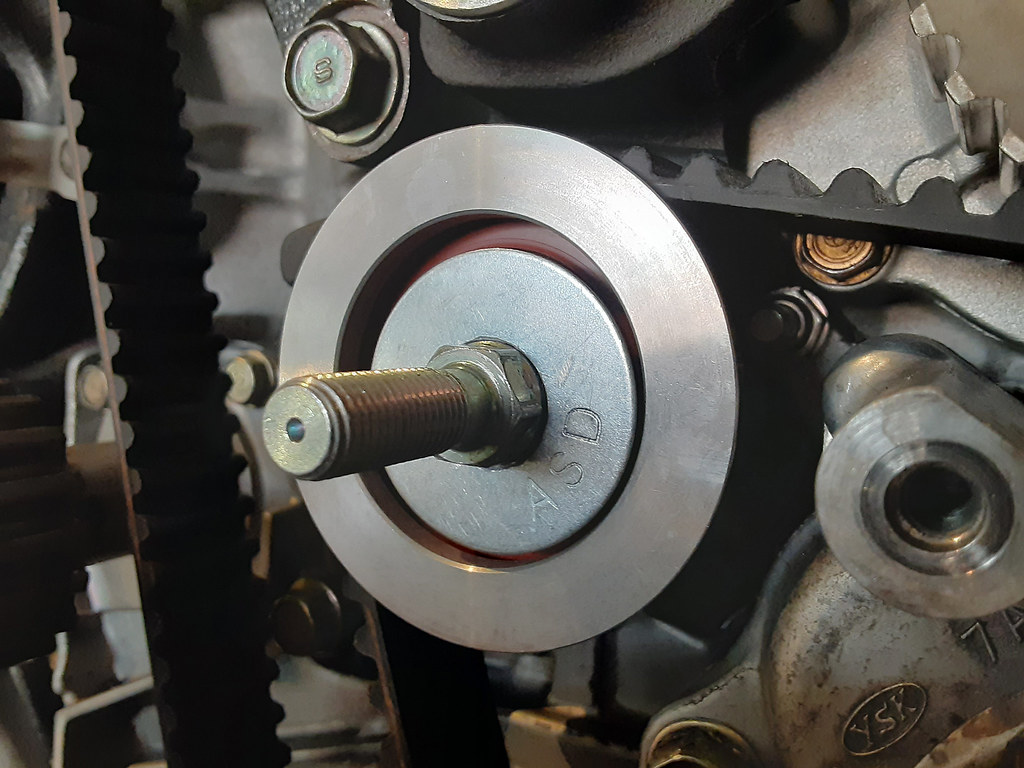
And of course, being a company that sells balance shaft deletes, KS Tuned designed their walk blocker without catering to those of us who want to keep ours, so I had to make up a spacer. Luckily I had a washer of the right thickness and a solid width laying around, which I enlarged the center hole to fit snug over the pulley's locating bolt.

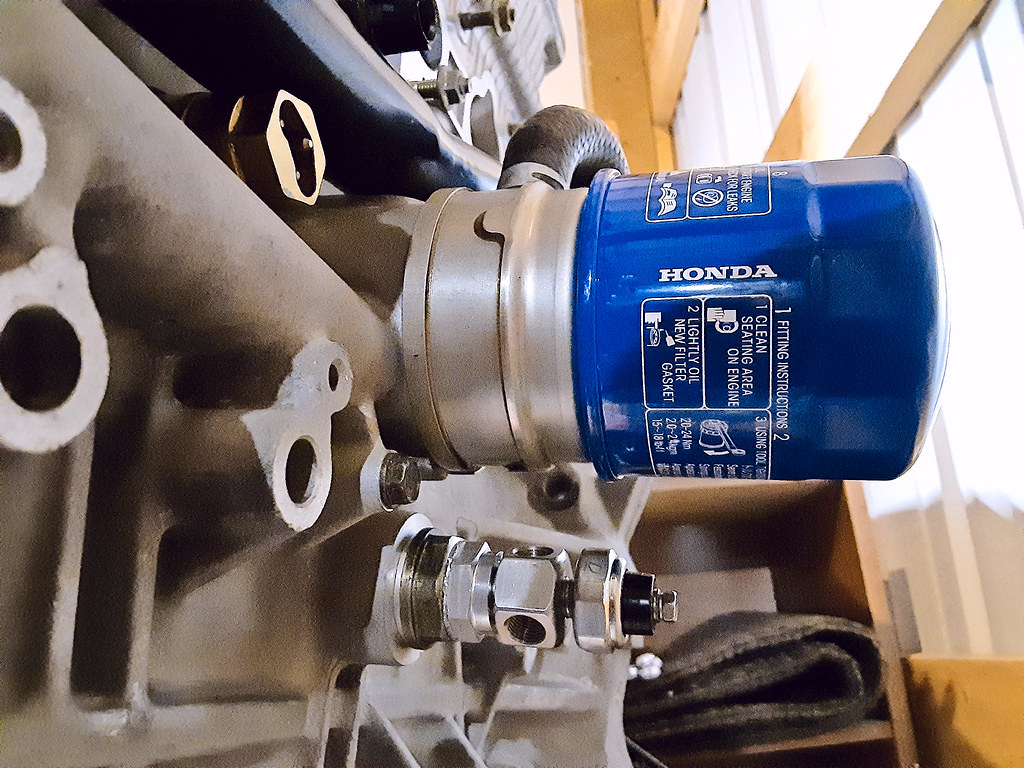
I also finally got around to taking care of the K-Tuned oil sensor adapter, sandwiching a washer between the adapter and the factory receiver so the K-Tuned oil ring had something to seat against:

I may have shaved this washer a bit too small, but it looks like it'll do the job (service manual was back out because I took the cams back out to double-check that everything in the head was torqued to spec):

Sensor adapter mounted under the S2000 oil filter. Anyone know what that 10mm bolt is for? It's been so long since I took this apart.
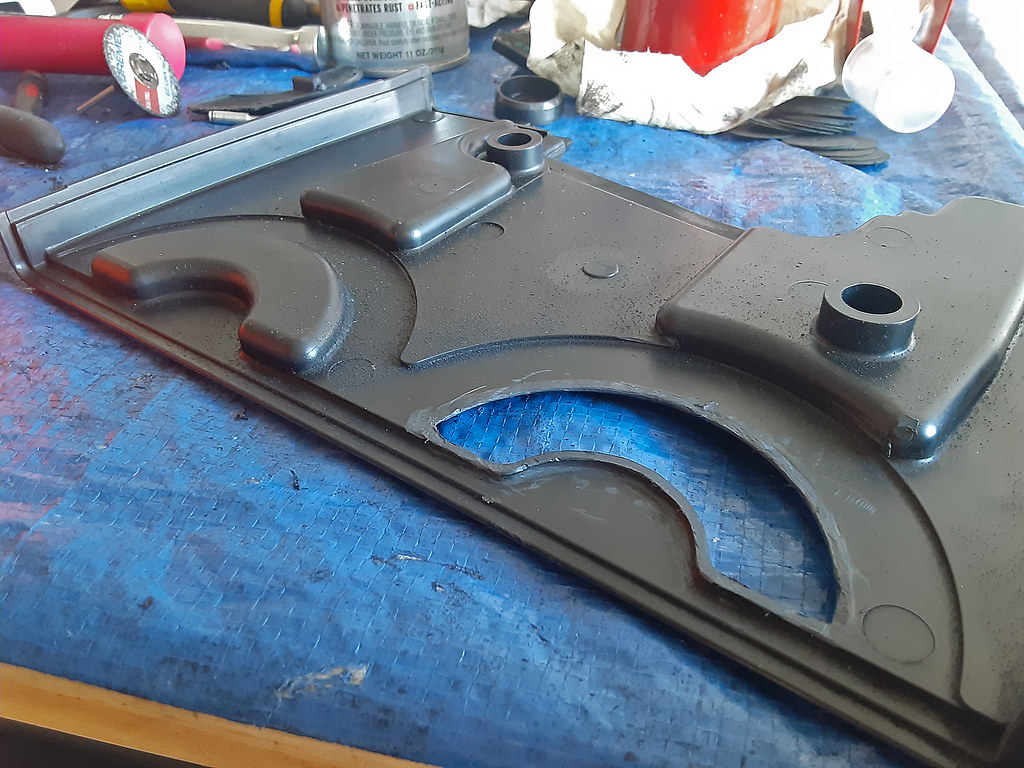
As I mentioned earlier, the adjustment bolts on the Skunk2 cam gears was rubbing on these indentations in the upper timing cover. I cut them out hoping I could simply move them further out and plastic weld them back in place to try and make it look like the cover was never modified to begin with, but it still wasn't enough. I had to shave more plastic away from the gears, so until I figure something out to seal away the timing area, the gears are going to be slightly exposed...


 Last edited by CyborgGT; 10-14-2020, 02:58 AM.
Leave a comment:
-
I'm pretty sure it was the H23 tensioner system's over-tightening of the belt that was doing it. We'll see in a few days when I can get out to the engine and put the H22 parts on. Aside from the KS Tuned parts, I got everything else new from Honda. *ED. - oh, and KS Tuned says that the metal bushing that the manual tensioner pulley pivots on (#24 here) wears out over time and allows the pulley to sag, which is a common contributor to belt walk.Originally posted by Raf99 View Post
Fleetw00d, I PM'd you, thanks!Last edited by CyborgGT; 10-04-2020, 03:06 PM.Leave a comment:
-
I use my power folding mirrors every time I drive the car Say, you ever figure out the belt walk issue?
Leave a comment:
-
Finally! Been waiting for these parts before posting my progress here. I'll have the engine assembly completed this weekend short of small things like vacuum hoses. Interestingly, the tensioner pulley with walk blocker installed was cheaper from KS Tuned than getting the pulley by itself from Majestic. 3D-printed cam gear holder is a new freebee they throw in when you buy their more expensive parts; nice detail in design for such a simple piece.

Still need to fund:
- Junkyard transmission
- Fluids
- ECU w/Hondata and basemap to confirm engine runs as it should at home
- ST rear sway bar so the exhaust can be routed to allow for it.
- Get the full exhaust system welded
- Dyno tune
- Register the car
Power folding mirrors are also installed, but still need to be paint-matched. The funny part is I'll probably never use them for fear of the motors dying and not being able to replace them. DIY for the external relay system coming soon.
 Last edited by CyborgGT; 10-15-2020, 12:36 PM.
Leave a comment:
-
I have it, I just need to cut out the little half-circles and probably plastic weld them flush with the rest of the cover, just so they don't stick inward and hit the cam gear bolts.Leave a comment:
-
Currently waiting for all the parts to ship from KSTuned and Majestic to convert back to the H22 timing tension system (some parts need to be ordered by both parties before they can ship them to me), and in the meantime I'm finishing up the header fitment and intake manifold polishing. I'll get pics up when those are done.
But I was cleaning the plastic timing covers and discovered that the upper piece doesn't clear the adjustment bolts on the cam pulleys. I have that valve cover that leaves the gears exposed for the dyno and for going to shows, but I definitely don't want dirt getting in there otherwise, so that'll need some customizing...Last edited by CyborgGT; 08-30-2020, 11:29 PM.Leave a comment:
-
Thx for the props on your build page on the cb9R loving the detail of work on the car and engine bay. Any updatesLeave a comment:

Leave a comment: