
Ya, i got the Jordan Distributors unit which is all the security I'll ever need. Especially since it has the touch sensor to activate the unit. As for the ESP bar, I never had any issues with mine. But I also didn't do the install of it but I am using the original parts it came with.
- https://www.jordandistributors.com/c...ns/electronics
-
More little things...
The black urethane bushings I'd ordered for the front sway bar never shipped out, the seller was unresponsive, and I had to get eBay to refund me. Sadly, I could only find Ricer Red after that.

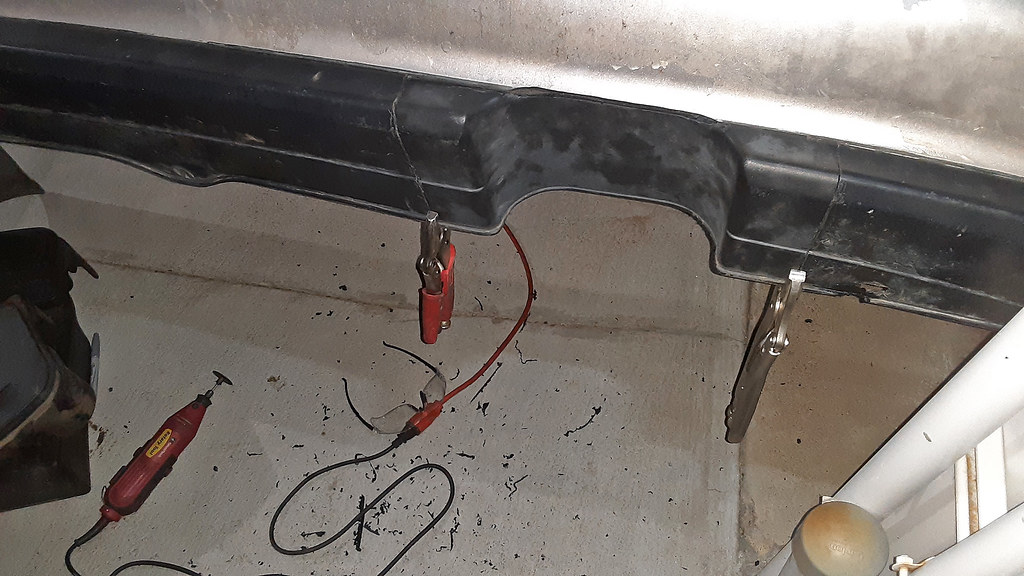
After I first installed the ESP traction bar, I was suddenly getting visible toe-out even with the Heim joints adjusted all the way in. Others have reported not being able to get a proper alignment as well, so I ordered these radius rods that are an inch shorter, at 16". Thanks again, SSM, for posting that screenshot in the other thread so I could find these. I'm leaving the car on jack stands for now, but hopefully they solve the issue.

Leave a comment:
-
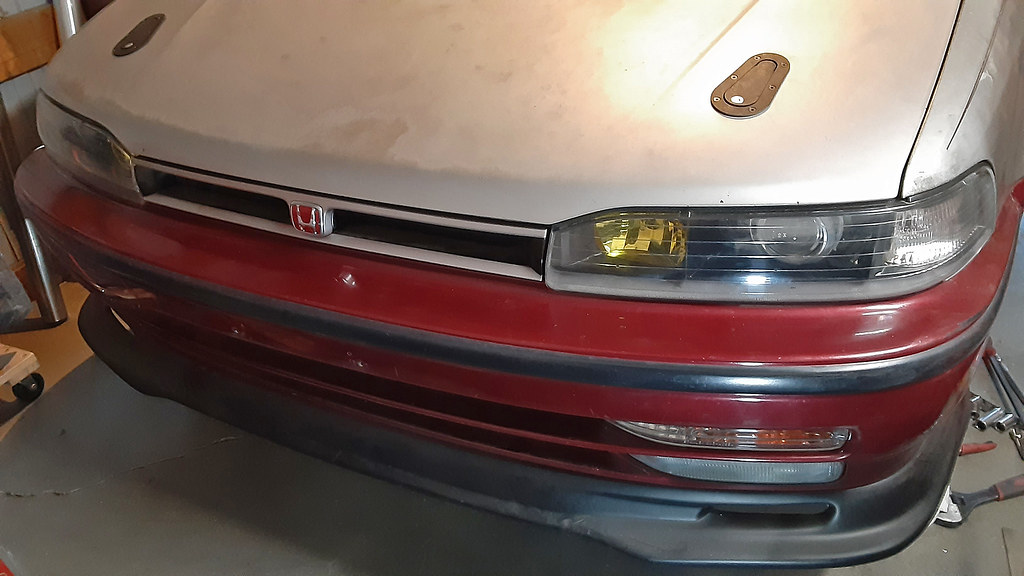
Got freaked out by local Honda thefts and impulse-bought some locking hood pins. This in addition to a removable plug I had already made in the engine harness to cut power to the fuel injectors; a little thing I can pull and stick in my pocket when I'm going to be away from the car for any decent length of time. Surely with '90s Hondas only getting older and being a less common sight on the road, thefts will die down eventually, right? I'm trying to get this car ready to drive to South Dakota in July, so I especially want any little bit of security I can afford before being so far from home.


Leave a comment:
-
Brokeboi problems, I'm getting bored saving up for the tune and exhaust fab (looking like April/May for that; I've set an amount that I hope is way over-budgeting just to be safe). I wanted an excuse to go out to the car, and the sagging boot from the trans conversion was annoying me. I'm loving this little collar from Hybrid Racing:
 Last edited by CyborgGT; 01-21-2022, 09:10 PM.
Leave a comment:
-
Excellent work as always. I can’t wait until this is carving up the Colorado canyons!!!Leave a comment:
-
'Current state of the engine bay' photo from two months ago:

I'd finally installed the ECU back in October, after replacing some damaged pins on the RyWire VTEC sub-harness I kept from my last swap. One of the companies I follow on IG, I can't remember if it was Phearable or KS Tuned, made a post about how a spider had gotten into a customer's ECU and nested on the Hondata board, causing enough damage to affect the tune. I thought taping up the hole would be a smart idea. The USB cable will just stay attached, and tucked behind the carpet when not needed. It got too cold for me to want to spend time in a junkyard experimenting with different cars' ECU mounting plates, so I just got some heavy duty zip-ties to hold it to the stock plate.

Power steering is finally complete. Now I just have to hope there's no bottleneck to stress the pump, in that custom high-pressure line I had made earlier. 5/8" ID hose to fit the Prelude pump, a 5/8"-to-1/2" barb fitting, and a 1/2" ID hose to fit the Accord reservoir.

I cut the hose at the right lengths to hide the ugly clamps under the cruise control diaphragm:


Replaced the noodle out back with an ST bar. Had to get this now to make sure the exhaust will clear:

The rotten front end links got new urethane. I ordered the D-bushings as well, but that was a week ago and the seller still hasn't shipped them out. The chassis will be the next big project for this car, and I can't wait until all this is powder coated under here...
 Last edited by CyborgGT; 12-21-2021, 10:16 PM.
Leave a comment:
-
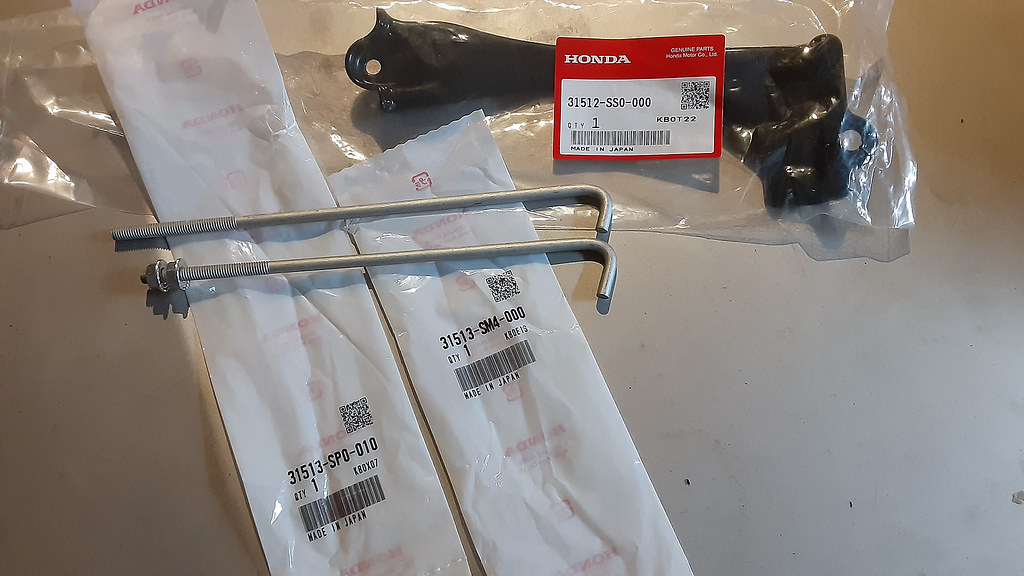
Yes, it fits perfect. I assume the only reason why it's not listed as CB-compatible is because the battery in the CD is rotated 90 degrees from ours and there's an arrow stamped into the metal pointing to the front of the car. Using those two different-length J-bolts, on the correct sides of the battery (easy enough to figure out when it's all in-hand; I know the CB is spec'd as using two equal length J-bolts), that arrow is now pointing to the passenger fender.Originally posted by hiptech View Post
As for your question on how I knew it would fit... I didn't. I studied pictures of the factory CD battery tray and the height & offset difference between the two holes for the J-bolts, compared it to my own, and took a chance assuming the battery was the same size. I was more worried about getting the correct-length J-bolts, if I'm honest. That kit came with two different sizes, one of them being the correct CB length, so I figured worst case I would only have to replace one bolt. I got lucky with not having to modify anything. As long as that arrow doesn't bother you.Last edited by CyborgGT; 08-17-2021, 07:56 PM.Leave a comment:
-
Hey Cyborg,
Just made an offer on EB to buy a couple of these battery hold down plates (the same P/N as yours) can you confirm the dimensions and fit is the same as the original before I pull the trigger?
ThanksLeave a comment:
-
I also hate those single use plastic screw / retainer thingies. The lip project seems like it is going to turn out quite well. Can’t wait to see it finished.
Leave a comment:
-
You might not have posted "completed work" but there is a whole lot of work going on here, and it's looking great.Leave a comment:
-
More great work here...Originally posted by CyborgGT View Post
I too (along with others) have been seeking a replacement battery hold down bar but obviously they've been discontinued. I checked the part number you found from your pic and it's designed for the '94 on up models. The correct one is Plate, Battery Setting (70D/80D) - Honda (31512-SM4-010) which I'm sure you know.
Since the P/N: 31512-SS0-000 was used across multiple models and years I'm hoping it's a perfect fit. So I have to ask how did you figure out this part would work since it definitely looks the same but are dimensions? But most importantly how well does it fit the CB7?
BTW I found this helpful if you need to bring the plastic containers up to a like new condition...
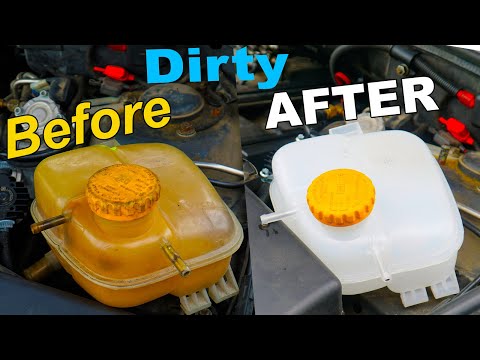
Last edited by hiptech; 08-17-2021, 09:32 AM.Leave a comment:
-
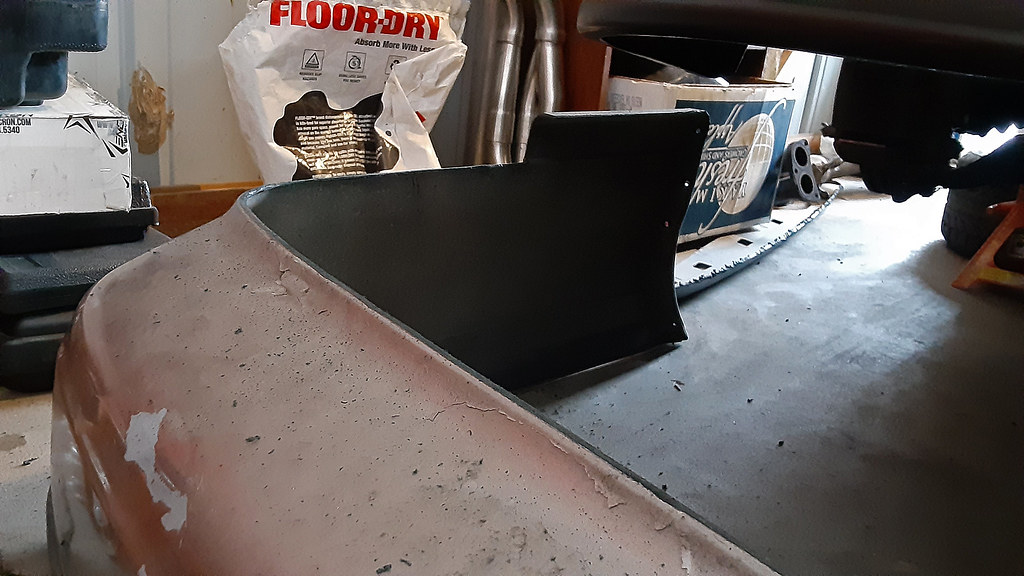
I was hoping to post updates of completed work, but I've been so all over the place with this car lately, and things are more or less at a standstill again, so here's a bit of a dump...
The biggest project has been grafting the sedan rear lip onto the wagon bumper. It's still not complete, because those plastic welder tips break way too easily. I've broken two so far. The brand of welder that Harbor Freight sells doesn't seem to sell just the tips, so to get a second tip, I just bought an entire second welding kit because it was convenient, only for that tip to break as well. I found another brand that sells tips separately on eBay, so hopefully those fit the HF welder. Still need to order them. I got most of the way through the welding part of the project, at least.
Started by cutting the lip off of a sedan bumper and cleaning it up:

Removing the bumper from the wagon was fun. My fourth-grade self says, "NOT!!" I hate these single-use plastic clips.

One of the four studs that secures the bumper support to the body snapped. I hope these are hammered in and out of place like lug studs and can be replaced as easily.

So much dirt in this car! This is just what came out of the bumper. When I first got the car, even the interior was covered in a fine layer of dust.

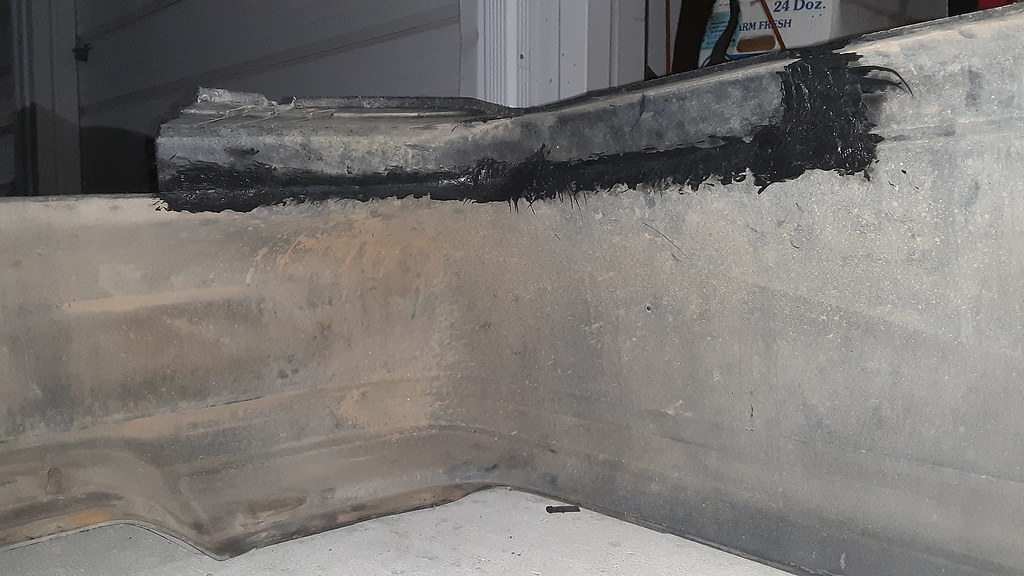
What looks to be the extent of this car's rust, aside from some tiny rock chips in the paint on random spots on the body:

I'm worried about this bulge. The bumper support underneath appears fine, but this spot is super dried out and hardened into this shape. At this point, I'm not sure if I can cut it out and plastic weld a new piece in place, or if I'll be cutting my custom lip back off one day to put it onto another bumper. I'm not tackling it at this point in the build, though.

I cut the lip off and cleaned up the edge. I left a bit of the end on because the sedan lip is longer on the sides and would have required cutting anyway, but I also wanted to try to blend the sedan lip into the wagon's here.
Here you can see that the two lips are shaped differently, and because of that the wagon lip is a bit wider. This gap is equal on both sides.

To widen the sedan lip, I cut out the exhaust gap, since locating that within the width of the lip is the most crucial part of this whole project. The two sides of the sedan lip were then plastic welded onto the wagon bumper, at least from behind for now. What I forgot to photograph were the pie cuts I had to do to re-shape the corners of the lip and tighten them into the more 90-degree shape of the wagon's.
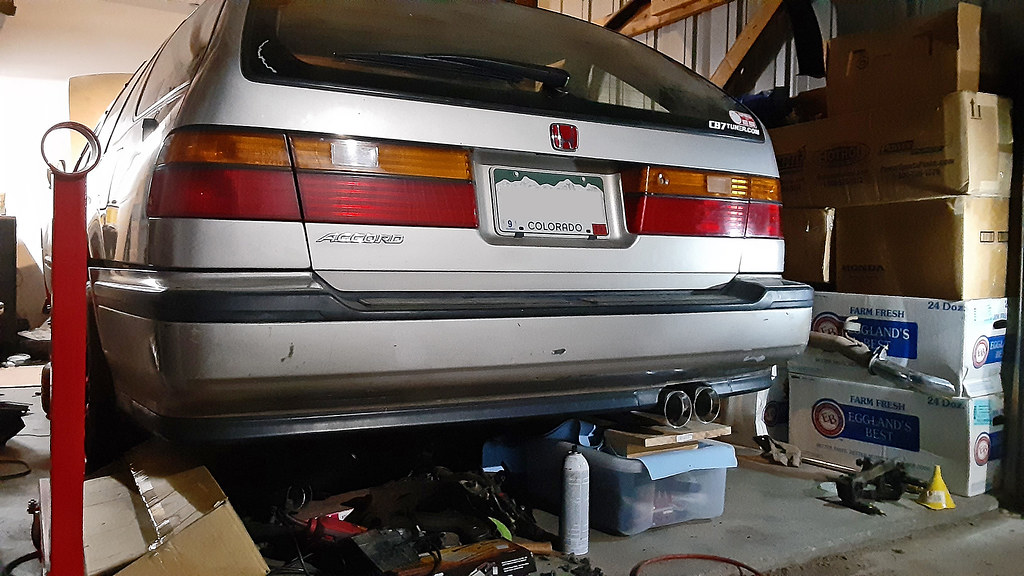
The bumper was then placed back on the car and I propped up my muffler, centered within the heat shield under the car.

After going to the junkyard to cut the muffler gap section out of a second sedan lip, wider than needed so that I had room for error, I then cut it as needed to match up with the centered muffler tips. It took a lot of careful trimming before I got it just right and ready to weld into place.
It's looking very patchwork-quilty at the moment, but I'm feeling it'll come out looking like nothing was modified in the end. I just need to do some more plastic welding on the outside to add strength where the top edge of the lip meets the bumper, and then I can get to sanding it all down, adding filler where needed, etc.

The "small things" I mentioned I've been taking care of were pieces like this OEM battery tie down. The factory CB plate is discontinued, the but 5th gen's is still available and works fine. I found this full kit on eBay.
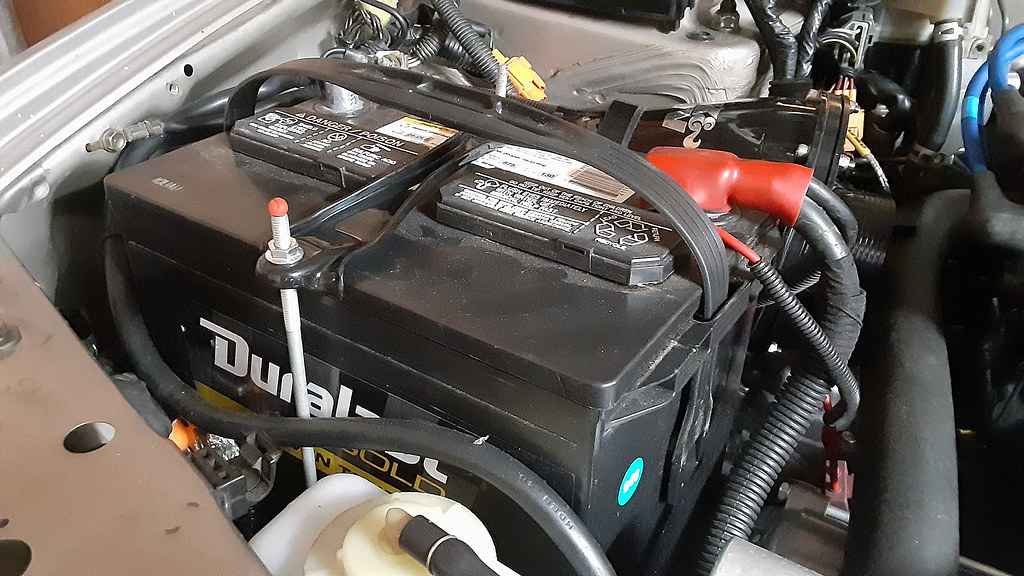
I used the Play-Doh from back when I made sure my pistons weren't contacting my valves to see if these J-bolts were contacting the hood. No contact with this little ball but after stepping up to an even larger ball, it's close but I should be good. Another part that you can see a bit of in this photo that Honda still has available is the coolant reservoir, since mine was filthy inside and there was no hope in cleaning it out. The lid's discontinued, but get the bottle while you can if you want a fresh one! It came with their 'vintage parts/no returns' tag, so I'm sure they'll be gone soon.
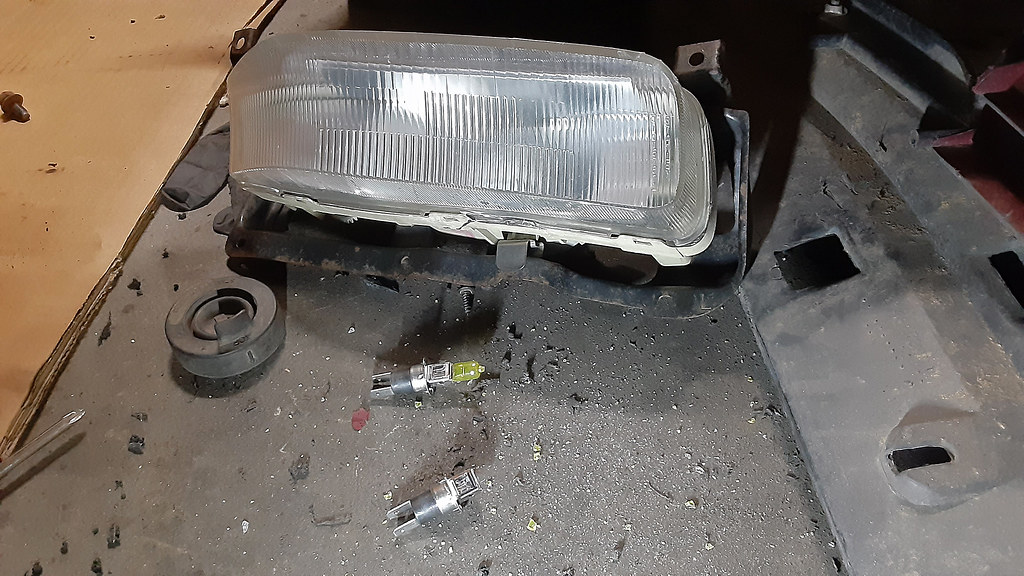
I also replaced the little rubber grommets that hold the washer fluid motors into their reservoir, which meant removing the front bumper again. May as well remove the fog light while I'm in there to check out the exploded light bulb. Damnit, I'm going to have to open this thing up. Those bits of light bulb glass in there seem to be melted to the lens, and there's a fine coating of white dust everywhere inside. This driver side fog light has a foggier look to it now, compared to the passenger side light. That means replacing the butyl though, so I might just leave it and deal with it later on. Hopefully this was the result of cheap bulbs and not a wiring issue that needs figuring out. Oh, and that's not cracking in the lens, if you're wondering. Just the edge of the vinyl I have protecting the face from rocks.

The belts, and a p/s pulley that isn't bent, were more of the small parts I needed. This power steering pump just isn't done giving me problems. First, the pulley shaft isn't reverse-threaded like OEM, so I had to take it to the hardware store just to buy a single nut and washer (anyone else hate going to a store just to spend pocket change?). And of course the threading on this cheap pump played mostly friendly with the nut. Ugh. At least it's on and tight. I was finally able to mount the pump into the car, but my earlier problem of the two side engine mounts fighting each other for position came back to bite me again: aside from the p/s pulley needing to be unbolted from the rest of the ATI damper just to get the belt on, that belt is a couple hairs away from rubbing on the mount bracket. And then, the low pressure fitting that the reservoir hose attaches to is smaller on 4th gen Accords than it is on 5th gen Accords and Preludes. So now I've got to grab a section of CD/Prelude hose, and figure out a step-down fitting to mate it to the CB's hose.

At least my overall to-do list is pretty small these days. It's mainly a few more small parts to buy, including all of the fluids; draining the gas tank of regular octane and installing the Walbro pump, which I've been procrastinating on because I'm just not looking forward to that job since we don't have an access panel; and saving up the relatively large amount of money it's going to cost to get the intake and exhaust tubing welded up along with the dyno tune. A while back, PFI quoted me about $650 on the high end for just the tune, but if you follow them and their recent issues with the EPA, I'm starting to fear that they won't touch my 'street car' just to avoid getting in more trouble than they need to risk. There are other reputable tuners in Colorado, but Brent clearly knows the shortcuts in how to make Honda engines happy.Last edited by CyborgGT; 08-17-2021, 08:04 AM.Leave a comment:
Leave a comment: