
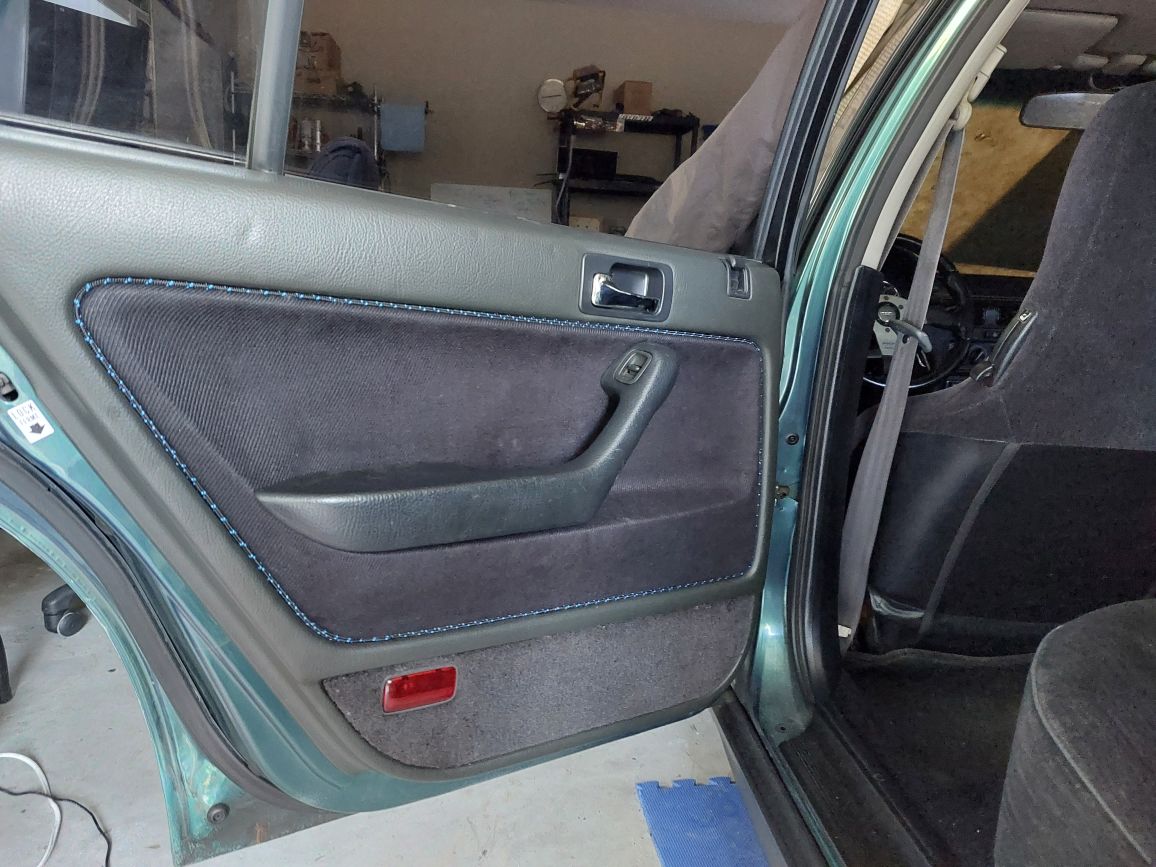
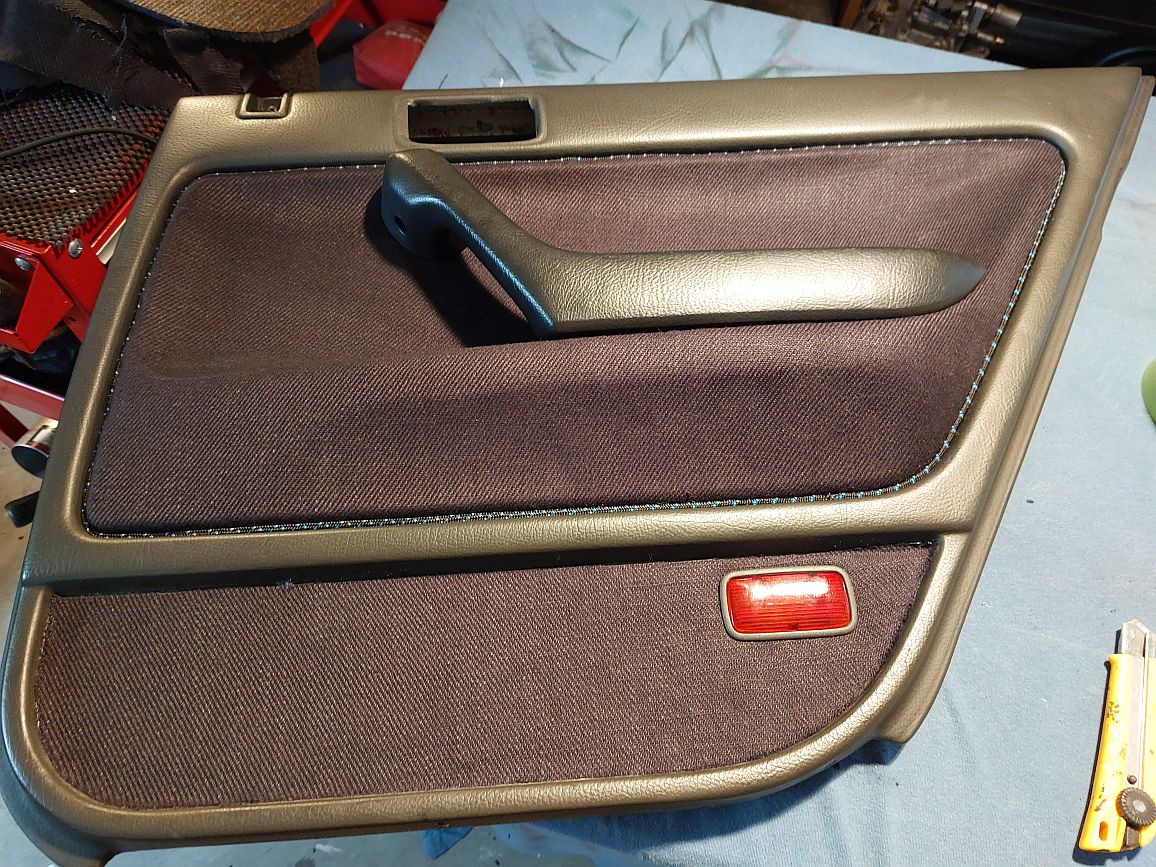
Excellent work on the headlamps and the door re-trim!  I like the small hint of color in the rope, a black rope may look sleeker and less decorative.
"But the fabric on the bottom is grey and ... 90s. I haven't made up my mind what exactly needs to change to make this look more complete. I'll think on it. I wonder if a pro could do better as to replace the grey part of the full panel. black leather....or suede. Would need some unique tools."
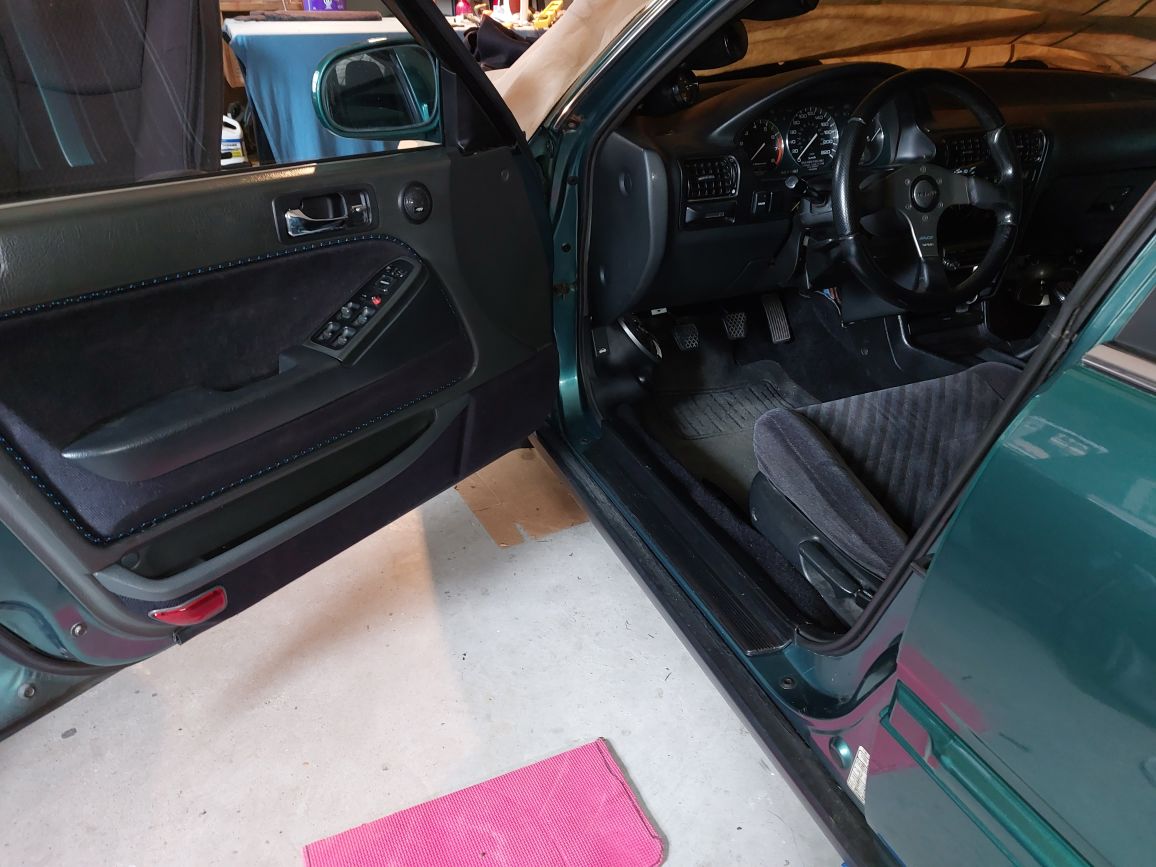
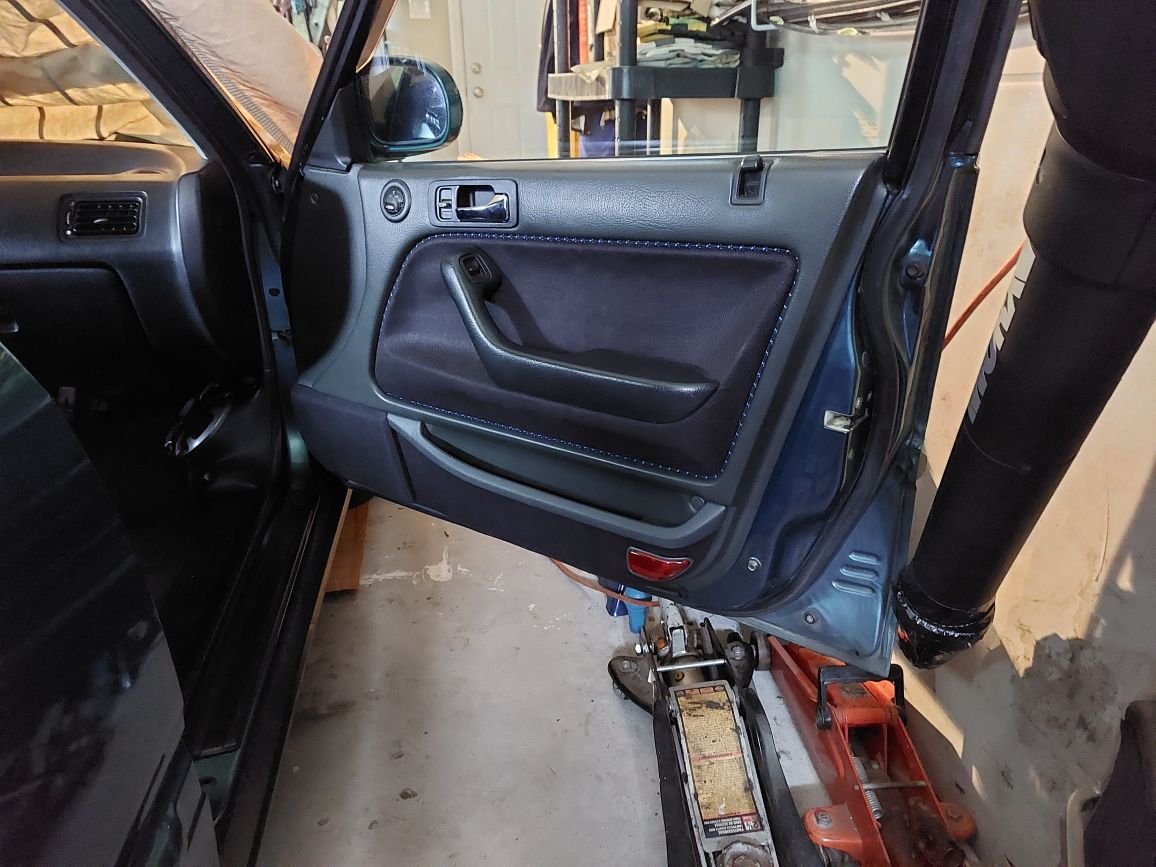
I think you are talking about the carpet on the lower part of the doors. This isn't as hard as it may seem, although it does take a little bit of time.
Materials:
- Fabric/Suede/Vinyl/Leather
- 4mm/6mm upholstery foam (depending how plush you want the final material to be)
- Illustration Board (very sturdy, moisture resistant white paper board (it is not poster board) that can be acquired from an art supply store)
- Sharp cutting utensil
- heavy duty spray adhesive
- fabric glue ( I prefer Fabri-Tac)
- sandpaper or scouring pad
For the front doors it is pretty straight forward, I replaced my carpet with microfiber suede probably a decade ago. You have to remove the carpet from the map pocket and remove the old glue residue. Use the carpet to make a template for the shape. Transfer this shape to the upholstery foam. The material that you plan to wrap needs to be laminated to this upholstery foam to give it volume to fill the depth that the carpet previously had to fill in the void below the hard plastic of the map pocket bezel. Once the new fabric/foam is mated and dry, spray adhesive the material to the map pocket. Trim the upper part so that just enough is left to tuck under the map pocket bezel and use a clean plastic putty knife or other such tool to tuck the fabric under the bezel of the map pocket. For the rest you will have to hand wrap and use fabric glue to adhere the fabric to the back of the map pocket. The curved area will have to have "pie cuts" made to wrap cleanly.
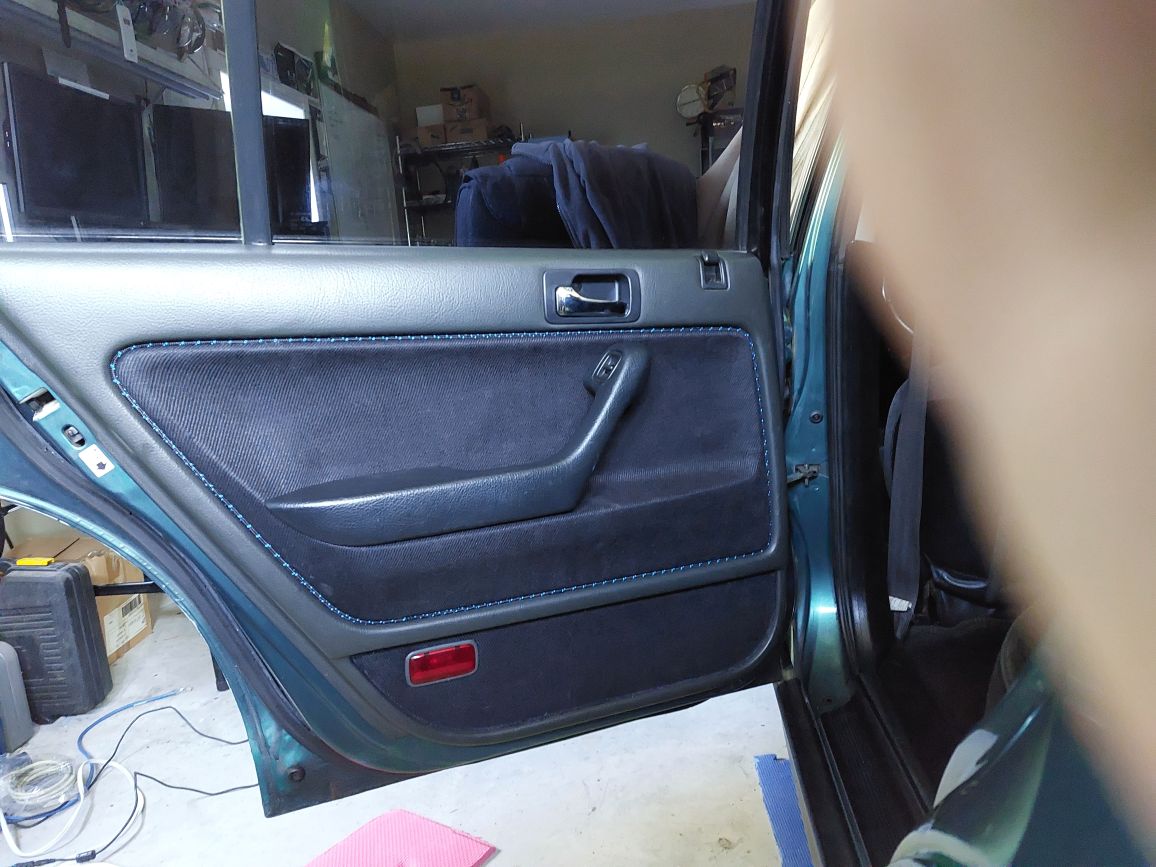
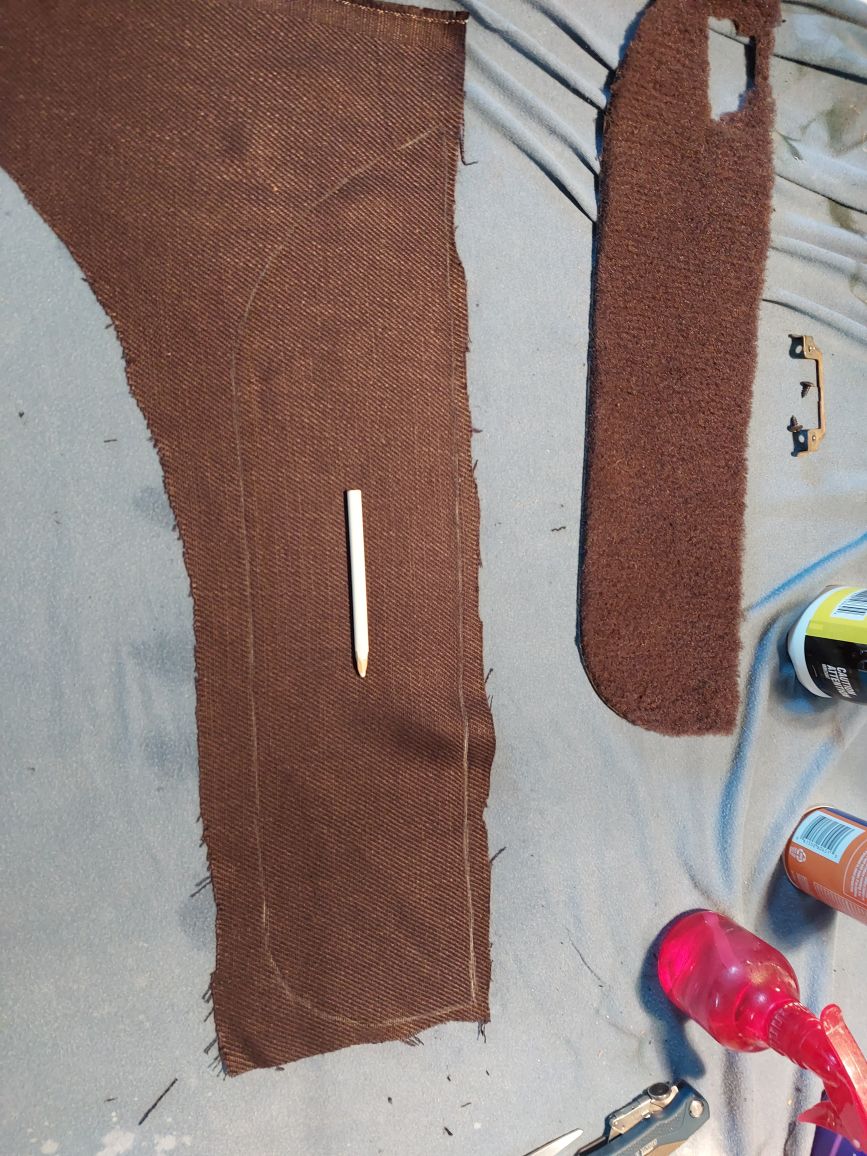
The rear doors are a similar story. Remove the old carpet and remove any glue residue from the door. Use the carpet as a template. Using illustration board (NOT CARDBOARD) transfer the template to the foam and cut out the shape. I think I made this about 2mm smaller all the way around so that it fit properly when I was done. Laminate the fabric and foam using adhesive. Glue the fabric/foam to the illustration board. Wrap and glue the excess fabric to the back side of the illustration board. Glue the new panel onto the door. Voila! Done.
I did not do a great job documenting this originally. But here is the old rear door part that I made out of cardboard as example of what I did and why you should not use cardboard! The cardboard does not hold its shape very well and isn't very durable overall. Also, this suede was not UV stable which caused it to turn purple in about one summer. The grey material above is the foam I used when I redid this part. When I redid these, I used an automotive grade material that even a decade later is still black.

Cyborg is not incorrect, suede does tend to be susceptible to oil and hand creams that can make it age poorly. That typically only occurs on steering wheels and shift knobs though, door bolsters, headliners and such tend to not suffer from this. My doors are a decade old and the suede has held up pretty well. Maybe I will make a small DIY on this process. I would have to take new images though. Hmm...
I like the small hint of color in the rope, a black rope may look sleeker and less decorative."But the fabric on the bottom is grey and ... 90s. I haven't made up my mind what exactly needs to change to make this look more complete. I'll think on it. I wonder if a pro could do better as to replace the grey part of the full panel. black leather....or suede. Would need some unique tools."
I think you are talking about the carpet on the lower part of the doors. This isn't as hard as it may seem, although it does take a little bit of time.
Materials:
- Fabric/Suede/Vinyl/Leather
- 4mm/6mm upholstery foam (depending how plush you want the final material to be)
- Illustration Board (very sturdy, moisture resistant white paper board (it is not poster board) that can be acquired from an art supply store)
- Sharp cutting utensil
- heavy duty spray adhesive
- fabric glue ( I prefer Fabri-Tac)
- sandpaper or scouring pad
For the front doors it is pretty straight forward, I replaced my carpet with microfiber suede probably a decade ago. You have to remove the carpet from the map pocket and remove the old glue residue. Use the carpet to make a template for the shape. Transfer this shape to the upholstery foam. The material that you plan to wrap needs to be laminated to this upholstery foam to give it volume to fill the depth that the carpet previously had to fill in the void below the hard plastic of the map pocket bezel. Once the new fabric/foam is mated and dry, spray adhesive the material to the map pocket. Trim the upper part so that just enough is left to tuck under the map pocket bezel and use a clean plastic putty knife or other such tool to tuck the fabric under the bezel of the map pocket. For the rest you will have to hand wrap and use fabric glue to adhere the fabric to the back of the map pocket. The curved area will have to have "pie cuts" made to wrap cleanly.
The rear doors are a similar story. Remove the old carpet and remove any glue residue from the door. Use the carpet as a template. Using illustration board (NOT CARDBOARD) transfer the template to the foam and cut out the shape. I think I made this about 2mm smaller all the way around so that it fit properly when I was done. Laminate the fabric and foam using adhesive. Glue the fabric/foam to the illustration board. Wrap and glue the excess fabric to the back side of the illustration board. Glue the new panel onto the door. Voila! Done.
I did not do a great job documenting this originally. But here is the old rear door part that I made out of cardboard as example of what I did and why you should not use cardboard! The cardboard does not hold its shape very well and isn't very durable overall. Also, this suede was not UV stable which caused it to turn purple in about one summer. The grey material above is the foam I used when I redid this part. When I redid these, I used an automotive grade material that even a decade later is still black.
Cyborg is not incorrect, suede does tend to be susceptible to oil and hand creams that can make it age poorly. That typically only occurs on steering wheels and shift knobs though, door bolsters, headliners and such tend to not suffer from this. My doors are a decade old and the suede has held up pretty well. Maybe I will make a small DIY on this process. I would have to take new images though. Hmm...


Comment